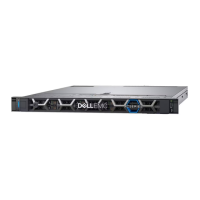
Figure 44. Installing a drive carrier
Removing the drive from the drive carrier
Prerequisites
1. Follow the safety guidelines listed in the Safety instructions.
2. Remove the drive carrier.
Steps
1. Using a Phillips #1 screwdriver, remove the screws from the slide rails on the drive carrier.
NOTE:
If the drive carrier has Torx screw, use Torx 6 (for 2.5-inch drive) or Torx 8 (for 3.5-inch drive) screwdriver to
remove the drive.
2. Lift the drive out of the drive carrier.
72
Installing and removing system components