49
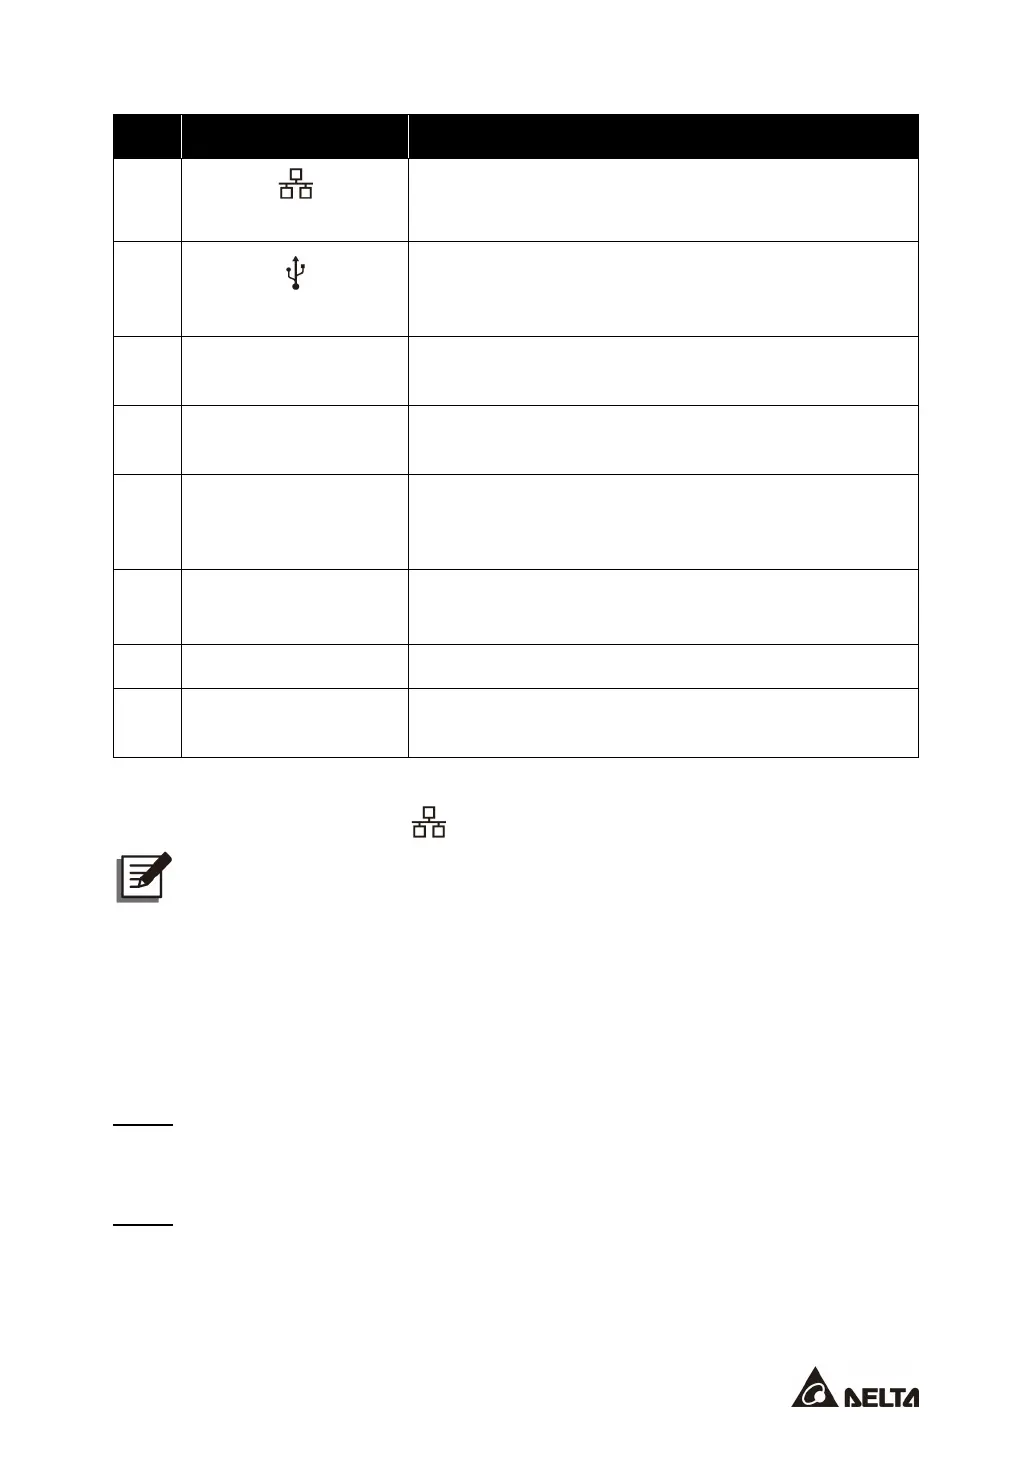
No. Item Description
1
(Network Port)
1. Provides SNMP communication service.
2. Connects to a user-supplied monitoring system.
2
(USB Port × 2)
There are two USB ports. Connect a user-supplied
USB flash drive to the USB ports to (1) upgrade the
UPS and LCD’s firmware and (2) download event logs.
3
EMS/ CONSOLE
Connects to a user-supplied environmental monitoring
system or Delta EnviroProbe 1000 (optional).
4
DISPLAY
Before shipment, the DISPLAY port has been
connected.
5
BMS
Connects to the Delta battery management system
(optional). The BMS function is only applicable to lead-
acid batteries.
6
MODBUS
1. Provides MODBUS communication service.
2. Connects to a user-supplied monitoring system.
7
RESET Press the RESET button to restart the LCD.
8
EPO
Before shipment, the EPO button on the front of the UPS
has been connected to the EPO port.
Please follow the instructions below to route the user-supplied signal cables. The signal
cable routing of the network port ( ) is taken as an example.
NOTE:
1. In accordance with National Electrical Codes (NEC), please install a suitable
conduit and bushing for cable protection.
2. Please refer to national and local electrical codes for the acceptable cable
sizes.
3. For top entry, please remove the knockout cover(s) at the top of the UPS before
performing the steps below.
300kVA UPS_ Signal Cable Routing Method (Top Entry Only)
Step 1
Install the snap bushing(s). See
Figure 4-5
. There are three cable entrances that you can
choose to use. The snap bushings are provided in the accessory package.
Step 2
Refer to instructions
❶
~
❻
below to properly route and secure the signal cable with cable
ties (user-supplied). There are eight bridge lances that you can choose to use.