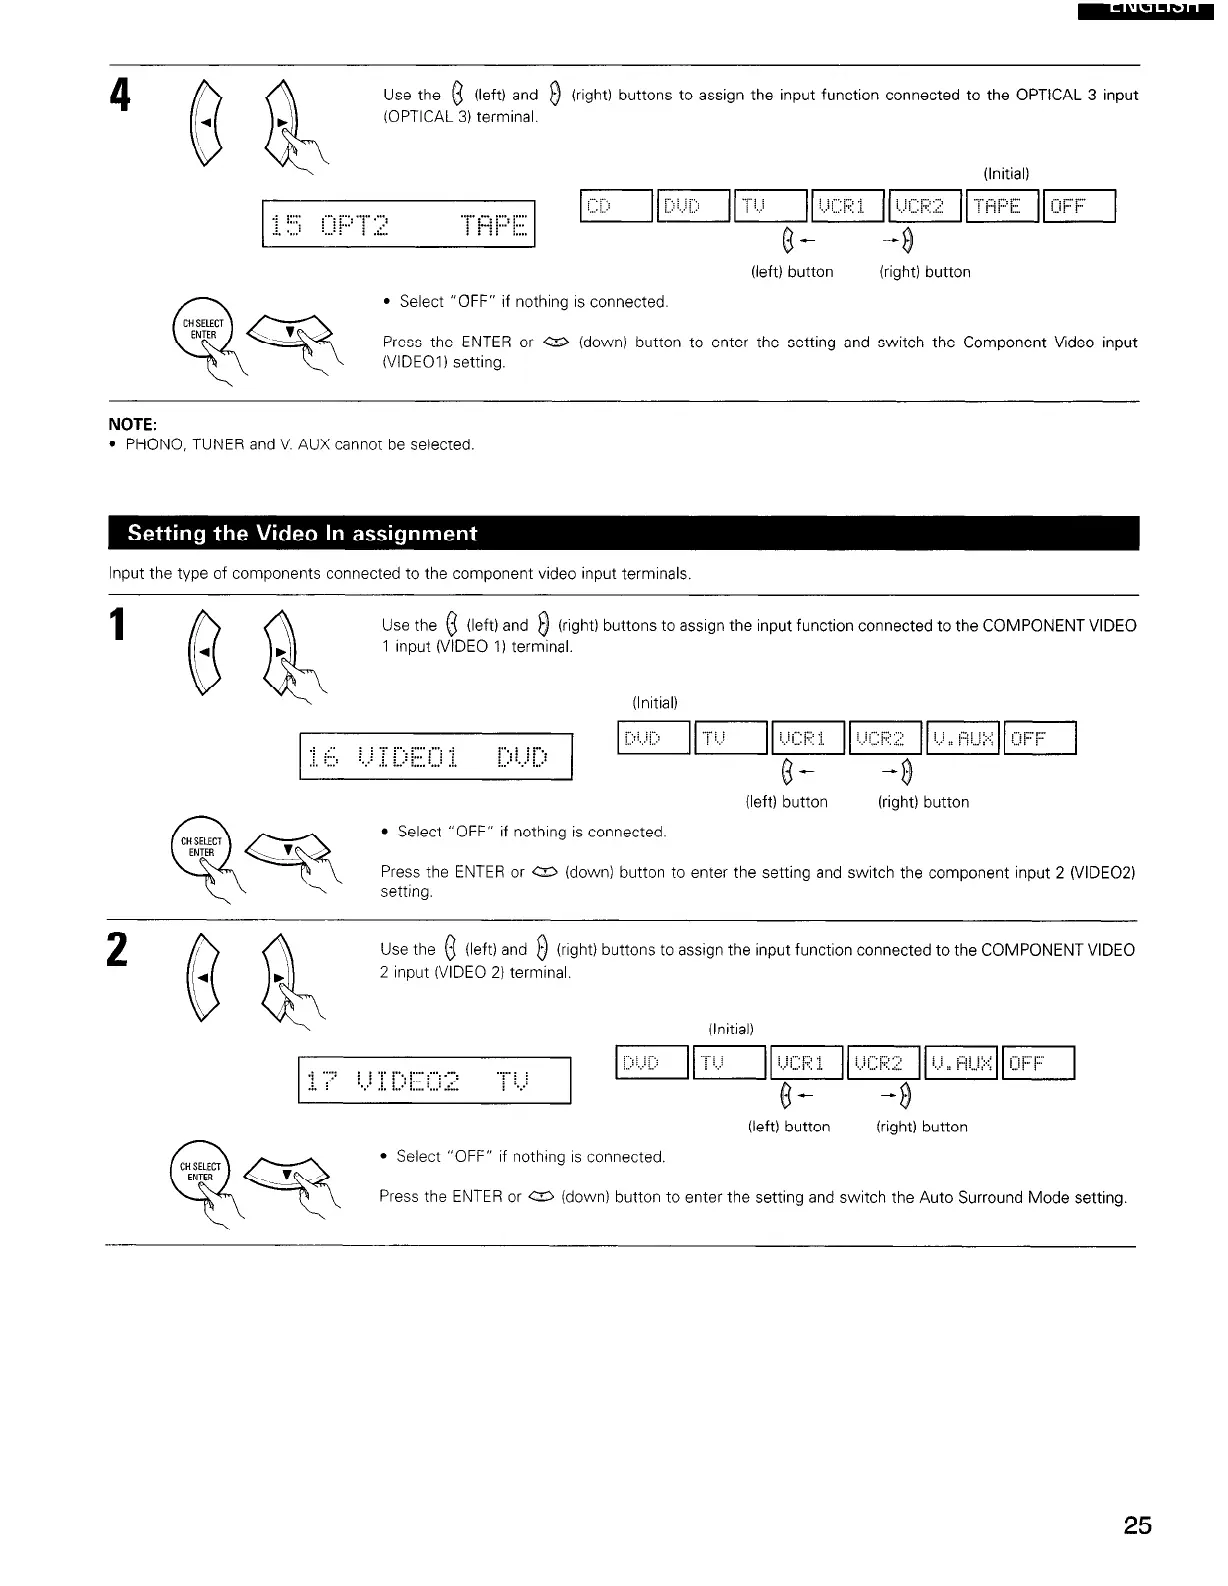
Use the 0 (left) and 0 (right) buttons to assign the input function connected to the OPTICAL 3 input
(OPTICAL 3) terminal.
(Initial)
g+ -0
(left) button (right) button
l Select “OFF” if nothing is connected.
Press the ENTER or a (down) button to enter the setting and switch the Component Video input
(VIDEOI) setting.
NOTE:
l PHONO, TUNER and V. AUX cannot be selected.
Input the type of components connected to the component video input terminals.
fN7
Use the (3 (left) and 0 (right) buttons to assrgn the input function connected to the COMPONENTVIDEO
4
b
1 input (VIDEO 1) terminal.
(Initial)
,: ,.. t t .~ ~, :.... . . . . . .:
:... : : :...
: :...
I~II....;lic;:;:;::l
A. :...: :.::
:ii+;: ::::::
.:. :.: : . . . . . . . . .
.I.
I,,.. ..,.. j./.
L3- -0
(left) button
(right) button
l Select “OFF” if nothrng is connected.
Press the ENTER or a (down) button to enter the setting and switch the component input 2 (VIDE02)
setting.
Use the 0 (left) and 0 (rrght) buttons to assign the input function connected to the COMPONENT VIDEO
2 input (VIDEO 2) terminal.
(Initial)
.: . . . . . ~.
: :
: : .r :...
. . . . i
j. j : : : :... ;
. ...:
-r: :
.i. i
: ; ;
[.:::i’iC:iIIlJli..‘::::i:;ll::I(U;::’F:2II
. 2. i....! . . . . . .::..
: .:
(.j- -8
(left) button (right) button
l Select “OFF” if nothing IS connected.
Press the ENTER or a (down) button to enter the setting and switch the Auto Surround Mode setting
25
 Loading...