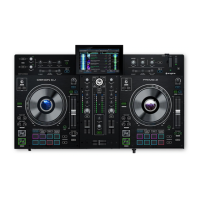
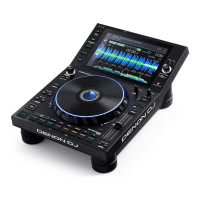
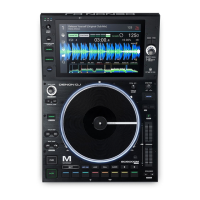
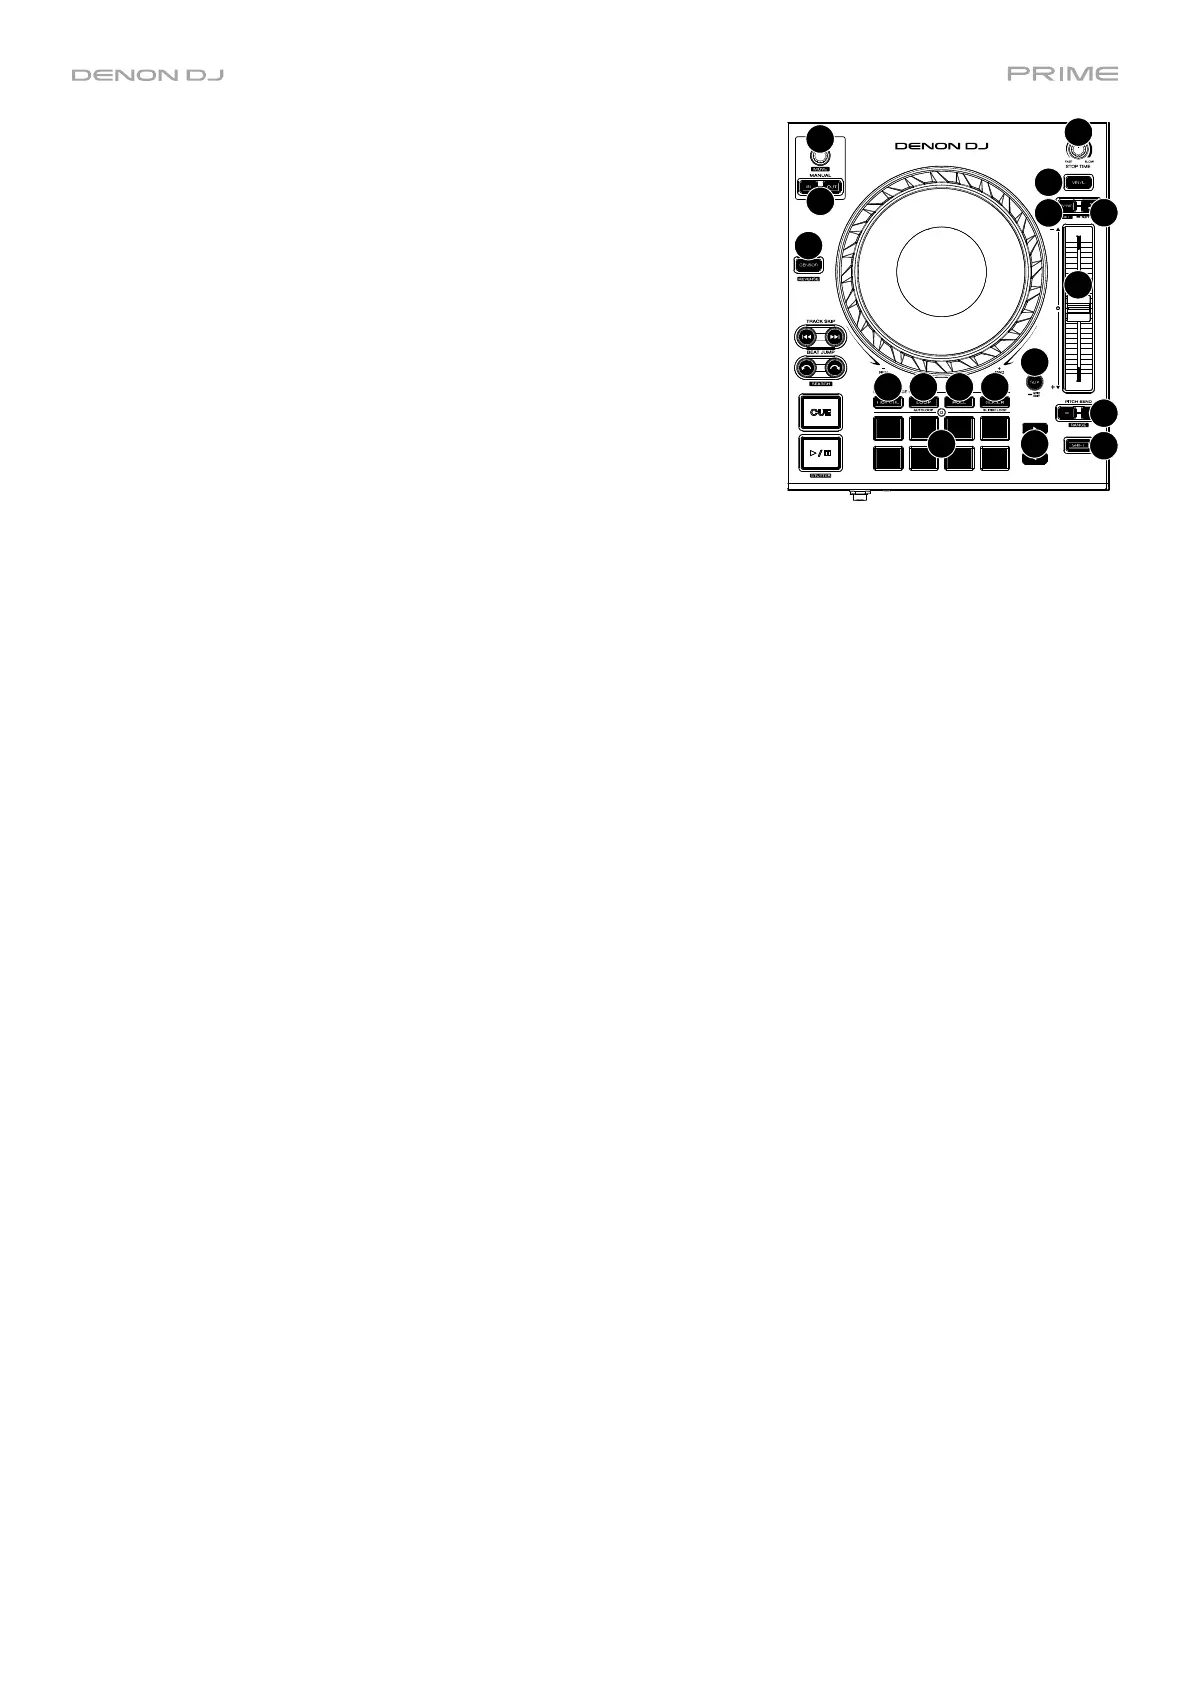
16
25. Stop Time: Controls the rate at which the track slows to a complete
stop ("brake time") when you pause it by pressing Play/Pause.
26. Vinyl: Press this button to activate/deactivate a “vinyl mode” for the
platter. When activated, you can use the platter to “scratch” the track
as you would with a vinyl record.
27. Sync / Sync Off: Press this button to activate sync.
Press and hold Shift and press this button to deactivate Sync. You can
also set Sync to deactivate without using Shift by changing the Sync
Button Action setting in the User Profile menu.
28. Key Lock / Key Sync: Press this button to activate/deactivate Key
Lock. When Key Lock is activated, the track’s key will remain the same
(0%) even if you adjust its speed. Press and hold Shift and press this
button to reset Key Lock.
Press and hold this button to activate key sync.
29. Pitch Fader: Move this fader to adjust the speed (pitch) of the track. You can adjust its total range with the Pitch
Bend buttons.
30. Pitch Bend –/+: Press and hold one of these buttons to momentarily reduce or increase (respectively) the speed
of the track.
Press and hold Shift and then press one of these buttons to set the range of the pitch fader.
31. Shift: Press and hold this button to access secondary functions of other controls.
32. Slip/Grid Edit: Press this button to enable or disable Slip Mode. In Slip Mode, you can jump to cue points,
trigger loop rolls, or use the platters, while the track’s timeline continues. In other words, when you stop the
action, the track will resume normal playback from where it would have been if you had never done anything (i.e.,
as if the track had been playing forward the whole time).
Press and hold this button to enable or disable beat grid editing.
Press and hold Shift and then press and hold this button to manually adjust cue/loop point locations left or right
using the touchscreen controls.
33. Censor / Reverse: Press this button to activate/deactivate the Censor feature: the playback of the track will be
reversed, but when you release the button, normal playback will resume from where it would have been if you
had never engaged the Censor feature (i.e., as if the track had been playing forward the whole time).
Press and hold Shift and then press this button to reverse the playback of the track normally.
34. Performance Pads: These pads have different functions on each deck depending on the current pad mode. See
Pad Modes for more information.
35. Hot Cue: Press this button to enter Hot Cue Mode.
36. Loop: Press this button once to enter Manual Loop Mode, and press it again to enter Auto Loop Mode.
37. Roll: Press this button to enter Roll Mode.
38. Slicer: Press this button once to enter Slicer Mode, and press it again to enter Slicer Loop Mode.
39. Parameter /: Use these buttons for various functions in each Pad Mode. See Pad Modes for more information.
40. Auto Loop/Loop Move: Turn this knob to set the size of an automatic loop. The value will be shown in the
touchscreen and platter display.
Press this knob to activate or deactivate an automatic loop at the current location of the track.
Press and hold Shift and turn this knob to shift the active loop to the left or right.
41. Loop In/Loop Out: Press either of these buttons to create a Loop In or Loop Out point at the current location.
Their placement will be affected by the Quantize and Smart Loops settings. See Looping & Beat-Jumping for
more information.
25
26
27
28
29
30
31
32
33
34
3635 3837
39
40
41
 Loading...