19
1. Version Display Mode
(1) While holding down buttons the "
2
" and "
8
/–
" buttons simultaneously, insert the AC plug to turn the power on.
(2) This unit cycles through 【MAIN u-COM Ver Display】 → 【USB u-COM Ver Display】 → 【MAIN u-COM Ver Display】 →・・・
each time the "
SDB/TONE
" button is pressed.
【MAIN u-COM Ver Display】
V e r 1 5 0 3 0 1 0 1 v E K
【USB u-COM Ver Display】
U S B V E R
2 0 1 5 0 2 0 2 8 5
(3) To exit this mode, unplug the power cord.
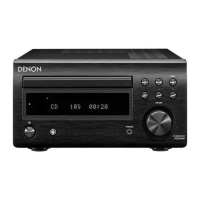
2. Display check mode
(1) While holding down buttons the "
X
" and "
5
" buttons simultaneously, insert the AC plug to turn the power on.
(2) Lights and unlights all indicators at once in one-second intervals. Turns muting on.
(3) To exit this mode, unplug the power cord.
3. Initialization (cold start)
(1) While holding down buttons the "
SOURCE
" and "
8
/-
" buttons simultaneously, insert the AC plug to turn the
power on.
This unit is initialized.
I N I T I A L I Z E
Default
SOURCE DISC
TUNER BAND FM ("DAB" on the DAB model)
SDB OFF
BASS 0
TREBLE 0
BLANCE CENTER
DIMMER 100%
VOLUME 5
TUNER PRESET frequency 0
Set -/+ PRESET -/+ button
Clock 00:00 Flashing (AM12:00 for E3)
ALARM SOURCE DISC
ALARM ON 00:00 (AM12:00 for E3)
ALARM OFF 00:00 (AM12:00 for E3)
SPK OPTIMISE ON
iPod MODE From iPod
CD Auto Play setting OFF
CLOCK MODE setting OFF
HP GAIN setting LOW
AUTO STANDBY E2/EK:ON
E3/JP/CN:OFF
DAB MODULE (EK) Initializes the module
※ Initial value of laser current and The accumulated laser on time are not cleared.
※ Power failure ag is not cleared.
(2) After initialization, the Unit returns to normal mode.