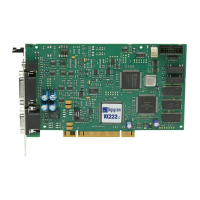
VX222
v2
User’s Manual
9
Installation under Mac OS X
• Switch off your Mac, and plug the VX222v2 in a free PCI slot.
• Restart the machine.
• Double click on the installation file included on the VX CDROM or
downloaded from the Digigram web site. This creates the VX Driver
volume on the desktop.
• Double click on the VXDriver volume icon.
• A window appears with the following items:
1- Read me first
2- Install VX Control
3- Install the driver
4- Uninstall
• Read the read me first document.
• Copy the VX Control to the desktop or to any location in your disk.
• In the ‘Install VX Driver section’, choose VX222
v2.
• Double click on the driver package ‘VX222
v2driver x-y-z.pkg’.
• Give a login/password that has administrator rights.
• The installation session opens.
• Click Continue in the welcome window.
• Click Continue in the ‘readme’ window.
• Select the disk you boot OS X from as destination drive; click Continue.
• Click Install.
• Click Continue Installation.
• Restart the Mac.
Removing the VX driver for Mac OS X
• Open the VX Driver volume.
• In item “4 - Uninstall”, run the uninstaller.
• Click on the “list installed packages” icon.
• Select the VX222
v2Driver x-y-z.pkg package.
• Select the “remove selected package icon” (red cross).
• Give a login/password with administrator rights, and click Ok.
• Click on Ok, in the alert window.
• Restart the computer.