Digital Projection
E-Vision Laser 6500 Series User Manual
Rev B August 2017
— 42 —
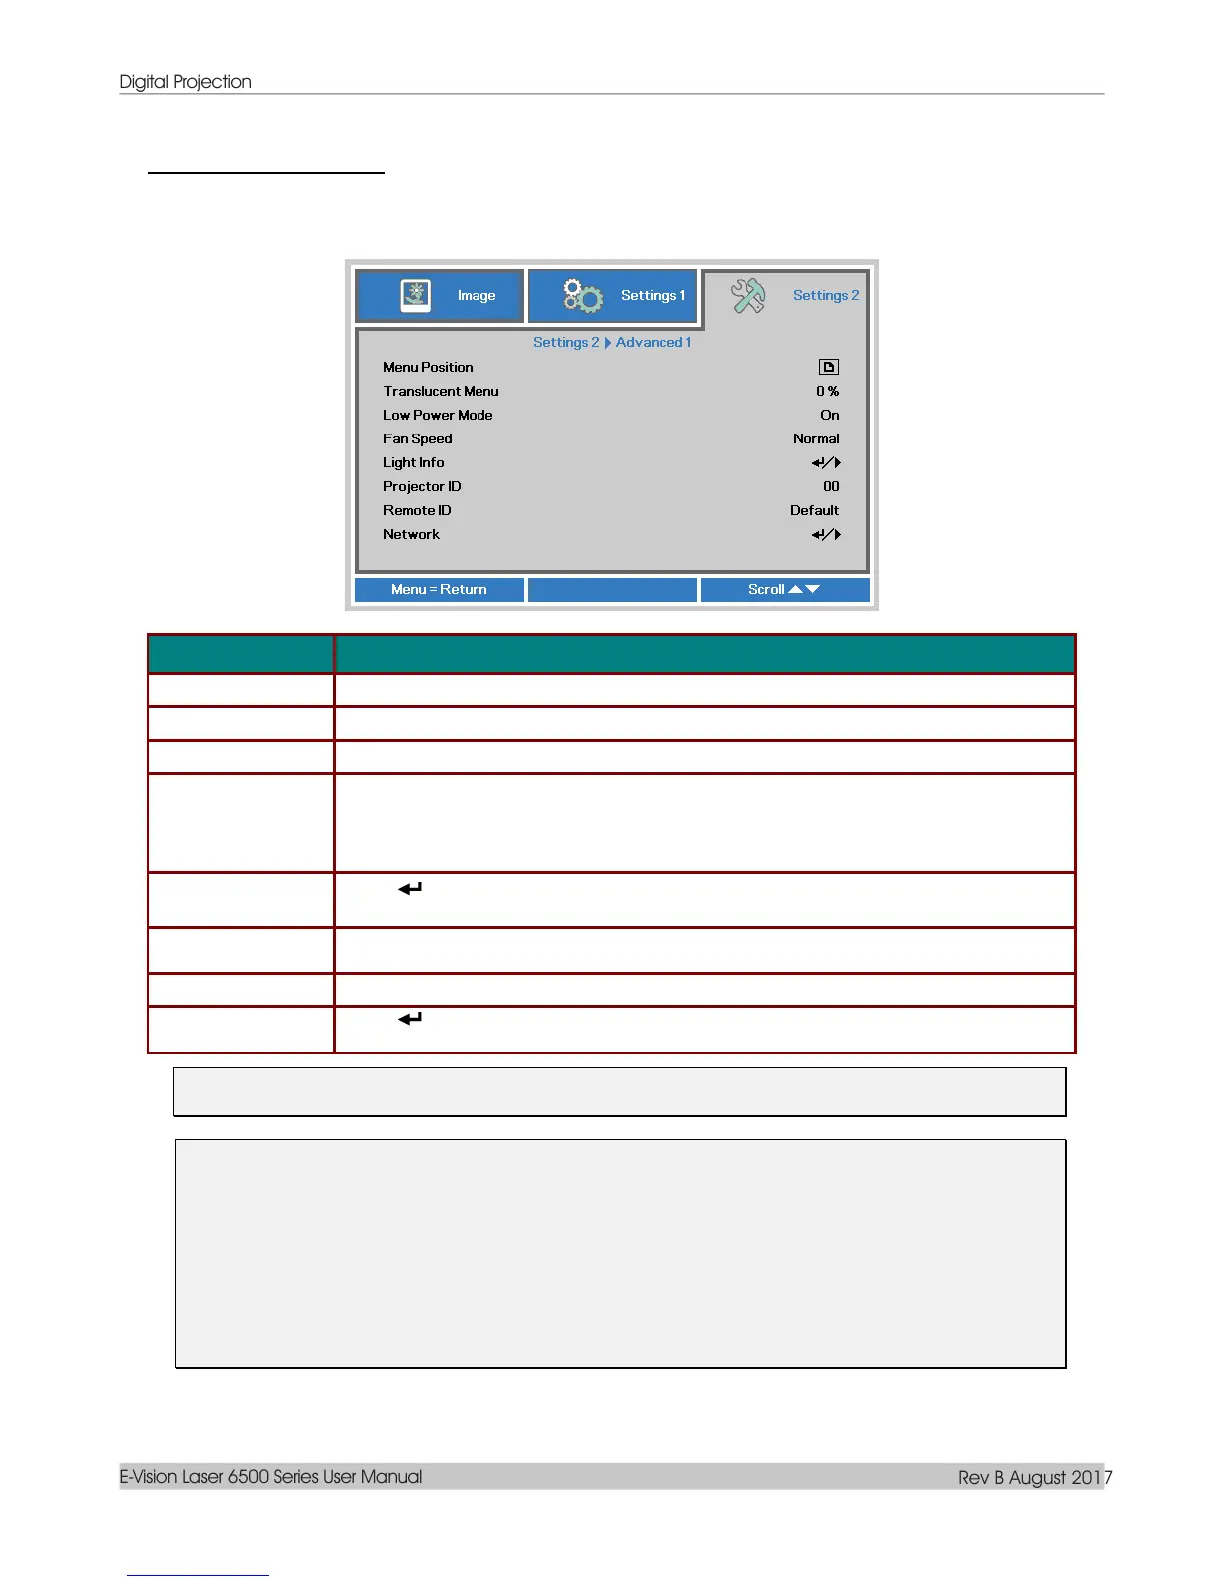
Advanced 1 Feature
Press the Menu button to open the OSD menu. Press ◄► to move to the Settings 2 menu. Press ▲▼ to
move to the Advanced 1 menu and then press Enter or ►. Press ▲▼ to move up and down in the
Advanced 1 menu. Press ◄► to enter and change values for setting.
Press the cursor ◄► button to enter and select different OSD location.
Press the cursor ◄► button to enter and select OSD background translucent level.
Press the cursor ◄► button to enter and turn Low Power Mode Off/On or On By Lan.
Press the cursor ◄► button to enter and toggle between Normal and High fan
speeds.
Note: We recommend selecting high speed in high temperatures, high humidity, or
high altitude (higher than 1500m/4921ft) areas.
Press (Enter) / ► to enter the Light Info menu to display the light hours for each
light mode.
Press the cursor ◄► button to enter and adjust a two digit projector ID from 00
through 98.
Press the cursor ◄► buttons to select remote ID to fit the current remote ID settings.
Press (Enter) / ► to enter the Network menu. See page 43 for more information on
Network.
Note:
About “On By Lan”, RJ45 will support to be waked up in this mode(Under 3W) but scalar won’t.
Note:
1. Remoter with Default customer code will be available for any Remote ID setting on the OSD.
2. Status key will be available for any Remote ID setting on the OSD
3. IF users forget the current Remote ID setting, please press the Status key to call out the
INFORMATION OSD to check the current Remote ID setting and then adjust the ID on the remoter
to meet the OSD setting.
4. After adjusting Remote ID from OSD, only if the OSD Menu has been closed then the new ID value
can be taken effected and memorized.
5. The setting value “Default” means ID 0 on the remoter.

 Loading...


