ScaoldingErectionGuidelines User Information Ringlock
999817902 - 11/2020
10
Step 2
➤ Connect the Ledgers to the rosette on the Base
Collar. Do not hammer in the wedges at this stage.
➤ Usingaspiritlevel,adjusttheJackssothatthe
Ledgers and Transoms are horizontal. Accuracy in
leveling at this stage eliminates the need for further
levelingplumbingasthescaoldiserected.
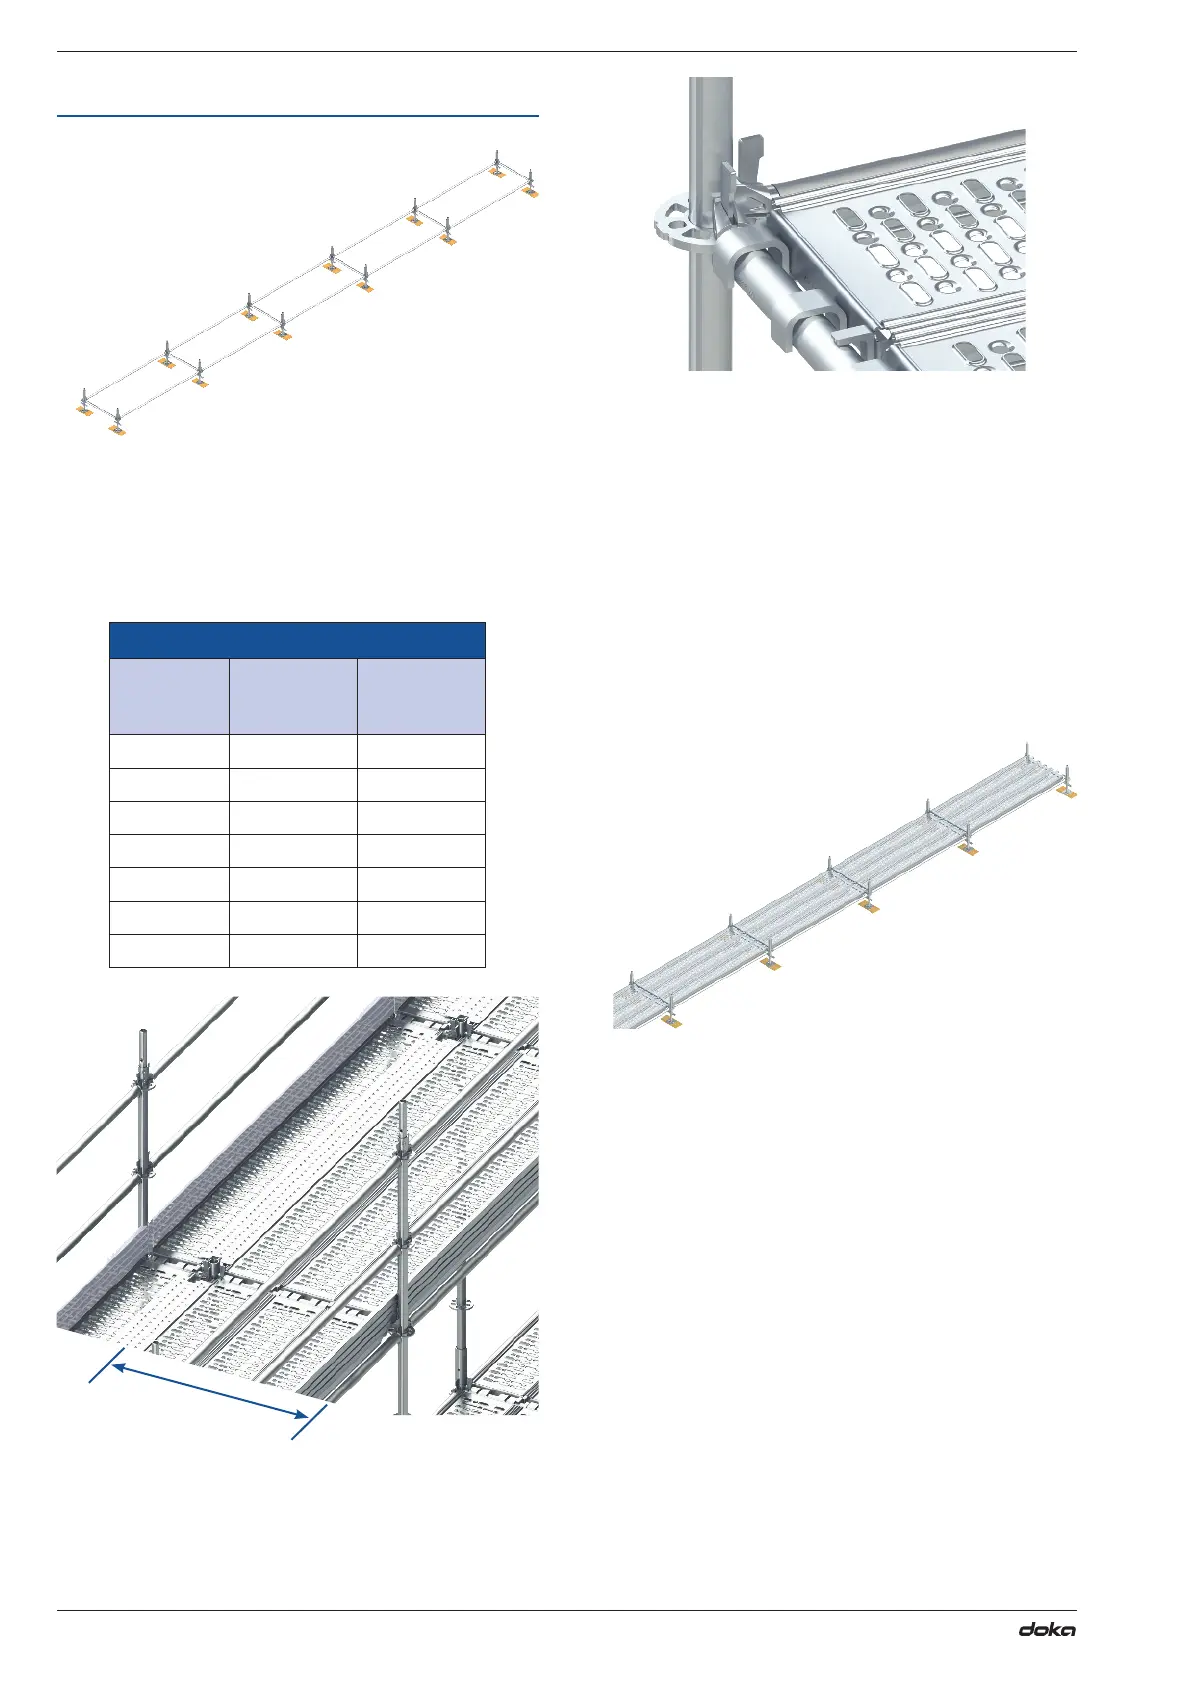
STEELPLANKCONFIGURATION
BAY WIDTH
(m)
NUMBER
OF0.32m
PLANKS
NUMBER
OF0.19m
PLANKS
0.73 2 -
1.09 3 -
1.40 4 -
1.57 4 1
2.07 6 -
2.57 7 1
3.07 9 -
Bay width
Detail of Plank connection
➤ Place Planks of the correct bay length into the end
bay to fully deck out the bay. Adjust the position of
the Jacks and Base Collar by pushing one Jack
sideways either in or out in order that the Planks
areparallelwiththeLedgers.Onlyasmallamount
of movement may be needed to ensure the bay
is square enough to lock down the Planks with
DeckLocks.Onceyouaresatisedthatthebayis
square,llallotherbayswithPlankssothataplat-
formiscreatedfromwhichtherestofthescaold
can be erected.
➤ Whenyouaresatisedthatthescaoldisfully
squaredandlevelled,hammerinthewedges.
ScaoldingNote:
Irrespective of whether a platform is required on the
lowest rosettes it is recommended that the Planks are
installedatthislevel.Thisensuresthatthescaoldis
square and level prior to erection and it also provides
planstiness.Thisismostimportant,especiallywhen
themaximumheightofthescaoldisaboveeightlifts.
The installation of these Planks ensure that the out
of alignment eccentricities are kept to a minimum in
orderforthescaoldtoattainthemaximumpermissi-
ble height for each recommended tie pattern (refer to
Technical Manual).