Ceiling and wall attachment
Dr. Mach
Lamps and Engineering
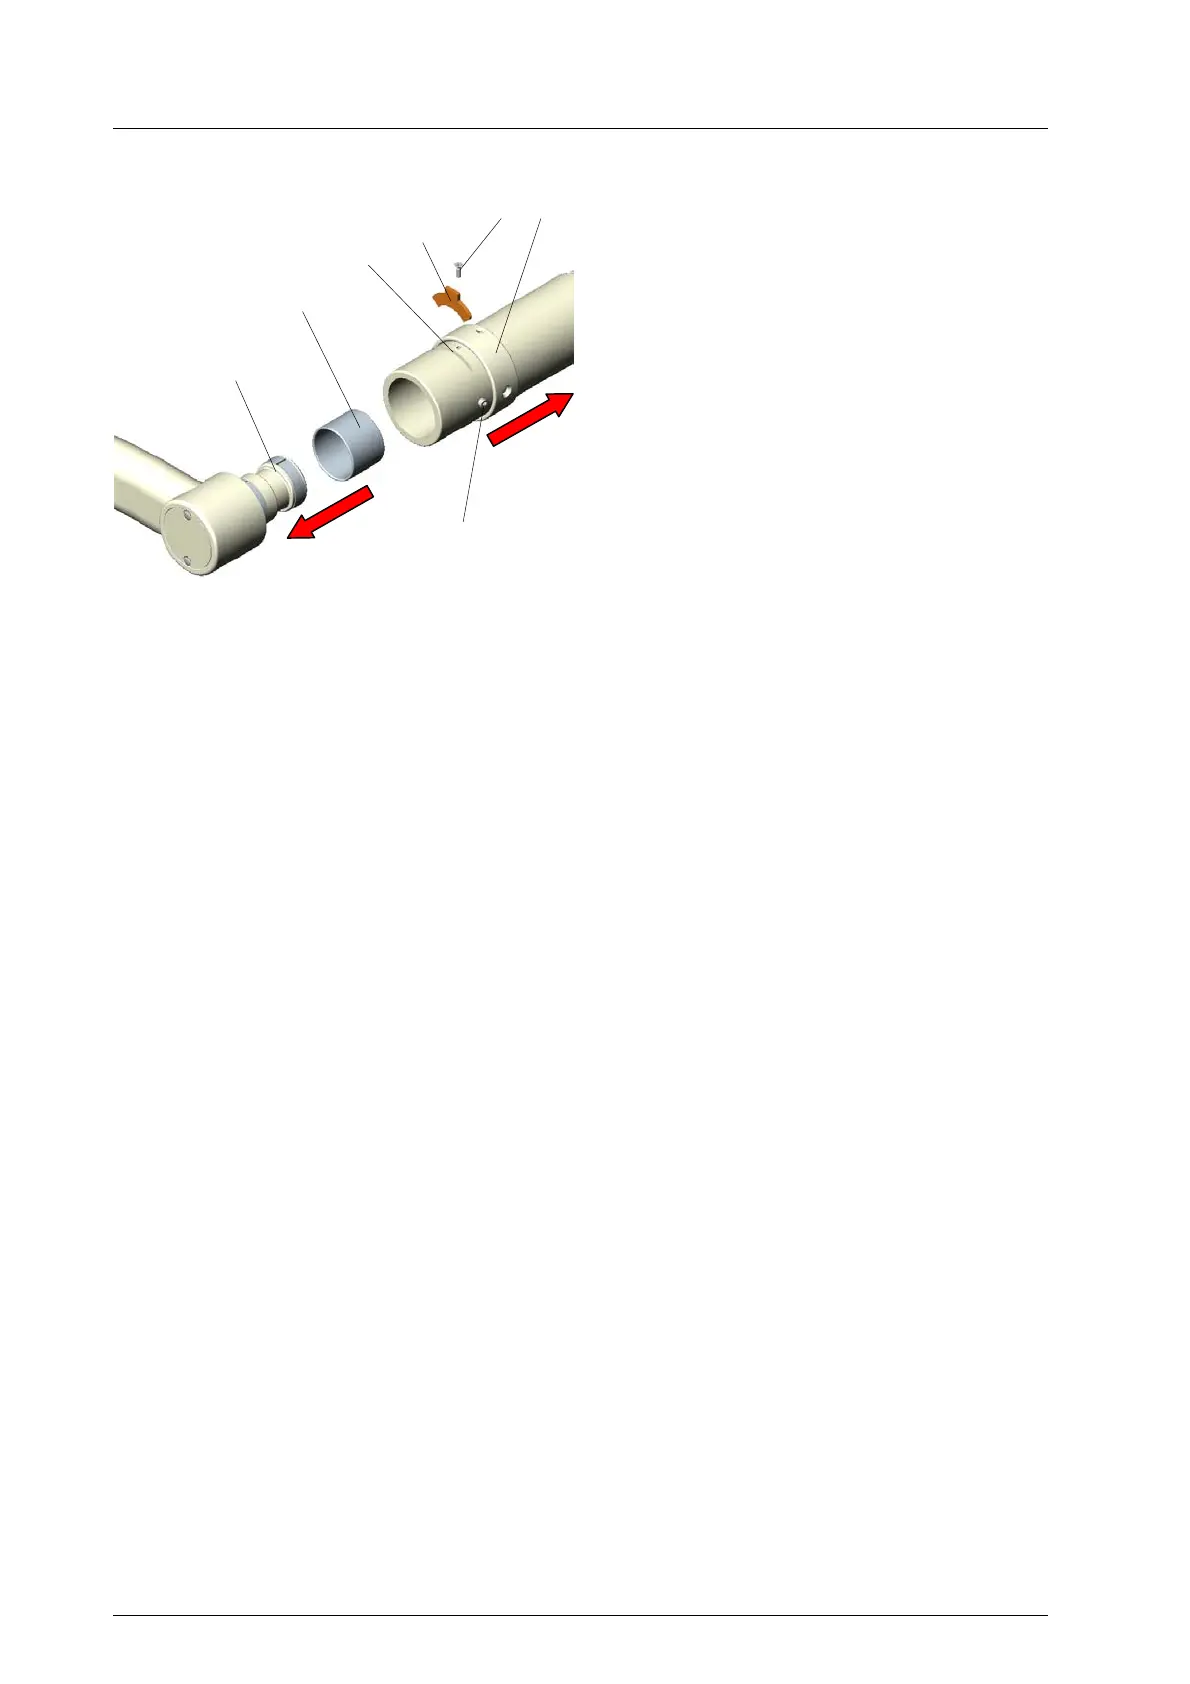
Central spring arm (until 2000)
• Loosen safety screw 7 using a crosshead screw
driver and remove.
• Push safeguard bushing 8 backwards.
• Remove segment 9.
• Slip helmet 10 over the journal of the lamp bow.
• Loosen the two lateral brake screws 11 on the
spring arm using the allen key SW3 (included in
the scope of supply).
• Push the lamp bow into the bore of the spring
arm, such as the journal groove 13 is visible in
slot 12.
• Insert segment 9 and push safeguard bushing 8
forwards, such as the borehole in the safeguard
bushing matches with the thread in the spring
arm.
• Insert safety screw 7 and tighten.
7 8
9
12
10
13
11
59500001 Edition 06 11.03.2003 / Bak Page 34/48