CALL TOLL FREE 1-800-DR-OWNER 21
Engaging the PTA
™
1. Stand in the operator’s position.
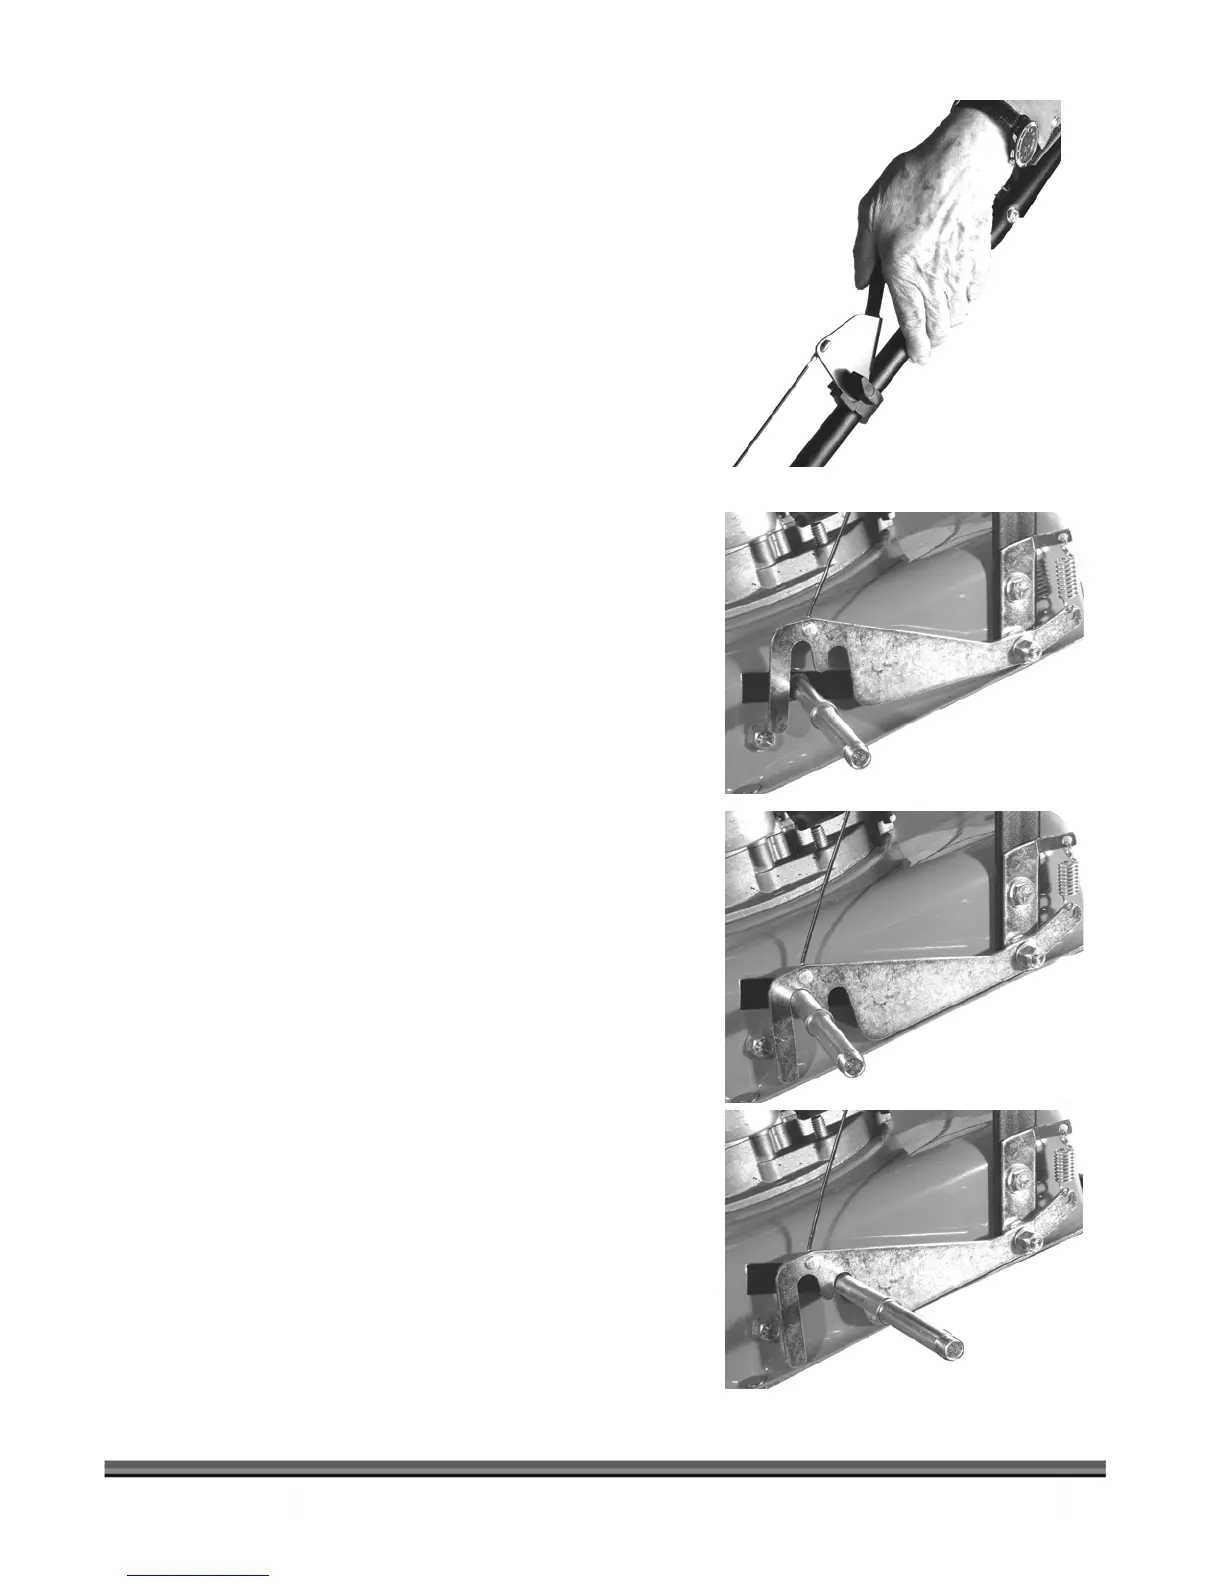
2. Pull the PTA
Lever (Figure 7)
against the
Handlebar and hold it there. This unlocks the
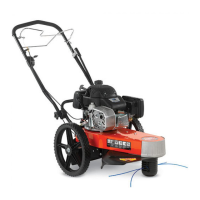
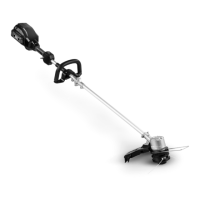
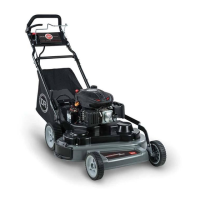
Axle (Figure 8)
.
NOTE: Figure 8
shows the Axle with the wheel
removed for clarity.
3. Push down on the Handlebar to tip the nose of
the machine a few inches off the ground.
Balancing the weight of the machine on the
wheels makes it easier to pivot the front of the
Trimmer to the left.
4. While continuing to hold the PTA
Lever down,
grip the sides of the Handlebar pulling up with
the right hand and pushing down with the left,
swinging the front of the Trimmer to the left.
5. Release the PTA
Lever. This will lock the Axle in
PTA
mode (Figure 8)
.
Returning to Normal Mode
1. Pull the PTA
Lever (Figure 7) against the
Handlebar and hold it there.
2. Push down on the Handlebar to tip the nose of
the machine up a few inches off the ground.
3. While continuing to hold the PTA
Lever down,
grip the sides of the Handlebar while pulling up
with the left hand and pushing down with the
right, swinging the front of the Trimmer to the
right, and stopping at center.
4. Release the PTA
Lever. This locks the Axle in the
Normal operation mode (Figure 8).
Figure 7
Figure 8
PTA
Lever Unlocked
PTA
Lever locked in PTA
PTA
Lever locked in
Normal Mode
Wheel Removed
Wheel Removed
Wheel Removed