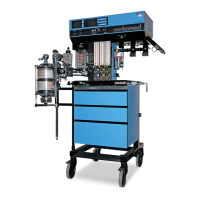
NM2C REPLACEMENT PROCEDURES (continued)
4.22.8 Remove the cable from J1 and J4 on the system interface board
(marked (*) in the illustration).
4.22.9 Remove the ORDM - processor board cable from J2/J3 of the ORDM
CPU PCB (marked (*) in the illustration).
4.22.10 Reinstall the ORDM - processor board 24 cond. connector on J2/J3 of
the ORDM CPU PCB on the replacement ORDM. Ensure that the
locator tab on the connector faces away from the disk drive.
4.22.11 Install the 10 cond. connector of the ORDM - processor cable on J1 of
the system interface board.
4.22.12 Install the 16 cond. connector of the ORDM - processor cable on J4 of
the system interface board.
4.22.13 Position the replacement ORDM sub-assembly in the ventilator box
and reconnect the keyboard cable, network cable, and power supply
wire harness to the system interface board at the back of the ORDM
sub-assembly.
4.22.14 Slide the assembly into into the ventilator box. Tighten the captive
mounting screws to attach the ORDM sub-assembly to the ventilator
box.
4.22.15 Carefully fit the locking tab on the left side of the bezel into its
receptacle, then slide the bezel to the left until it is properly seated.
4.22.16 Reinstall the two retaining screws at the right side of the bezel.
(Reinstall the auxiliary lamp at this time, if applicable.)
4.22.17 At the back of the ventilator box, connect the ORDM - processor
board ribbon cable to J5 on the processor board, and replace the
ventilator box back panel with the screws that were previously
removed.
4.22.18 Insert the O.R. DATA MANAGER Program Disk into the disk drive.
Restore power to the machine and turn the System Power switch to
ON.
4.22.19 Follow the ORDM boot information that appears on the Remote
Display.
4.22.20 Perform the PMS Procedure given in Section 6.
Rev. A
4-69
RETURN TO CD-ROM TABLE OF CONTENTS
RETURN TO THIS MANUAL'S TABLE OF CONTENTS

 Loading...