25 EN
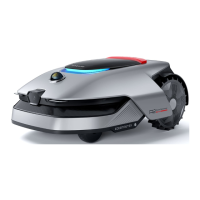
4. When the robot returns to within 1 m of the starting point, you can tap Close Boundary and the boundary
will automatically be completed.
5.2 Set No-Go Zone
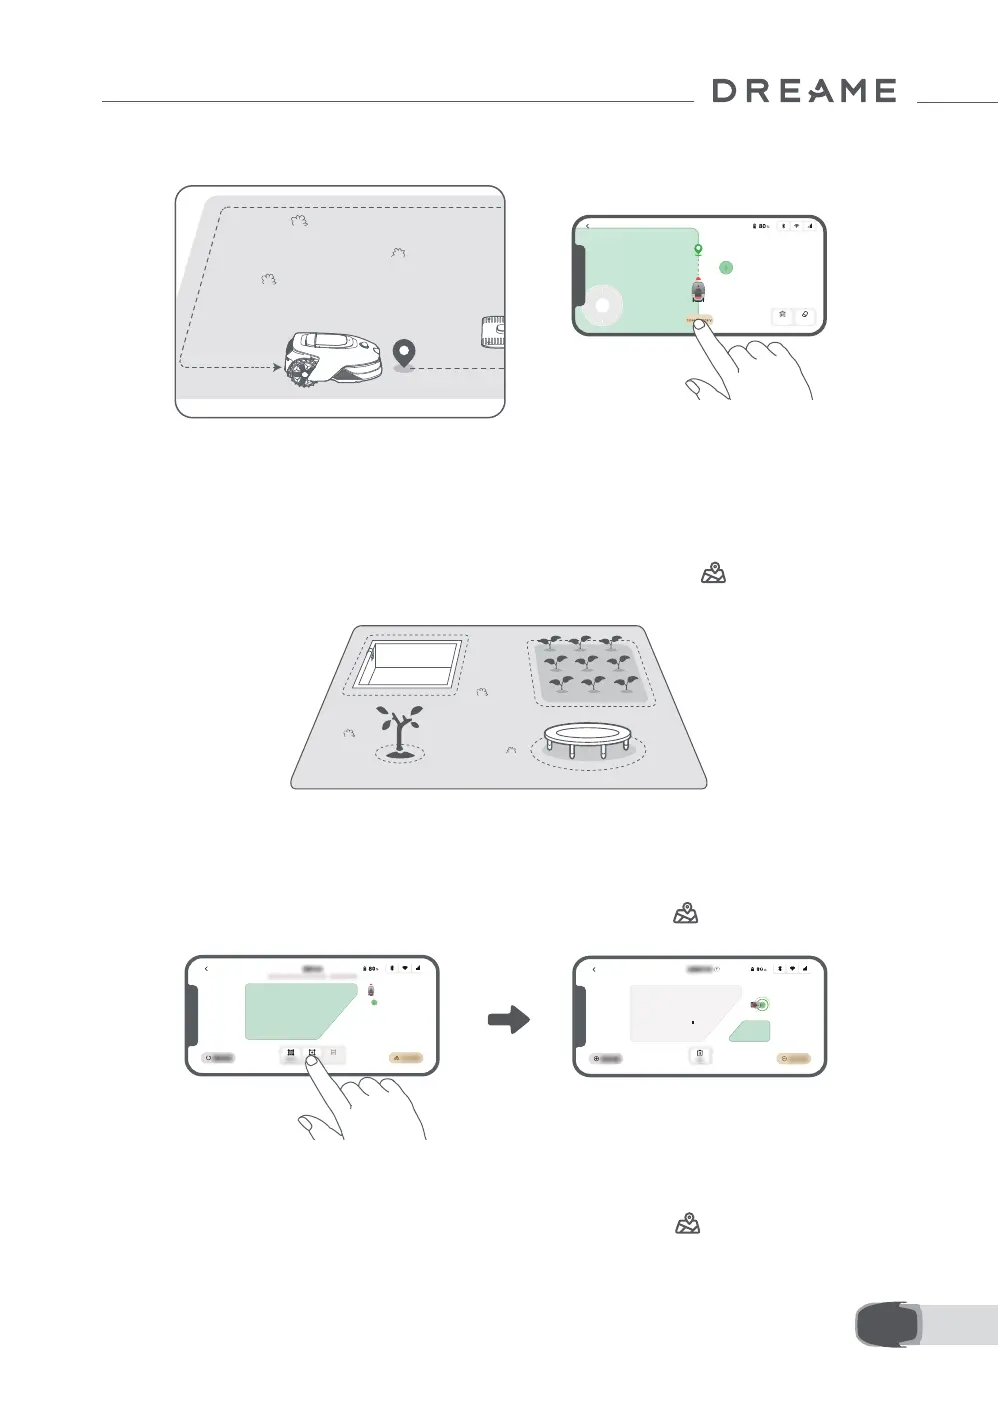
Though the robot can automatically avoid obstacles, it is still necessary to set areas with a risk of falling,
such as swimming pools and sandpits, as no-go zones. For objects you want to protect (such as a owerbed,
a trampoline, a vegetable patch or an exposed tree root), please set them as no-go zones. You can tap No-
go zone in the app to continue creating no-go zones. Alternatively, you can go to > Map Editing to
create or delete the no-go zones after the map is nished.
5.3 Create More Zones and Expand Existing Zones
• To Create More Zones
If your lawn is separated by roads or you have several isolated lawns, you can tap Work zone in the app to
continue creating work areas. You can also add, delete or modify the zones in > Map Editing when the
map is nished.
• To Expand Existing Zones
To expand an existing zone, tap Work zone in the app to create the area you want to include. If the two
areas overlap, they will be automatically merged. Alternatively, you can go to > Map Editing > Work
zone after mapping is complete to expand an existing zone.