23
8. The appliance
8.1 Glass panes
The wood set and monitor(s) are supplied separately. These can be tted after the glass panes and projection plate are
removed. After placement of the wood set, projection plate and monitor(s) (see sections 8.2, 8.3 and 8.4), it is possible to
place the glass panes:
3
Avoid damaging the glass panes during removal/placing.
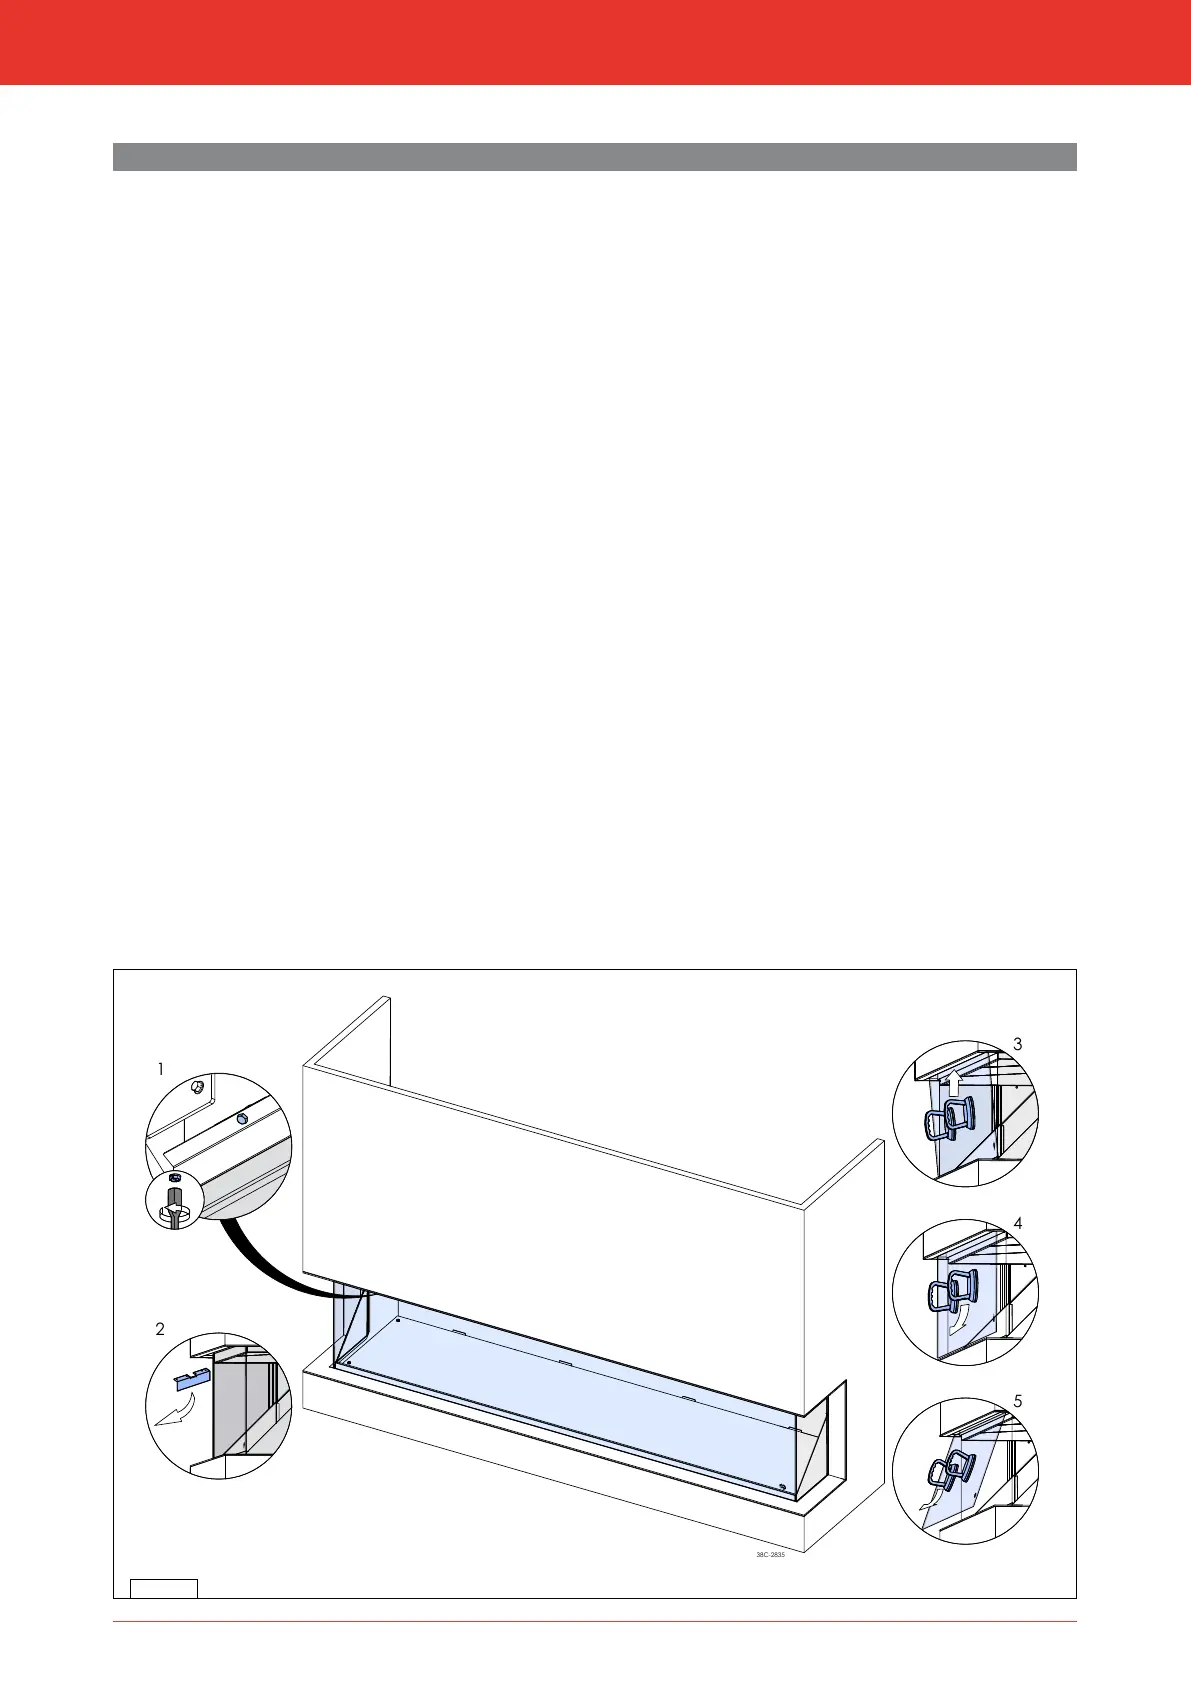
8.1.1 Removing the front glass pane
Observe the following instructions for removing the front glass pane (see g. 8-1).
3
Prevent the glass pane from getting damaged.
2
Place the suction cup on the glass pane to remove it from the appliance;
1
Unscrew the bolts of the glass strip on the top side and remove them together with the glass strip;
1
Properly hold the glass pane on both sides or the suction cup;
1
Tilt the top of the glass pane towards you;
1
Carefully lift up the glass pane and tilt the bottom of the glass pane towards you;
1
Remove the glass pane.
8.1.2 Placing the glass pane
Placing the glass pane will take place in reverse order of removing the glass pane, as described above:
1
Make sure that the groove of the glass pane strip at the bottom side is free from dirt and chips before the glass
pane is placed.
1
Place the glass pane with the logo at the bottom right.
1
Do not over-tighten the bolts, as they could break or the thread could be stripped.
3
Make sure the front glass pane fully connects to the side pane(s)
8.1.3 Cleaning the glass pane
For an optimum experience of the appliance, it is recommended to clean the glass pane.
3
The glass pane(s) to be cleaned should be cooled down to room temperature.
3
Avoid damage to the glass pane(s).
2
- Use a damp microbre cloth. Other materials such as (kitchen) paper, steel wool, etc., could cause scratches.
- It is recommended to use a good quality glass cleaner as a detergent for the glass panes.
- Always wear cotton gloves during the cleaning process to prevent the introduction of new ngerprints.
8-1
installatie- en gebruikershandleidingInstallation manual