Page 11
Chapter 3: Getting Started
Once all wiring is complete, the system is ready to be programmed. This section provides
an overview of how to carry out this task. Later sections of this guide explain the
configuration options in more detail.
About the user interface
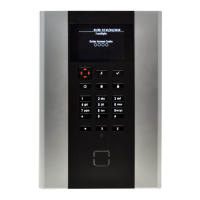
The control unit displays configuration options in menus. The top-level Installer menu
contains options such as Detectors/Devices, Outputs and Partitions. For example:
INSTALLER MENU
Detectors/Devices
The icon near the centre of the display helps you to recognise the options.
You can select an option by pressing or at the keypad until the name of the option or
device you want is displayed. Pressing selects that option. Some options require you to
press or to change the setting.
Selecting an option may display a menu of further options. For example, selecting
Detectors/Devices displays the following:
DETECTORS/DEVICES
Detectors
On-board Keypad
Radio Keypads
External Sirens
Internal Sounders
WAMs
You can repeat the process until you have selected the lowest-level setting you want to
change.
Pressing at the keypad takes you back one level. For example, pressing when you are
in the Detectors/Devices – Detectors menu takes you back to the Detectors/Devices
menu.
The section starting on page 17 shows a "menu map", which gives the position of all
menus and options in the Installer menu.
Entering text
You can use the numeric (1-9), * and # keys on the keypad to enter numbers and text. All
numeric keys are labelled to show the characters you can enter using that key. For

 Loading...