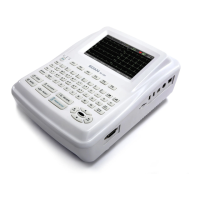
SE-1 Electrocardiograph User Manual Introduction
- 12 -
· 25 2.5mm/mV -10mV ~ +10mV
· 5 5mm/mV -5mV ~ +5mV
If the fluctuating range of the ECG signal is great, it’s better to choose AGC because the
sensitivity can be adjusted automatically in this mode.
Note: This key is ineffective during the printing course in the auto mode.
3) RESET (Lead Locking Key)
In the manual mode, during the printing course, pressing this key can lock the lead, and
then the corresponding ECG wave shows a straight line. The lead will be unlocked
automatically after 1 second. So in the case of baseline drift, press this key to draw the
baseline to zero quickly, and the ECG wave resumes after 1 second.
4) 1mV Calibration Key
In the manual mode, press this key to print a 1mV calibration mark during the printing
course.
5) MODE (Mode Switch Key)
Press this key to select a working mode among four auto modes and a manual mode. The
switch order of leads in each mode is listed in Table 2-1.
Table 2-1 Lead Switch Order in Different Modes
Mode Switch Order (from Left to Right)
MANU І II III aVR aVL aVF V1 V2 V3 V4 V5 V6
AUTO1 І II III aVR aVL aVF V1 V2 V3 V4 V5 V6
AUTO2 aVL І aVR II aVF III V1 V2 V3 V4 V5 V6
AUTO3 І aVR V1 V4 II aVL V2 V5 III aVF V3 V6
AUTO4 2-channel auto mode (AUTO1 + Rhythm Lead)