Chapter 2
| Installation Overview
Switch Installation Tasks
– 14 –
Switch Installation Tasks
Follow these tasks to install the switch in your network. For full details on each task,
go to the relevant chapter or section by clicking on the reference link.
Note:
The chapters in this guide are organized in the same sequence as the
installation tasks. For detiled installation procedures, it is recommended to read
chapters 3 through 6 in sequence.
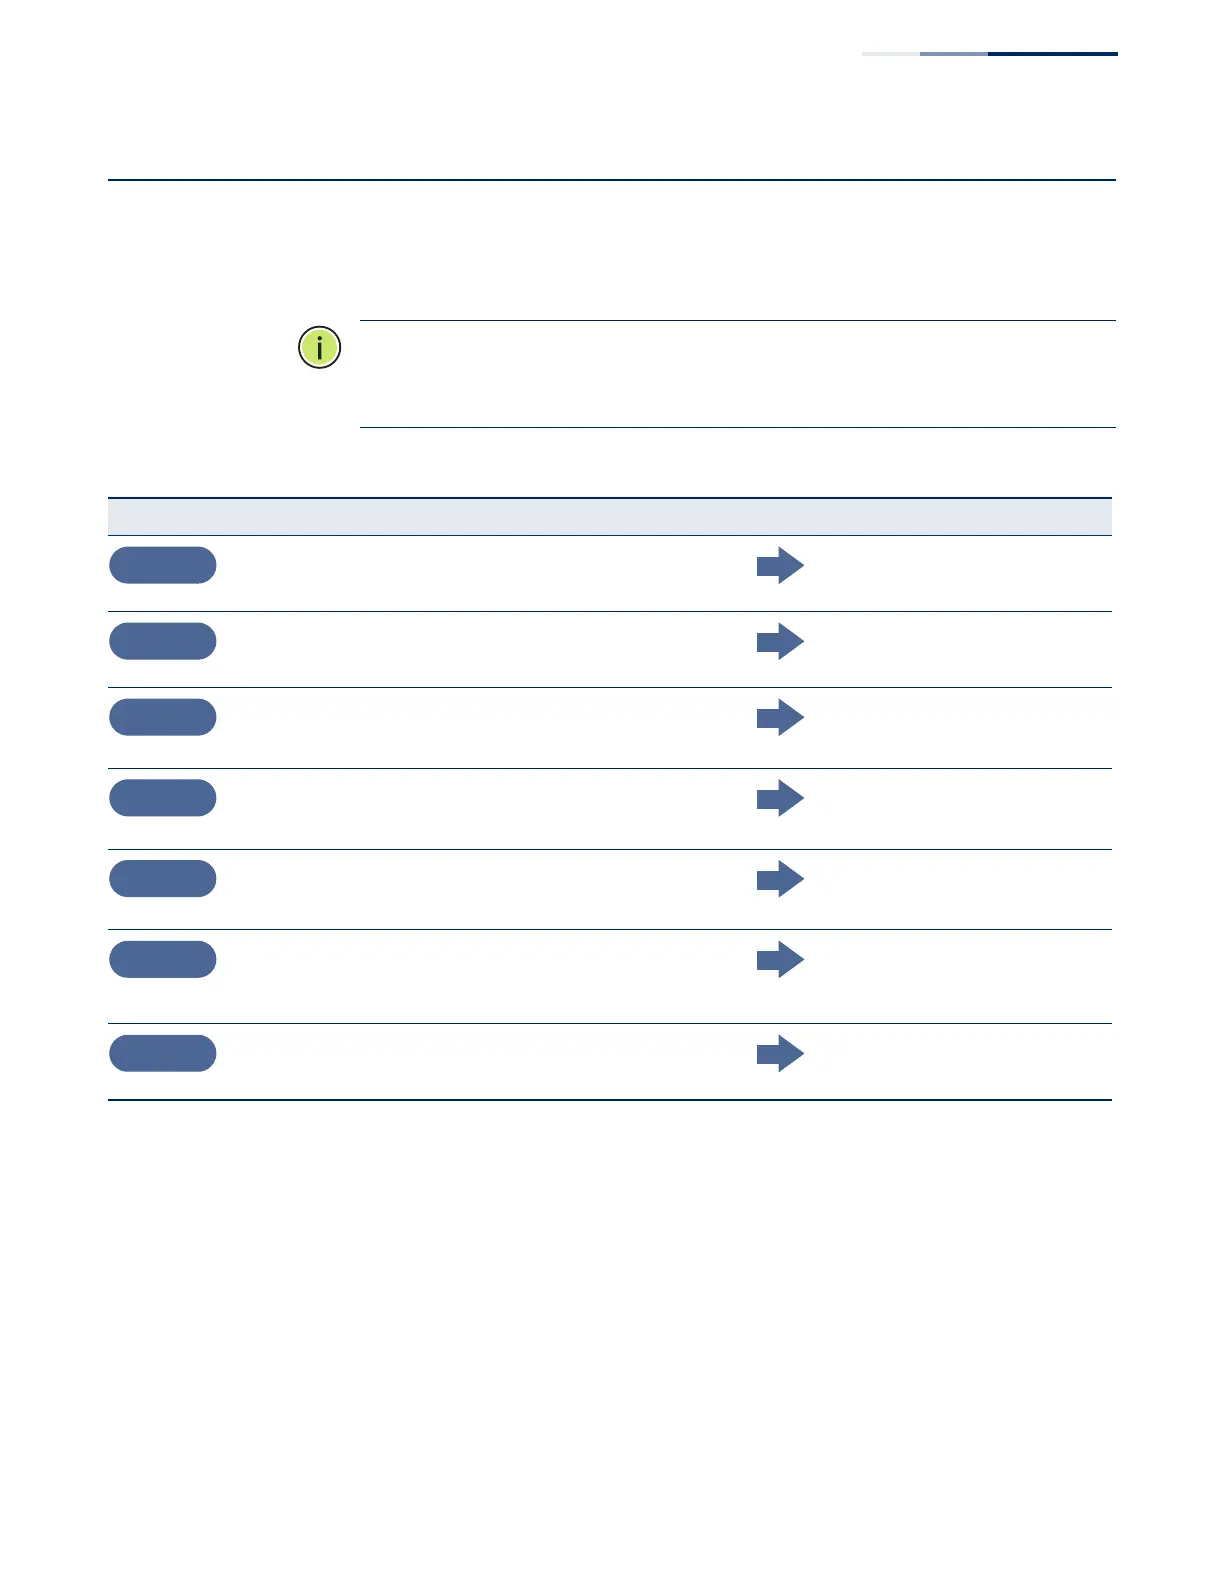
Table 2: Switch Installation Tasks
Task Number Task Action Detailed Information Reference
Unpack Package and Check Contents
Unpack your switch and check the package contents to be sure
you have received all the items.
“Package Contents” on page 12
Install the Chassis
Be sure to plan you rack installation, taking into account switch
cooling requirements.
“Switch Chassis” on page 15
Ground the Chassis
Use the grounding wire to connect to a rack grounding point.
“How to Ground the Chassis”
on page 22
Power On the Switch
Connect an AC power source to the switch.
“How to Connect to AC Power”
on page 23
Verify Switch Operation
Verify basic switch operation by checking the system LEDs.
“Understanding the Switch
Status LEDs” on page 25
Make Initial Configuration Changes
Make basic switch configuration changes before connecting to
the network. It is suggested to connect to the switch console port
to perform this task.
“How to Connect to the
Console Port” on page 26
Install Transceivers and Connect Cables
Install SFP transceivers and connect network cables to port
interfaces.
“Port Connections” on page 30