Installing the MVB into a rack
9
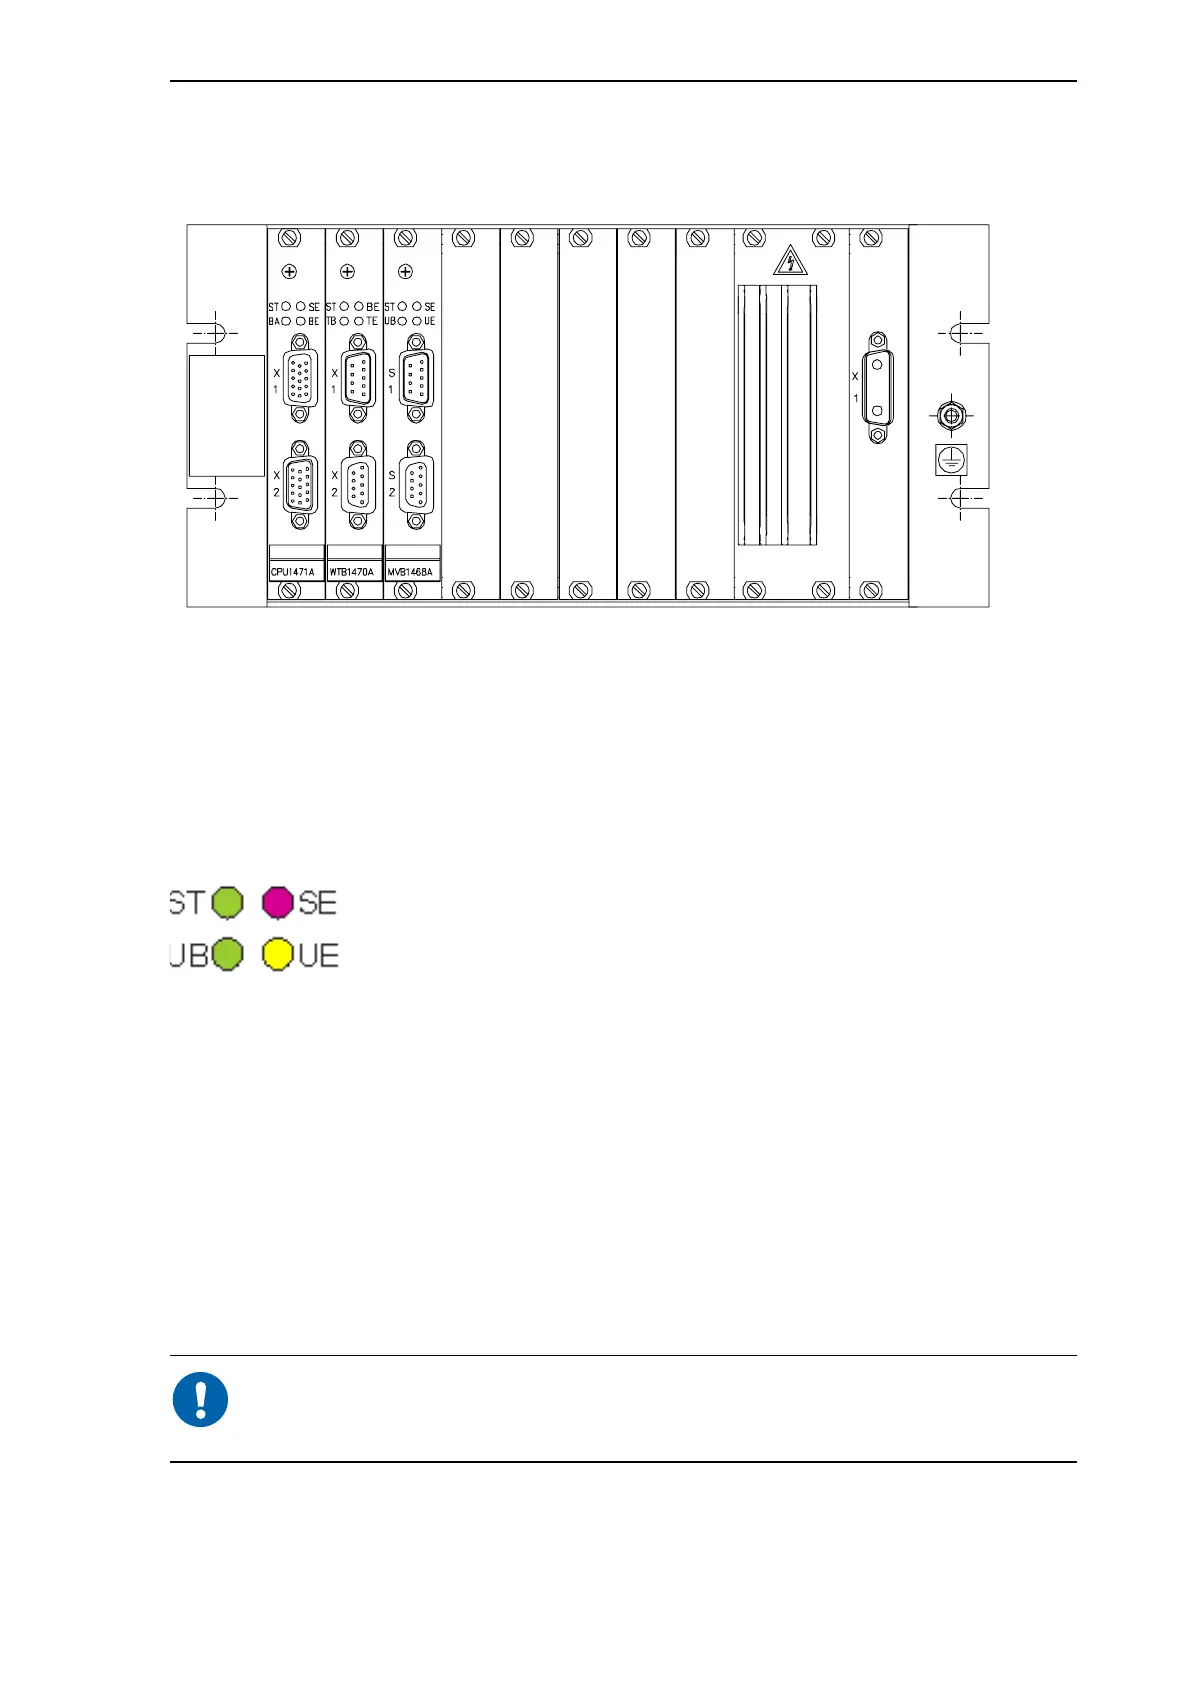
The following picture shows a sample rack with modules successfully installed. The
modules in the picture are just an example, and the picture is intended as illustration
only.
Figure 3.1: Modules installed in a rack, an example only
3.2.2 Checking the module
When you have successfully installed the module in the rack, the next step is to check
that the module works. You can do this by observing the LEDs. The following picture
shows the four LEDs on the module and their names.
Figure 3.2: MVB LEDs
To check the module, do the following:
1 Turn on the rack power.
2 Check that the green ST LED is on. Also, check that the red SE LED and yellow UE
LED are not on. This means that the module is OK.
3 If the red SE LED and yellow UE LED are constantly on, the module is not OK. In
such a case, make sure you have placed the MVB module properly in the rack. If
these LEDs still remain on, turn off the rack power, loosen the screws on the module
front panel and pull the module carefully out of the rack.
During module start-up, the red and yellow LEDs are on for a moment and
then go off. This is part of the normal start-up procedure and does not
indicate an error.
If the module was not OK, see the following section.