9
3.4 Removing and fitting a scratching tool
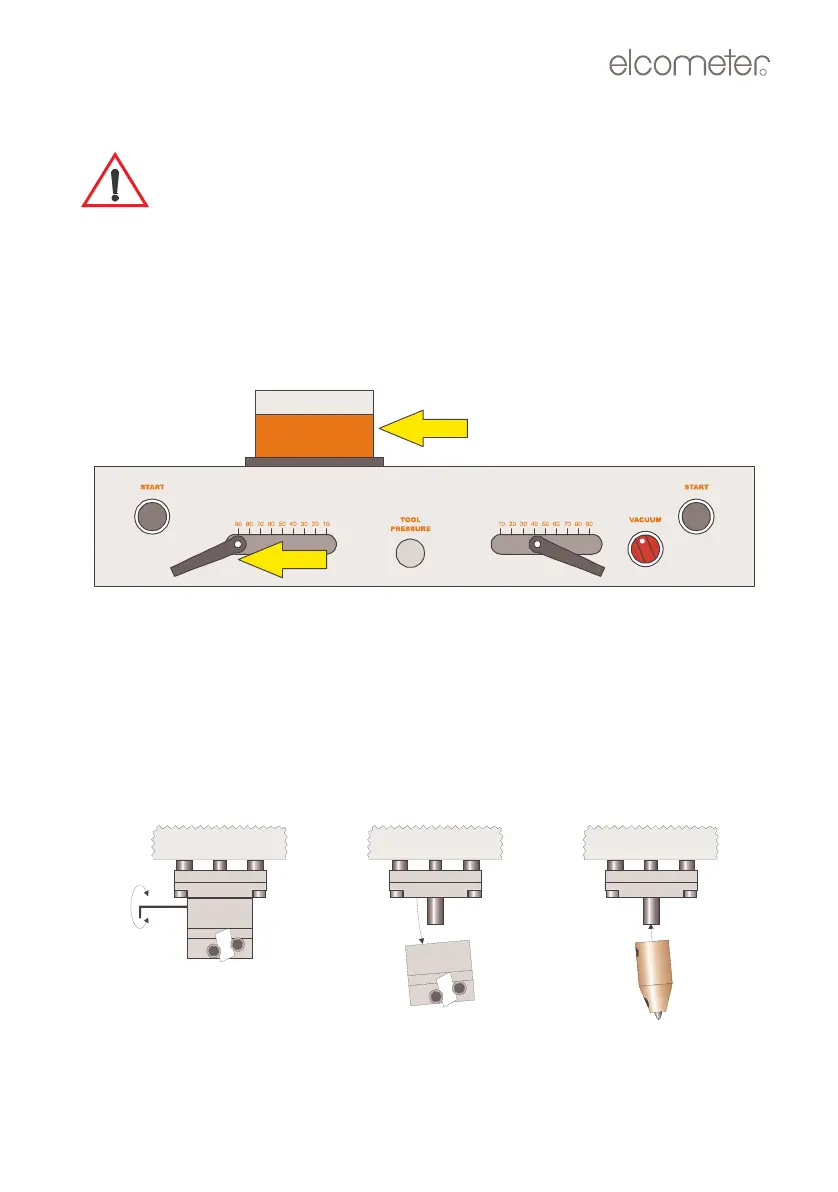
Before removing or fitting a scratching tool, always move the table out
of the way - see steps 1 and 3. This will prevent damage to the surface
of the table in the event that a tool or the tool holder is dropped
accidentally.
1. Ensure that the sliding stopcock at the rear of the tester is in its closed
position (Page 5, Figure 3).
2. Loosen the start position handle and move it to the 90 mm position.
3. Rotate the table to the 90° position and push to the left as far as it will go
(Figure 6).
Figure 4. Move table to one side before mounting a tool
4. Loosen the hexagonal screw on the left side of the tool holder and remove
the tool holder (Figure 5).
5. Fit the new tool holder with the hexagonal screw on the left.
6. Tighten the hexagonal screw.
7. Place a test panel on the table and push the table back to the central
position.
Figure 5. Changing a tool holder
Op_1535_01 A5.fm Page 9 Wednesday, August 8, 2007 3:59 PM