11
3.5 Checking and adjusting the angle of the tool holder
When creating scratches using the optional cross cut tools (see “Spare parts
and accessories” on page 22), it is essential that the angle of the tool is adjusted
until the cutting edge of the tool is parallel to the surface of the specimen.
3.5.1 Checking the angle of the tool holder
To check that the angle of the tool is correct:
1. Fit the cross cut tool.
2. Set the pressure to 1 bar.
3. Perform a scratch test.
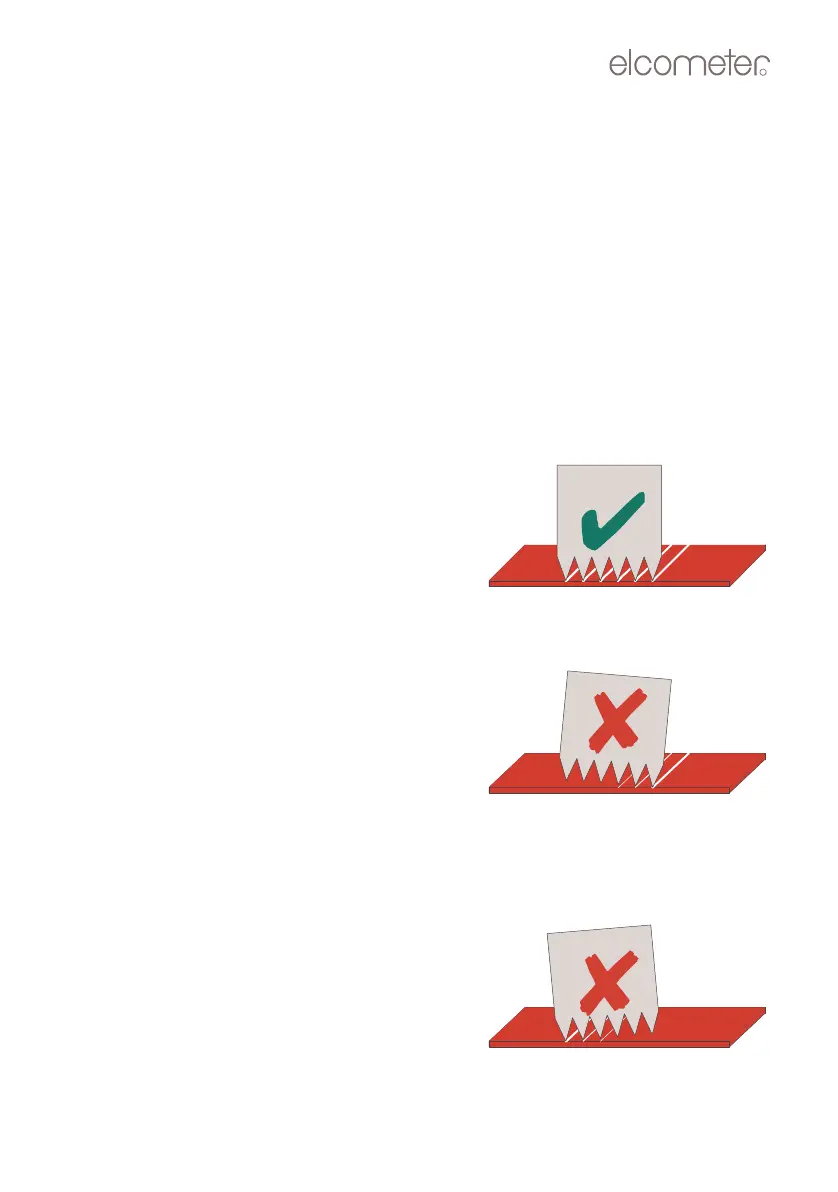
4. Inspect the specimen:
Depth of scratches is even front to back
The tool is correctly adjusted; all teeth of
the cross cut tool are in contact with the
surface of the specimen and the depth of
cut is equal.
No adjustment is required.
Scratches at back, no scratches at front
The cross cut tool is inclined; scratches at
the back of the specimen are deeper than
those at the front.
Adjustment is required; see “Adjusting the
angle of the tool holder” on page 12 and
rotate the micrometers towards zero
(direction A).
Scratches at front, no scratches at back
The cross cut tool is inclined; scratches at
the front of the specimen are deeper than
those at the back.
Adjustment is required; see “Adjusting the
angle of the tool holder” on page 12 and
rotate the micrometers away from zero
(direction B).
Op_1535_01 A5.fm Page 11 Wednesday, August 8, 2007 3:59 PM