Page 30 (40)
Rev 1 2018-03-21 www.elcon.se
Go to INDEX.
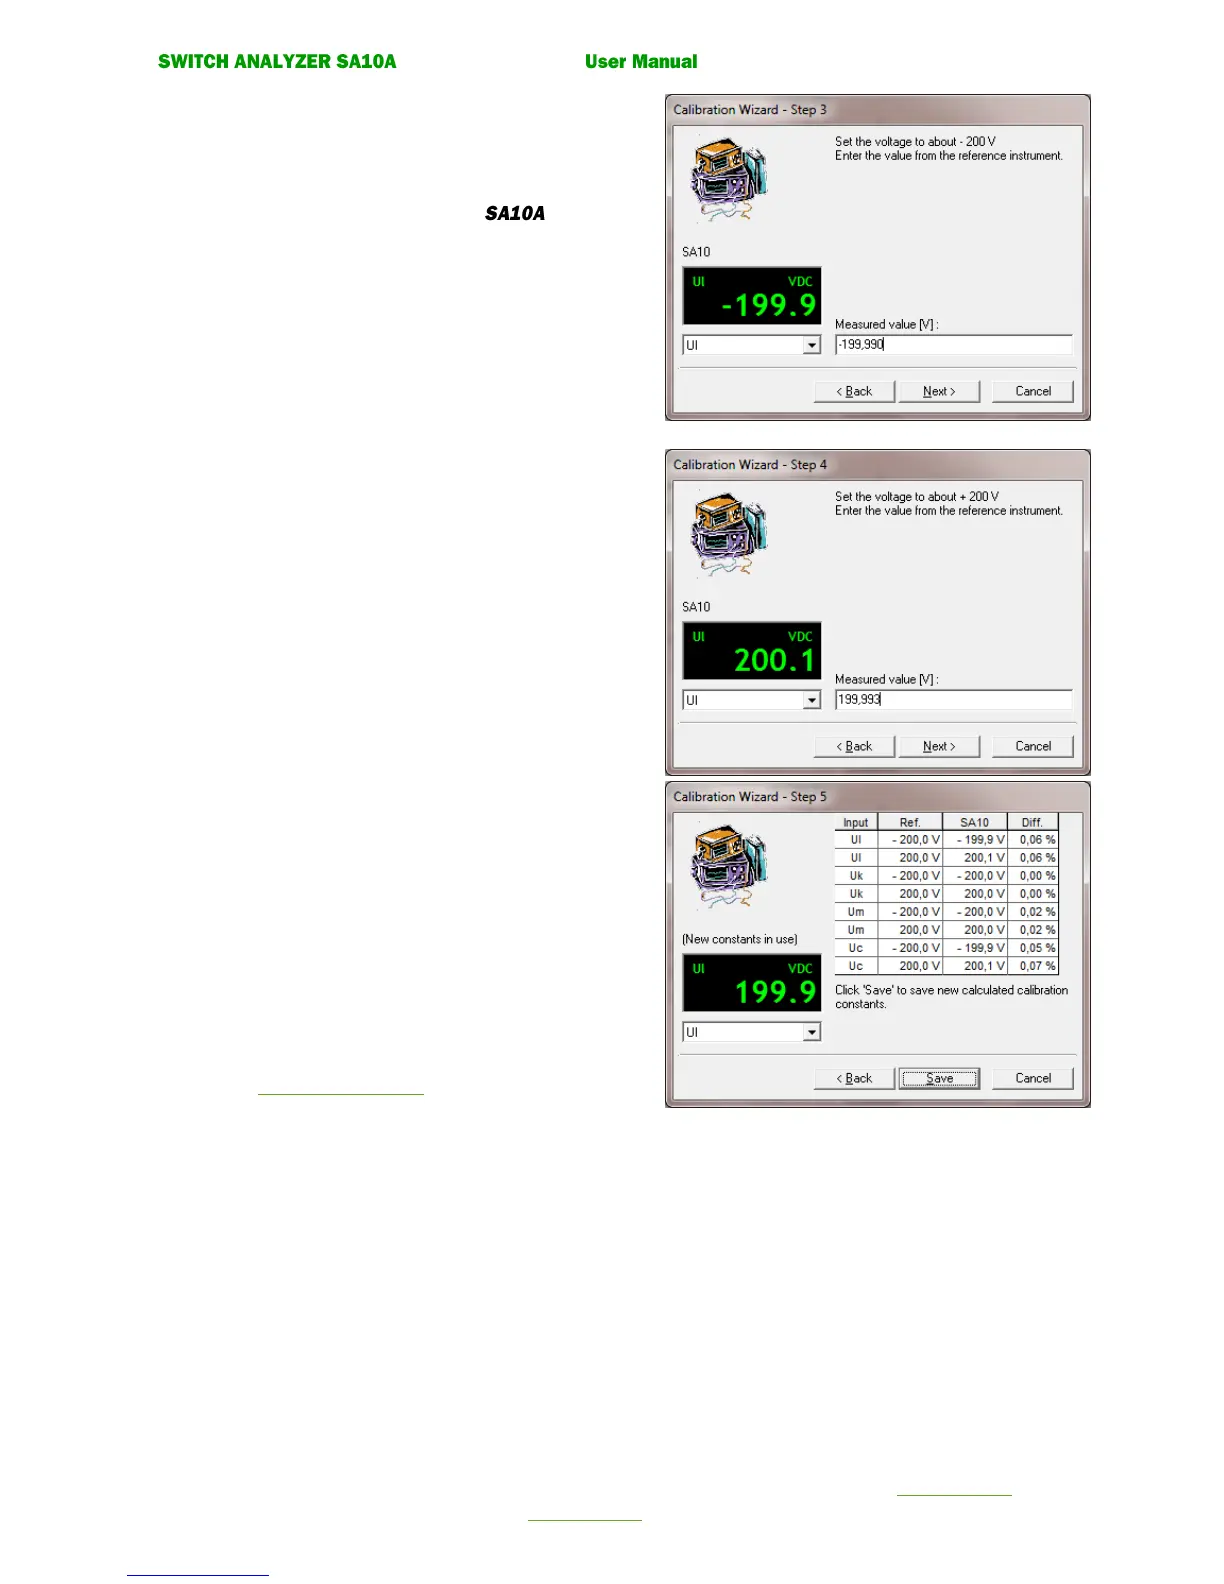
• Calibration wizard. Step 3
Note!
The instrument box shows the voltage value from selected
channel measured by the control unit
Set the voltage source to about -200 V.
Enter the value (V) from the reference instrument.
Click the command button. Next.
• Calibration wizard. Step 4
Set the voltage source to about +200 V.
Enter the value in Volt from the reference instrument.
Press the command button. Next.
• Calibration wizard. Step 5
New calibration constants are now calculated
Click button Save to save the new calculated calibration
constants.
Select button “Cancel” to cancel the guide without
updating the calibration constant.
• Calibration wizard. Step 6.
Enter password and calibration signature.
See 7.3.6 Enter Password.
• Calibration wizard. Step 7.
Check that the measured value compared to
the reference instrument is within the accuracy
for the input. If not Click Re-calibrate button.
If correct click Cancel button to exit Calibration Wizard.