36 Installation Manual
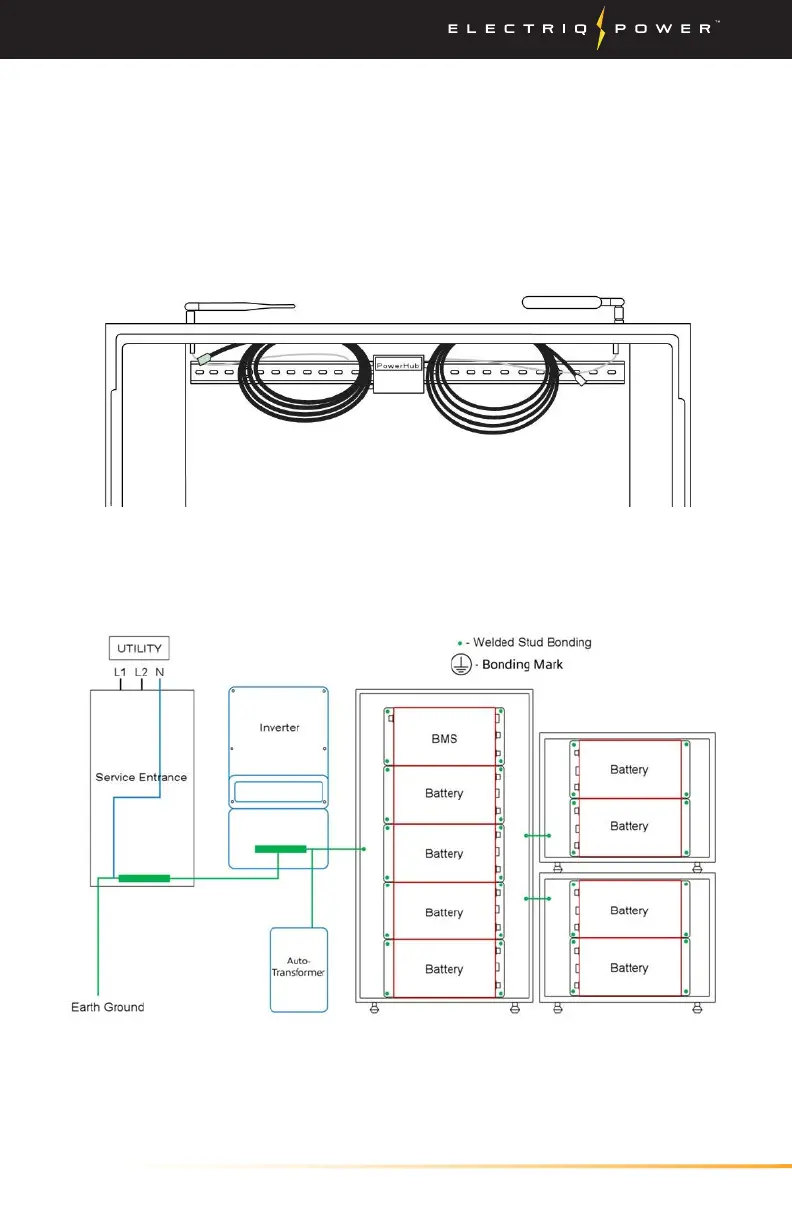
Bonding to main (10) and add-on (5 kWh) enclosure front panel not
shown. Bond between main enclosure and front panel with a PE wire
connected to marked PE PEMs.
Note: Accessory bags inside the enclosure will have all the required
cables and screws.
Installing System / Battery
3.3.3. BATTERY
1. Before installing the batteries, ensure the enclosure is securely
fastened and that all clearances have been adhered to as stated in
the 'Knockouts and Clearances' section of the manual.
2. There will be four cables coming from the left and right of the
PowerHub, which will be wired later on into the BMS, inverter,
communications cable and front display cover.
BONDING THE BATTERY ENCLOSURE DIAGRAM