32
English
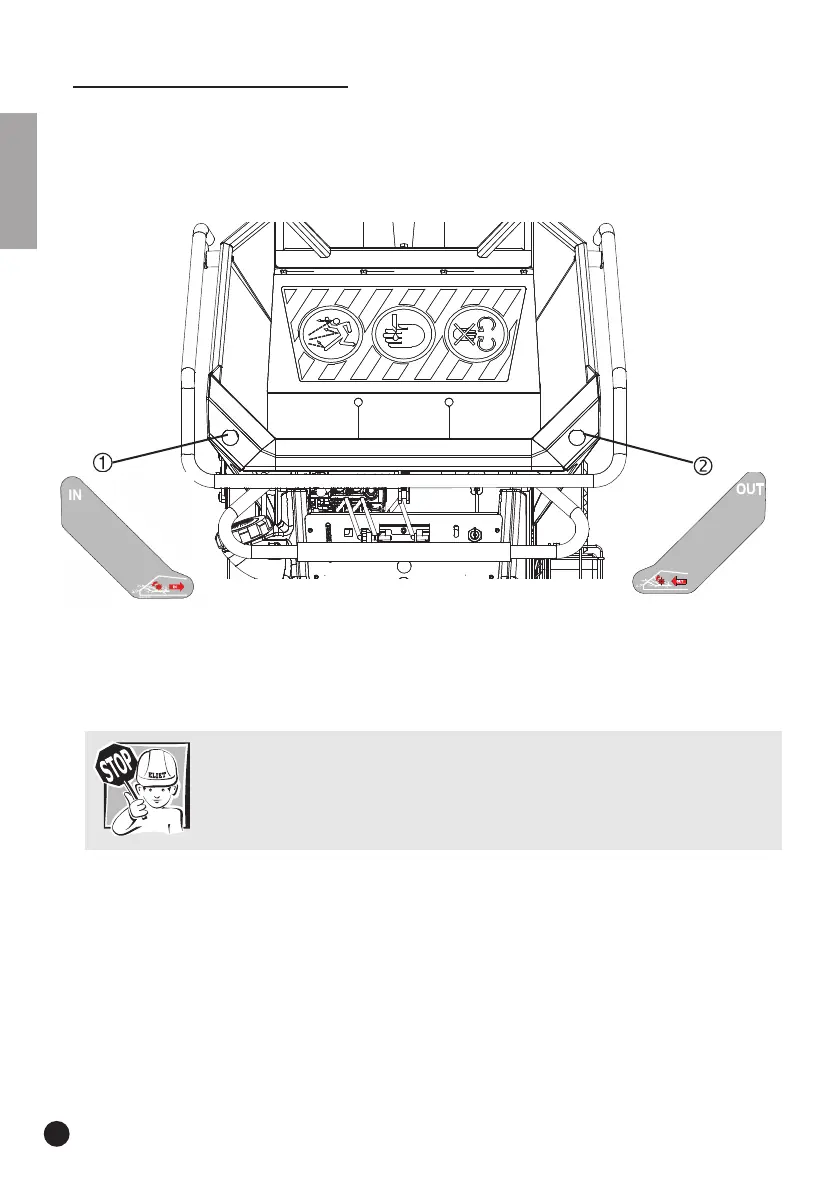
• Push the left button (1) and the feed roller will start moving and pull the cut waste into the feed
hopper at a constant speed. The buttons are fitted with integrated LED lights. These light up
the button when they are activated. These buttons show the direction of the feed roller.
Warning:
The feed roller can only be switched on if the blades are activated. If this is not
the case, a message will be displayed on the LCD screen. Press the Action button
to reactivate the blade axle.
• Preferably, the operator’s position is next to the black loading hopper to introduce the garden
waste. In this way, flying chippings finding their way from below the safety screen that are
expelled from the in-feed do not cause personal injury.
• Feed the garden waste into the loading hopper and guide it towards the feed roller. In the case
of loose garden waste (leaves, etc.), use a branch to push the material up to the feed roller. (DO
NOT USE a shovel or a fork to do this).
• The Axelero
TM
discharge system creates a suction effect in the hopper in front of the feed
roller. Loose cut waste and leaf litter can impede this suction. In order to ensure the Axelero
TM
suction is effective, the anti-projection flap in the feed hopper can be secured in a raised
position.
9.6.3.2 Operating the feed roller
In order to simplify operating the feed roller, a clear and well-organised system has been chosen,
using buttons on the front of the hopper.
The left button (1) is for inserting the cut waste; the right button (2) is for carrying back the cut
waste.