(F)
(B)
59
English
11.4.3.2 To replace the shredding blades, proceed as follows: (Replace knives)
•
The new set of blades, type RESIST/8 / RESIST/10 for Super Prof MAX can be purchased from
your ELIET dealer using the following order number: BU 401 300 202 / Super Prof Max: BU 401
301 000.
• Disassemble all bolts (M8) (Super Prof MAX M10) that secure the blades. Always use two ring
spanners with long handles to unscrew these bolt attachments.
• Do not pull away the blades using your hands but use a self-grip wrench.
• It is useful to put a wedge (screwdriver) in-between the blade disks to ensure it is easy to
release them.
• First remove any dirt between the blade plates before you insert a new blade. To do so, use a
stripping blade.
• Now carry out the steps that must be followed in order to turn the blades (Read “11.4.3.1 To
reverse a shredding blade, proceed as follows” on page 56)
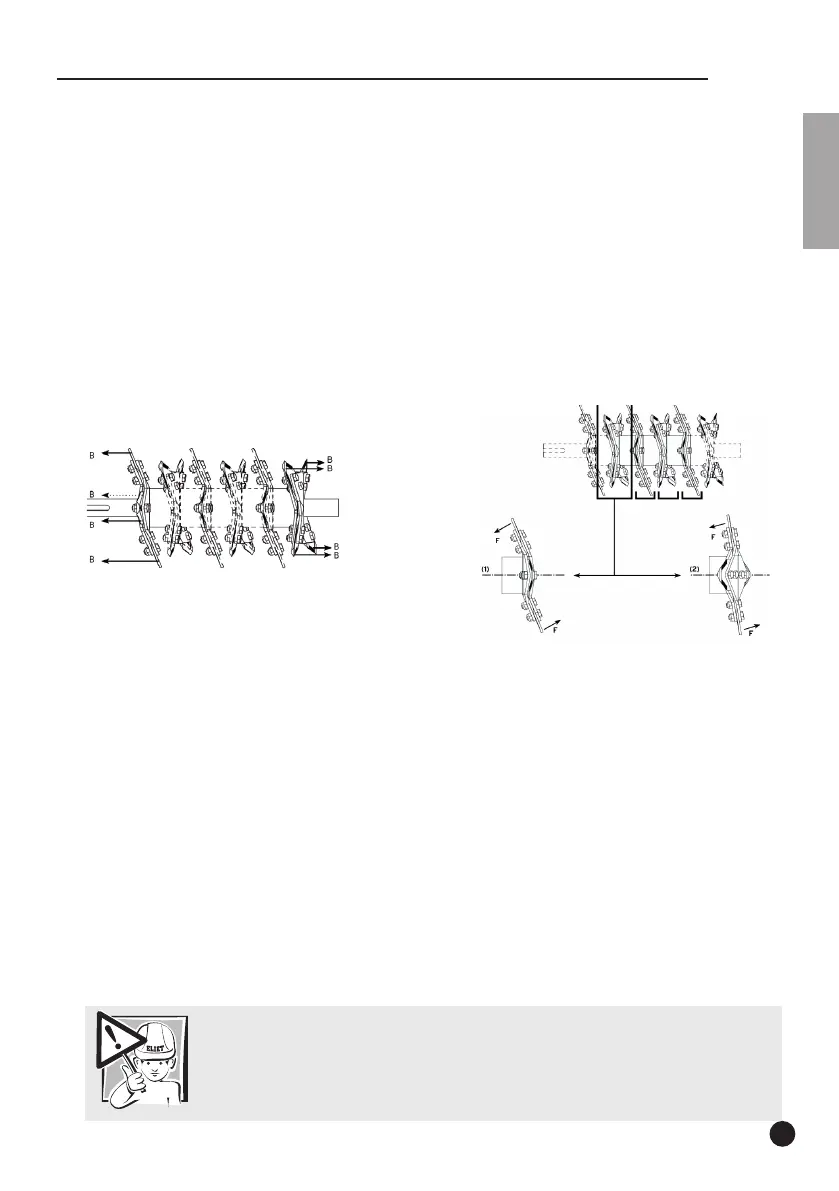
Group 1: Check that the rear of each blade faces towards the wall (B) of the shredding chamber.
Group 2: Each blade that is mounted on a fluted part of a blade disk must face the axis line of
the blade shaft with its front side (F).
• On replacing shredding blades, always fit new bolts and nuts.
•
When refitting the shredding blades check that all bolts are tight
(read “16.2 List of torques” on
page 78).
•
When refitting the bolts in the discs, always make sure the nut is located on the left side of the disc.
As a reminder: “All nuts in the blade shaft must always be positioned along the side of the pulley”
.
• After reversing or replacing the blades, always check the torque of the blade bolts after the
first 5 working hours and adjust, if required.
Caution:
Check the torque of the blade bolts after the first 5 working hours !