Faulty operating and switch elements
© Elma GmbH & Co KG SM/Transsonic_LC/1104/D
31
8. Insert the new themostat into the housing with the
connection contacts pointing to the bottom plate and
position the distance bushings. Then fix the fastening
screws (A).
Press the front plate back onto the housing.
9. Press the capillary probe back into the clamp and secure
with silicone.
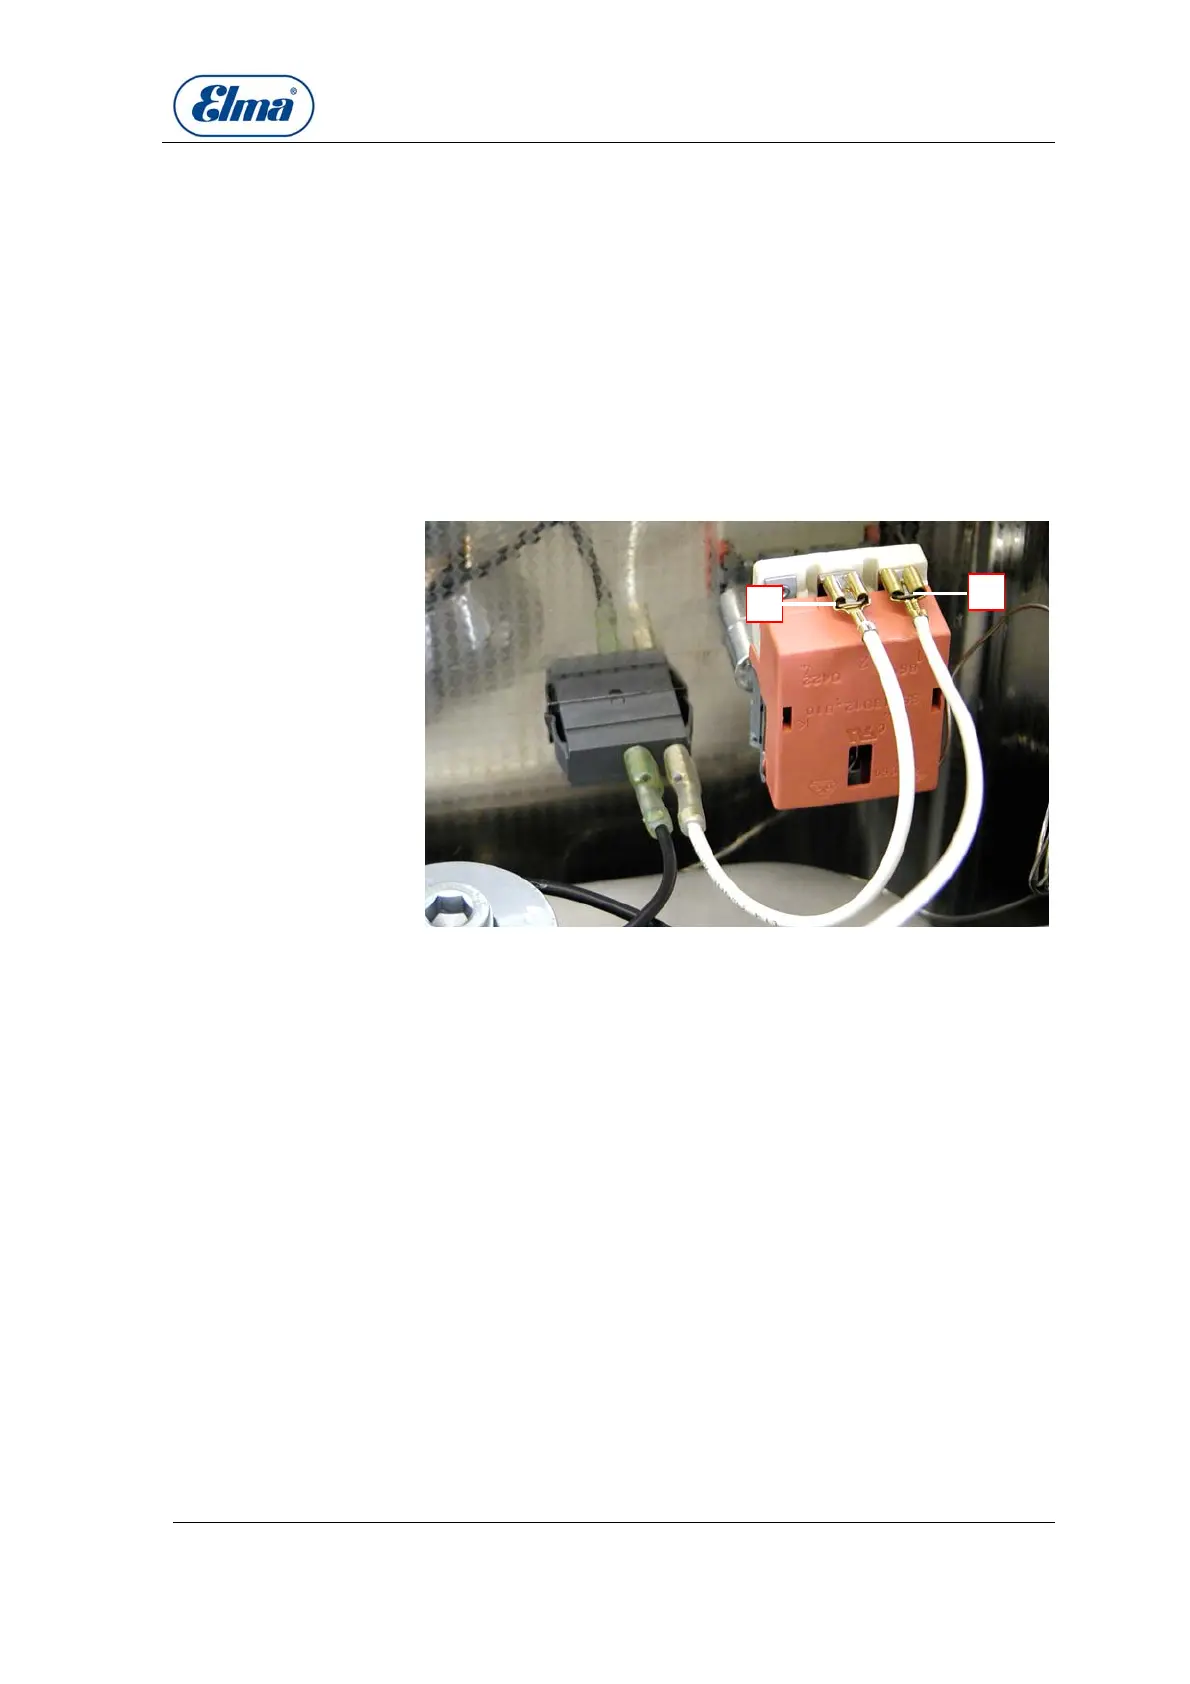
10. Reconnect the electric cable at the thermostat (Illustration
8.7.1.), polarization is irrelevant. Before closing the housing
check again that no cable has come loose or is pinched.
Illustration 8.7.1. Electric connections at control thermostat
Supply cable from heating switch
Cable to heating
B
A
B