Installation
13
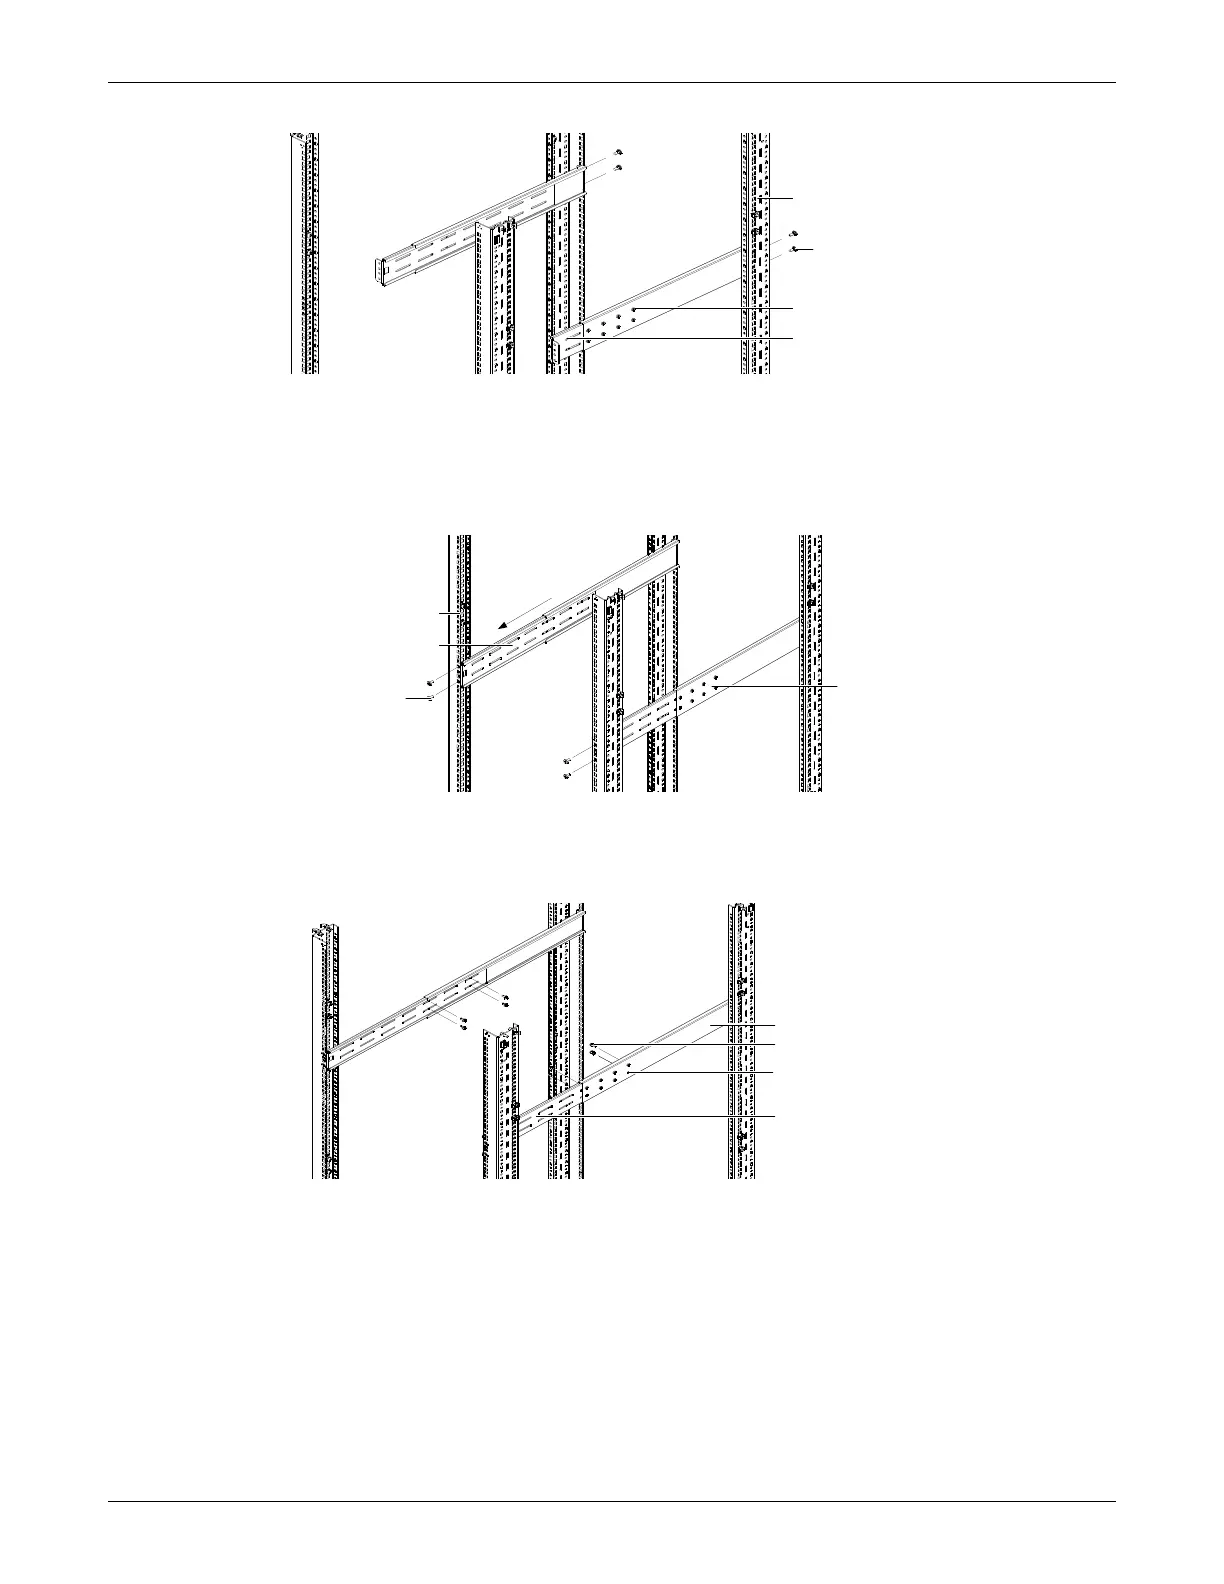
Figure 11 Installing rear member of each bracket assembly
5. Extend bracket assembly by sliding the front member forward until it touches the rack’s front
vertical rails (adjustable length: 18 inches to 32 inches).
6. Use two M5 screws to attach each front member onto the front vertical rails through the
installation holes. Make sure that the bracket assemblies are at the same mounting height on all
four of the rack’s vertical rails (see Figure 12.)
Figure 12 Installing front member of each bracket assembly
7. Fasten the rear and front members together using four M4 screws and four M4 nuts (M4 nuts
have been installed on the rear member before delivery) per bracket assembly, as shown in
Figure 13.
Figure 13 Fastening rear member and front member together
M5 screw (4 pcs)
Vertical pole
Rear member
Front member
Front vertical pole
M5 screw (4 pcs)
Front member
Rear member
S
l
i
d
e
M4 screw (8 pcs)
Rear member
Front member
M4 nut (8 pcs)