6. Press NEXT.
The ShoW Fit submenu appears.
7. Press ENTER.
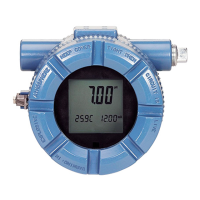
The most recent fault message appears in the display.
8. Press NEXT repeatedly to scroll through the stored messages.
The transmitter only remembers the three most recent messages. nonE appears if
there are no faults. Press EXIT to clear all the stored messages and return the
transmitter to the ShoW Fit display. If the transmitter loses power, all stored
warnings and fault messages are lost.
9. Press EXIT to return to the process display.
8.1.7 Testing the transmitter by simulating the pH
Overview of simulating a pH input
This section describes how to simulate a pH input into the 5081-P pH/ORP transmitter. pH
is directly proportionsl to voltage. To simulate the pH measurement, connect a standard
millivolt source to the transmitter. If the transmitter is working properly, it will accurately
measure the input voltage and convert it to pH. Although the general procedure is the
same, the wiring details depend on the location of the preamplifier. Consult the table to
find the correct procedure.
Preamplifier located
in Section
Transmitter pH simulation when the preamplifier is located in the transmitter
Remote junction box pH simulation when the preamplifer is located in a remote junction box or in
a sensor-mounted junction box
Sensor-mounted junc-
tion box
pH simulation when the preamplifer is located in a remote junction box or in
a sensor-mounted junction box
Sensor (model 381+
only)
pH simulation with 381+ sensor
Sensor (all other mod-
els)
pH simulation when preamplifier is in sensor
pH simulation when the preamplifier is located in the
transmitter
1.
Program PAMP to transmitter.
2. Turn off sensor diagnostics.
3. Turn off automatic temperature compensation. Set manual temperature
compensation to 25 °C (77 °F).
Diagnostics and troubleshooting
Instruction Manual 75