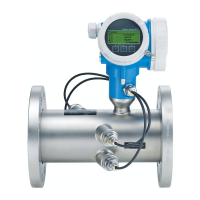
Proline Prosonic Flow P 500
Endress+Hauser 39
1 2
15 × DN 3 × DN 15 × DN 3 × DN
3 4
15 × DN 3 × DN
5 6
15 × DN 3 × DN
a
b
20 × DN 3 × DN 20 × DN 3 × DN
A0042041
26 Minimum inlet and outlet runs with various flow obstructions
1 Pipe bend
2 Two pipe bends (on one plane)
3 Two pipe bends (on two planes)
4a reduction
4b Expansion
5 Control valve (2/3 open)
6 Pump
Mounting the sensor
L
WARNING
Risk of injury when mounting the sensors and strapping bands!
‣
Due to the increased risk of cuts, wear suitable gloves and protective goggles.
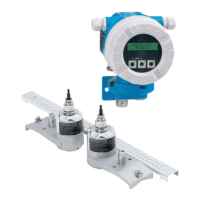
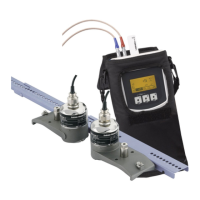
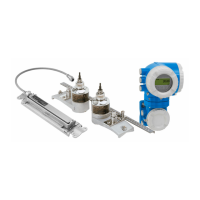
Sensor configuration and settings
DN 15 to 65 (½ to 2½") DN 50 to 4000 (2 to 160")
Strapping band Strapping band Welded bolt
2 traverses
[mm (in)]
1 traverse
[mm (in)]
2 traverses
[mm (in)]
1 traverse
[mm (in)]
2 traverses
[mm (in)]
Sensor distance
1)
Sensor distance
1)
Sensor distance
1)
Sensor distance
1)
Sensor distance
1)
– Wire length → 47 Measuring rail
1) 2)
Wire length Measuring rail
1) 2)
1) Depends on the conditions at the measuring point (measuring pipe, medium etc.). The dimension can be
determined via FieldCare or Applicator. See also the Result sensor distance / measuring aid parameter in
the Measuring point submenu
2) Only up to DN 600 (24")
Mounting types
Sensor holder with U-shaped screws
Can be used for
• Measuring devices with measuring range DN 15 to 65 (½ to 2½")
• Mounting on pipes DN 15 to 32 (½ to 1¼")
Procedure:
1. Disconnect the sensor from the sensor holder.
2. Position the sensor holder on the measuring pipe.
3. Fit the U-shaped screws through the sensor holder and lightly grease the thread.
 Loading...