S o n o m a U s e r M a n u a l
6
C H A P T E R T W O
7
S o n o m a U s e r M a n u a l
B A S I C I N S T A L L A T I O N
Performing a
Site Survey
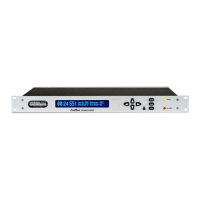
Using the status LED indicators, it’s easy to nd out if your Sonoma will work in your desired loca-
tion:
1. Screw the TNC plug on the end of the antenna cable onto the TNC antenna input jack on the chas-
sis rear panel of the Sonoma.
2. Plug one end of the supplied AC power cord into an 85-270 VAC outlet.
3. Plug the other end into the AC input connector on the chassis rear panel of the Sonoma.
Place the antenna on a at, preferably metallic surface while the unit is searching for the signal.
Make sure that it is not blocked by large metallic objects closer than one meter.
Initially upon power up:
1. The unit will light the Alarm LED for about 10 seconds.
2. Then it will continuously light the Sync LED.
3. When the unit has detected a CDMA signal, the Sync LED will begin to ash very slowly (about a
.4 Hz rate).
4. As the unit locks onto the CDMA signal and begins to decode the timing data, the Sync LED will
ash very rapidly (about a 6 Hz rate) until the data is fully decoded.
5. Then the Sync LED will pulse at precisely a 1 Hz rate, synchronized to UTC seconds.
At this point, the CDMA Subsystem has fully synchronized, and you may proceed to permanently
mounting the chassis and antenna in the desired location.
If this sequence has not occurred within twenty minutes, please read Appendix E - Installing the
CDMA Antenna for details on antenna placement and on switching your Sonoma to search PCS,
rather than cellular, frequencies.