S o n o m a U s e r M a n u a l
8
C H A P T E R T W O
9
S o n o m a U s e r M a n u a l
B A S I C I N S T A L L A T I O N
If your network does use DHCP for host conguration, and you are in a hurry to get your Sonoma up
and running, you may proceed to Verifying Network Conguration to make sure that the network
parameters were set up correctly. Otherwise, it is recommended that you read the following sections
on the use of the RS-232 serial I/O port now, since they will help you in debugging any problems that
you may encounter with the automatic conguration via DHCP.
If your network does not use DHCP, you will need to congure your Ethernet interfaces using either
the front-panel keypad or the RS-232 serial I/O port. The following sections contain brief descrip-
tions on how to do that.
Configuring Ethernet with the Front-Panel Keypad
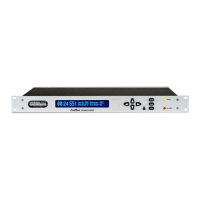
Conguring your Ethernet interfaces with the front-panel keypad is quite simple. After the unit has
powered on, press the ENTER key once or twice until you see a display called Main Menu. Now
press the RIGHT arrow key until the “Network4” or “Network6” selection is highlighted. Press EN-
TER again. Now you can choose which port to set up - either eth0 or eth1. You will then be able
to start modifying the IP address, gateway and netmask by pressing the EDIT key. The sequence of
displays will guide you through the setup process. Press the HELP key at any time to view context-
sensitive help information. When you are nished choose the REBOOT menu item and initiate a
system reboot.
Configuring Ethernet with the Serial Port
To congure your Ethernet interfaces with the serial port, after logging in as the root user, you must
run a simple script called netconfig. This script will prompt you for the needed information and
perform some syntax checking on your inputs. Then it will create or modify the appropriate les
needed to congure the Ethernet interface. The following sections will guide you in setting up com-
munications with the Sonoma using its RS-232 serial I/O port.
Connect the RS-232 Serial I/O Port
To test serial communications with the Sonoma you will need either a VT100 compatible terminal or
a terminal emulation program running on your computer. We will refer to either of these as “termi-
nal” for the remainder of this instruction.
1. Disconnect power from the Sonoma.
2. Connect one end of the DB9F-to-DB9F null modem adapter cable to the serial I/O jack on the
Sonoma.
3. Connect the other end of the DB9F-to-DB9F null modem adapter cable to the terminal. If the
serial I/O port on your terminal does not have a DB9M connector, you may need to use an adapter.
Refer to Appendix H - Specifications for details on the signal wiring. If you are using a computer
for your terminal, remember which port you are using because you will need to know that in order to
set up your terminal software.