SQ-80 — Musician's Manual
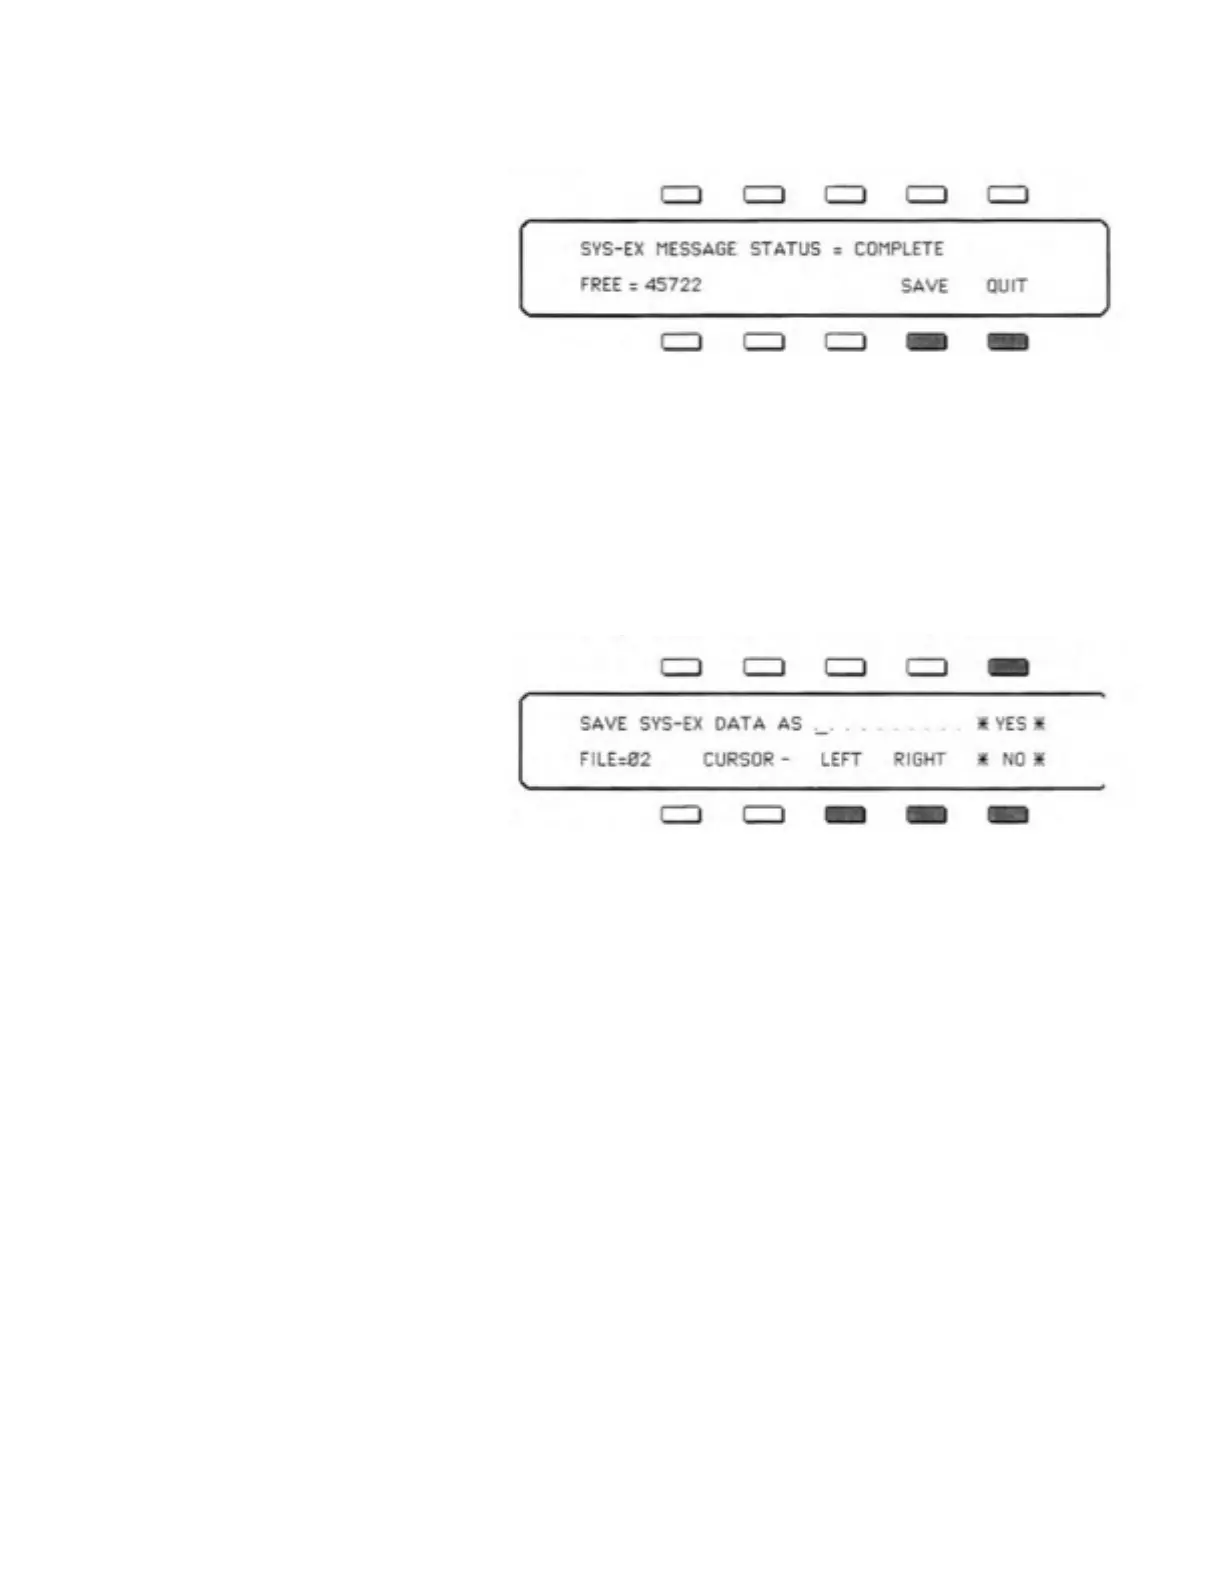
− > When a complete message has been received, the following Display will appear:
The Display shows how many
bytes of memory are left. At
this point, assuming there's
enough memory, you can send
the
SQ-80 another System Ex-
clusive message (from a different
instrument, for example) which
will be stored ri
ht afte
the first one. You can save as many different messages as memory permits in a single Sys-Ex
block. Each time a message is received, the Display will read "SYS-EX MESSAGE STATUS =
RECEIVING' and then return to the screen shown above, telling you how many bytes remain
free. When the data is later re-transmitted, all the messages will be sent out in the order they were
received, with a 150 millisecond pause between each. In this way you could load new data into
all your devices with a single Sys-Ex Load command from the
SQ-80.
− > If after receiving a Sys-Ex message the Display reads "SYS-EX MESSAGE
STATUS = INCOMPLETE" this means that the
SQ-80 did not receive an "End of Exclusive"
message at the end of the data. See SYS-EX Error messages on the next page.
− > Once you have successfully received the Sys-Ex message (or messages), press
SAVE.
following screen appears:
− > Select a name of up to ten
characters for the Sys-Ex data.
The file-name is initially
represented by ten dots. A
Cursor (underline) appears
eneath the first dot. Use
Entry Slider and the Up and Down Arrow buttons to select the letter or number you want for the
first character of the name. Then press the button labeled RIGHT to move the Cursor to the next
character, and select a second character.
Continue this, pressing the RIGHT and LEFT buttons to move the Cursor and using the Data
Entry Slider to change the character, until the Display shows the name you want.
Note that the lower-left of the Display tells you which of the ten available Sequencer/Sys-Ex
Blocks the File will occupy on the disk.
− > Press
*YES*. The Display reads "ACCESSING DISK DRIVE..." while the data is being
saved. When it is done you are returned to the
Storage Page.
Or Press
*NO* to cancel the procedure for any reason.
Section 6 — Data Storage 173
 Loading...