g
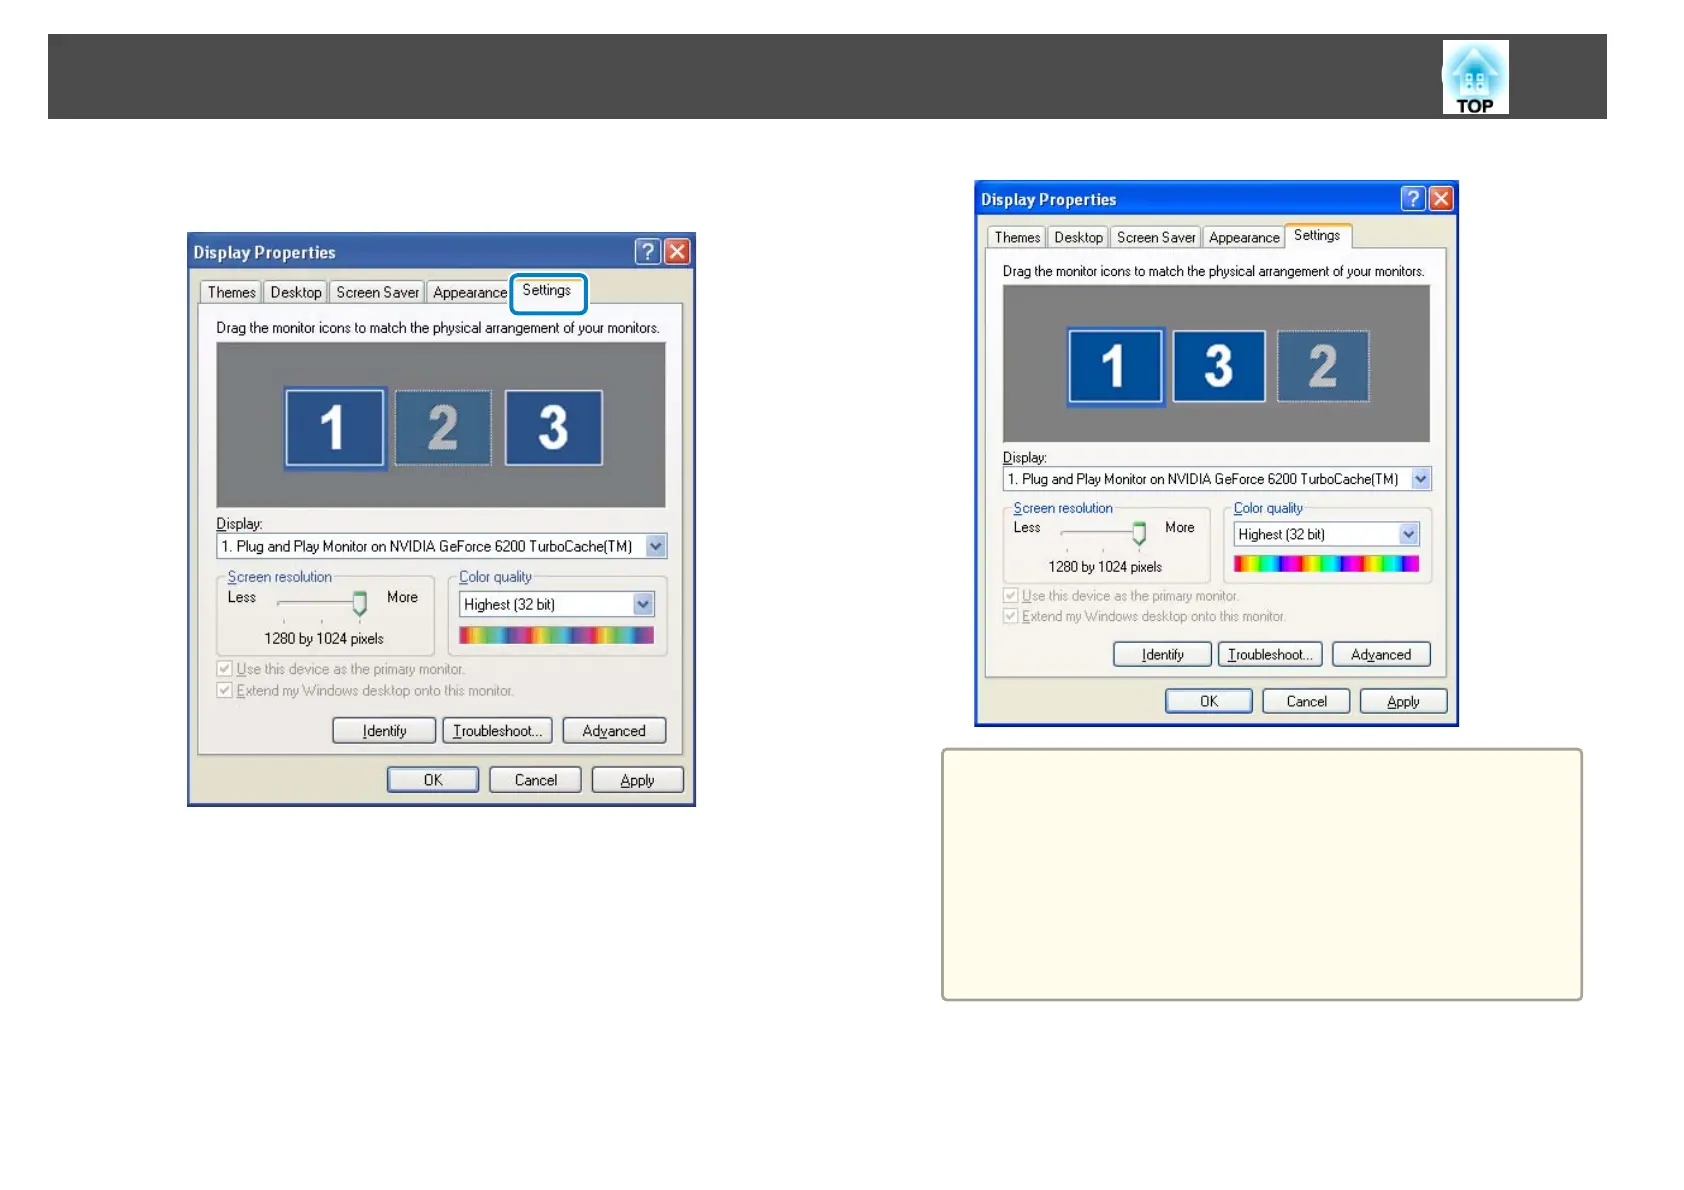
Click the Settings tab.
h
Drag the displayed monitor icon and place it where you want the
additional image to appear. In the following example, the actual
monitor (1) is placed on the left, while the additional monitor (3) is
placed on the right.
a
• When the PC has multiple display output terminals, the
numbers assigned to the virtual terminals are sequential to
those of the physical terminals.
• When an external monitor is connected as a secondary
monitor, the image for that screen cannot be projected.
• Depending on the hardware, the number for the secondary
monitor may not be "2". When placing the monitor icons,
click the icon to check that the display monitor type is not
the secondary monitor.
When the monitor icons have been arranged, displays are connected
as shown in this image.
Projecting Images Using the Multi-Screen Display Function
44