Maintenance 6. Arm #2
G3 Rev.14 115
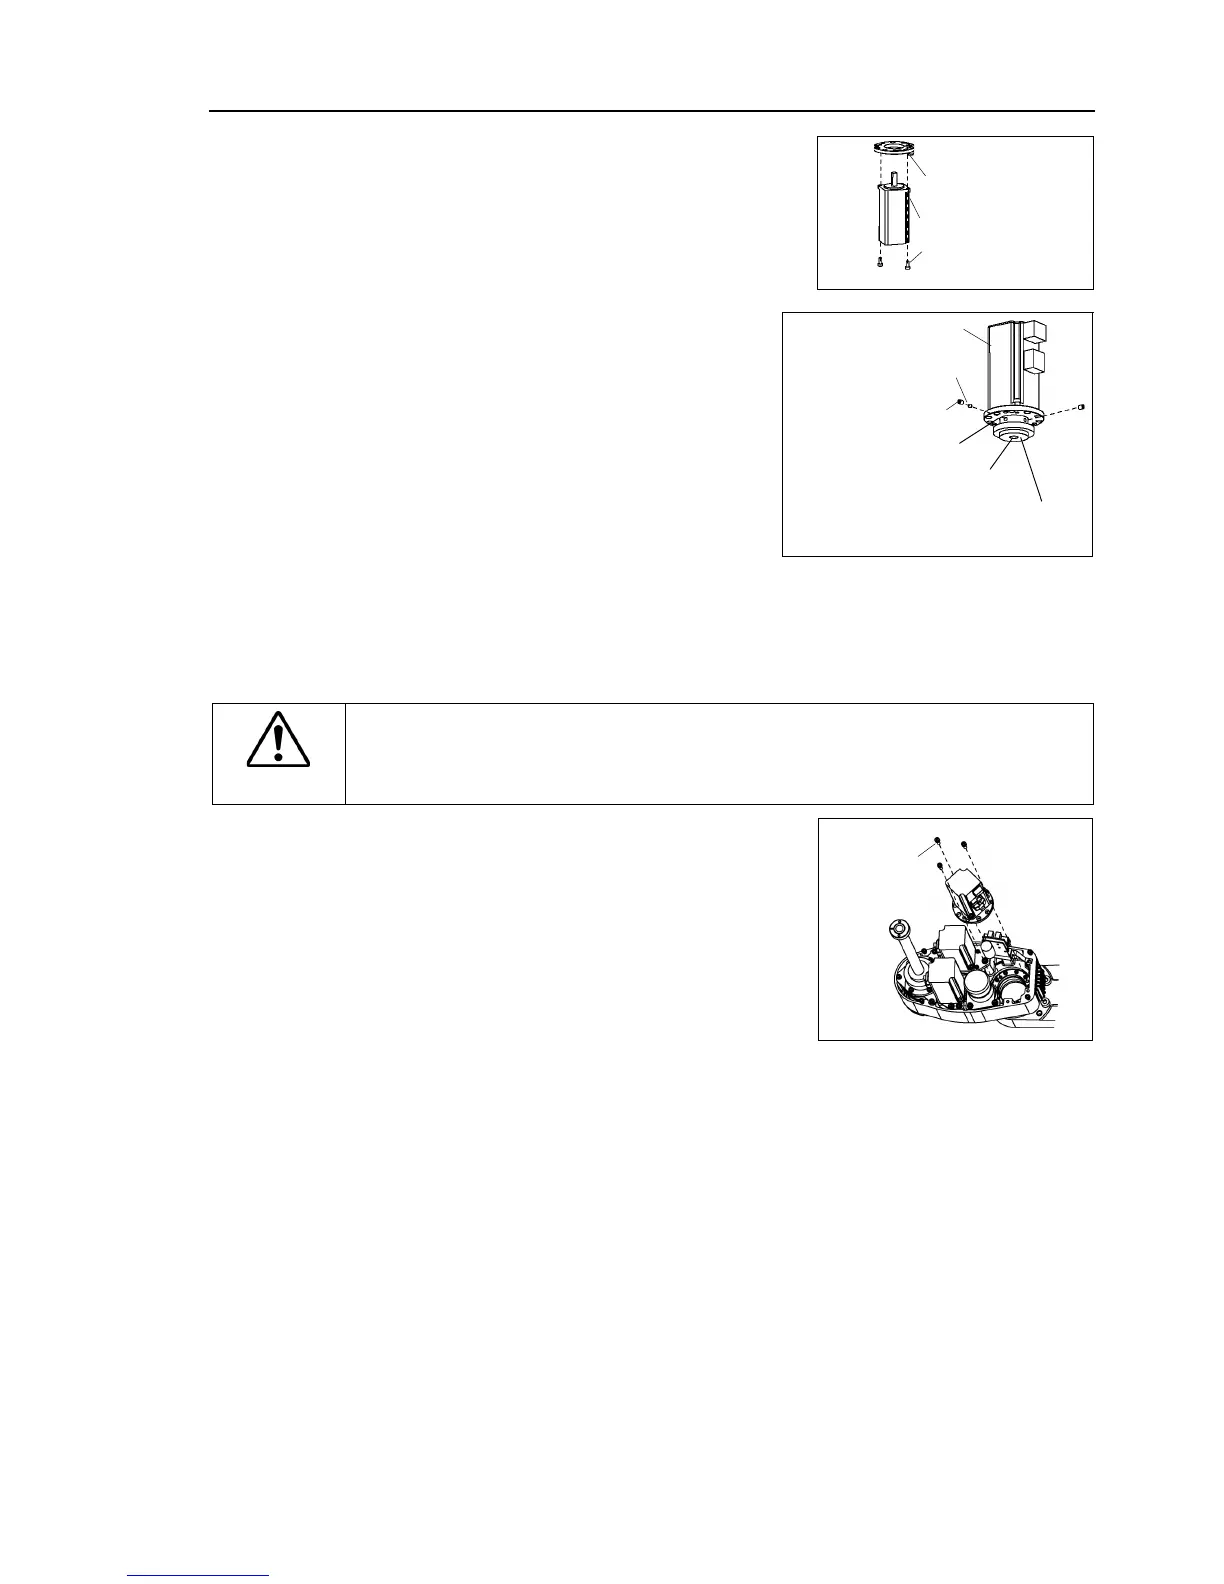
Joint #2 motor
Installation
Mount the motor flange on the Joint #2
Mount the waveform generator on the Joint
Be sure to fit the end face of the waveform
generator to the end face of the motor
of the motor shaft until the screw
the surface. Insert a bushing into
screw hole without damage to
End face of the motor shaft
End face of the Waveform generator
Apply grease (SK-2) to the between the waveform generator and motor flange.
Grease volume 3 g
CAUTION
■
See the figures above for the orientation of the waveform generator.
install the waveform generator properly.
Improper installation of the waveform
generator will result in improper function of the Manipulator.
ount the Joint #2 motor unit on Arm #2.
flange touches the intermediate pulley
and you cannot insert the motor straight on the
arm. Therefore, tip the motor and insert it
avoiding he intermediate pulley.
f it is difficult to insert the motor, push it
while moving Arm #2 slowly by hand.
-bundle the cables in their original positions with a wire tie
emoval procedure step (8).
Do not allow unnecessary strain on the cables.
Mount he user plate to Arm #2.
Mount the battery board to Arm #2.
connector X62 to the battery board.
the cables with a wire tie to prevent the back up cable connectors to fall out by

 Loading...


