Maintenance 6. Arm #2
G3 Rev.14 119
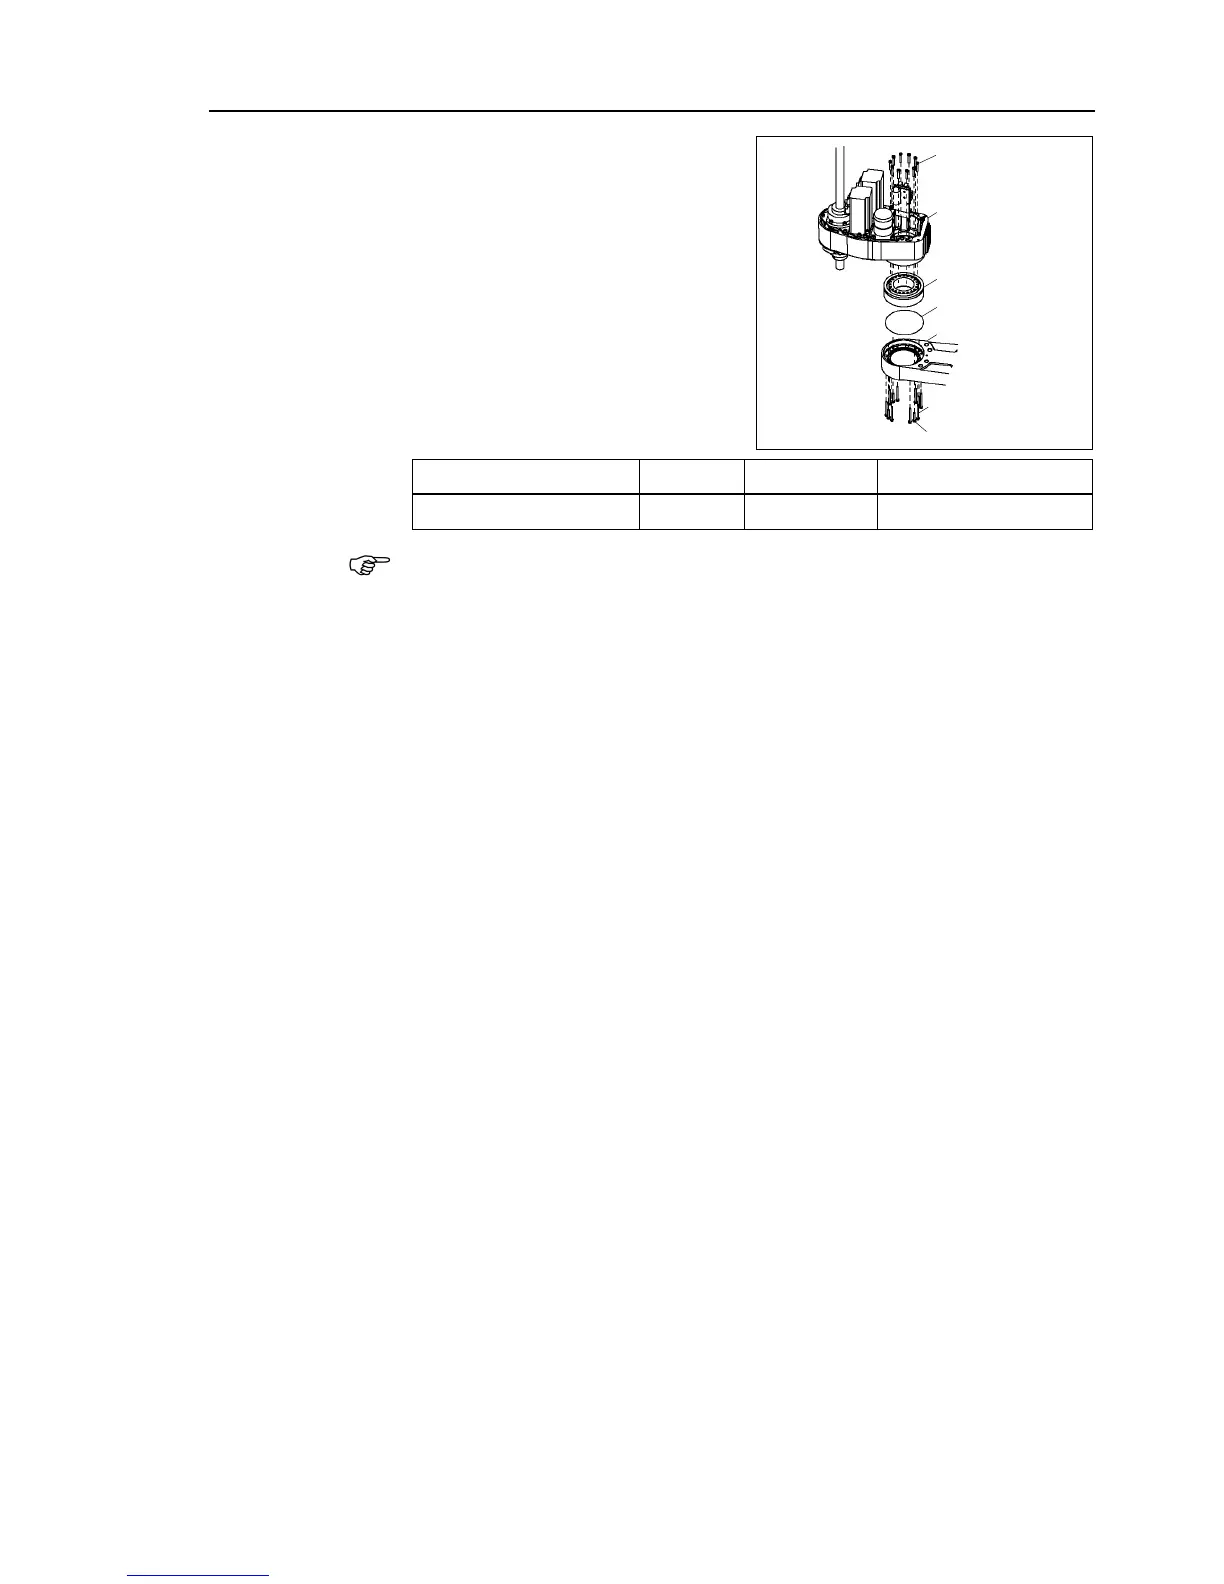
Mount the circular spline to Arm #2.
Loosely secure all bolts in a crisscross
pattern so that the bolts will be secured
evenly. Then, using a torque wrench,
tighten each bolt securely in a crisscross
pattern at the torque specified in the
table below.
Item Bolt type Number of bolts Tightening torque
Joint #2 reduction gear unit M3×20 10 3.0 N⋅m (30.6 kgf⋅cm)
Be careful not to apply too much force since it may damage the parts
-2) inside the flexspline.
Grease volume 8 g
Install the O ring to the Arm #1.
Install and secure the flexspline.
Slide the Arm #2 to the right/left to adjust the holes position.
Execute installation steps (2) to (12) in Maintenance: 6.1 Replacing Joint #2 Motor.

 Loading...


