Maintenance 7. Joint #3
LS20-B Rev.4 111
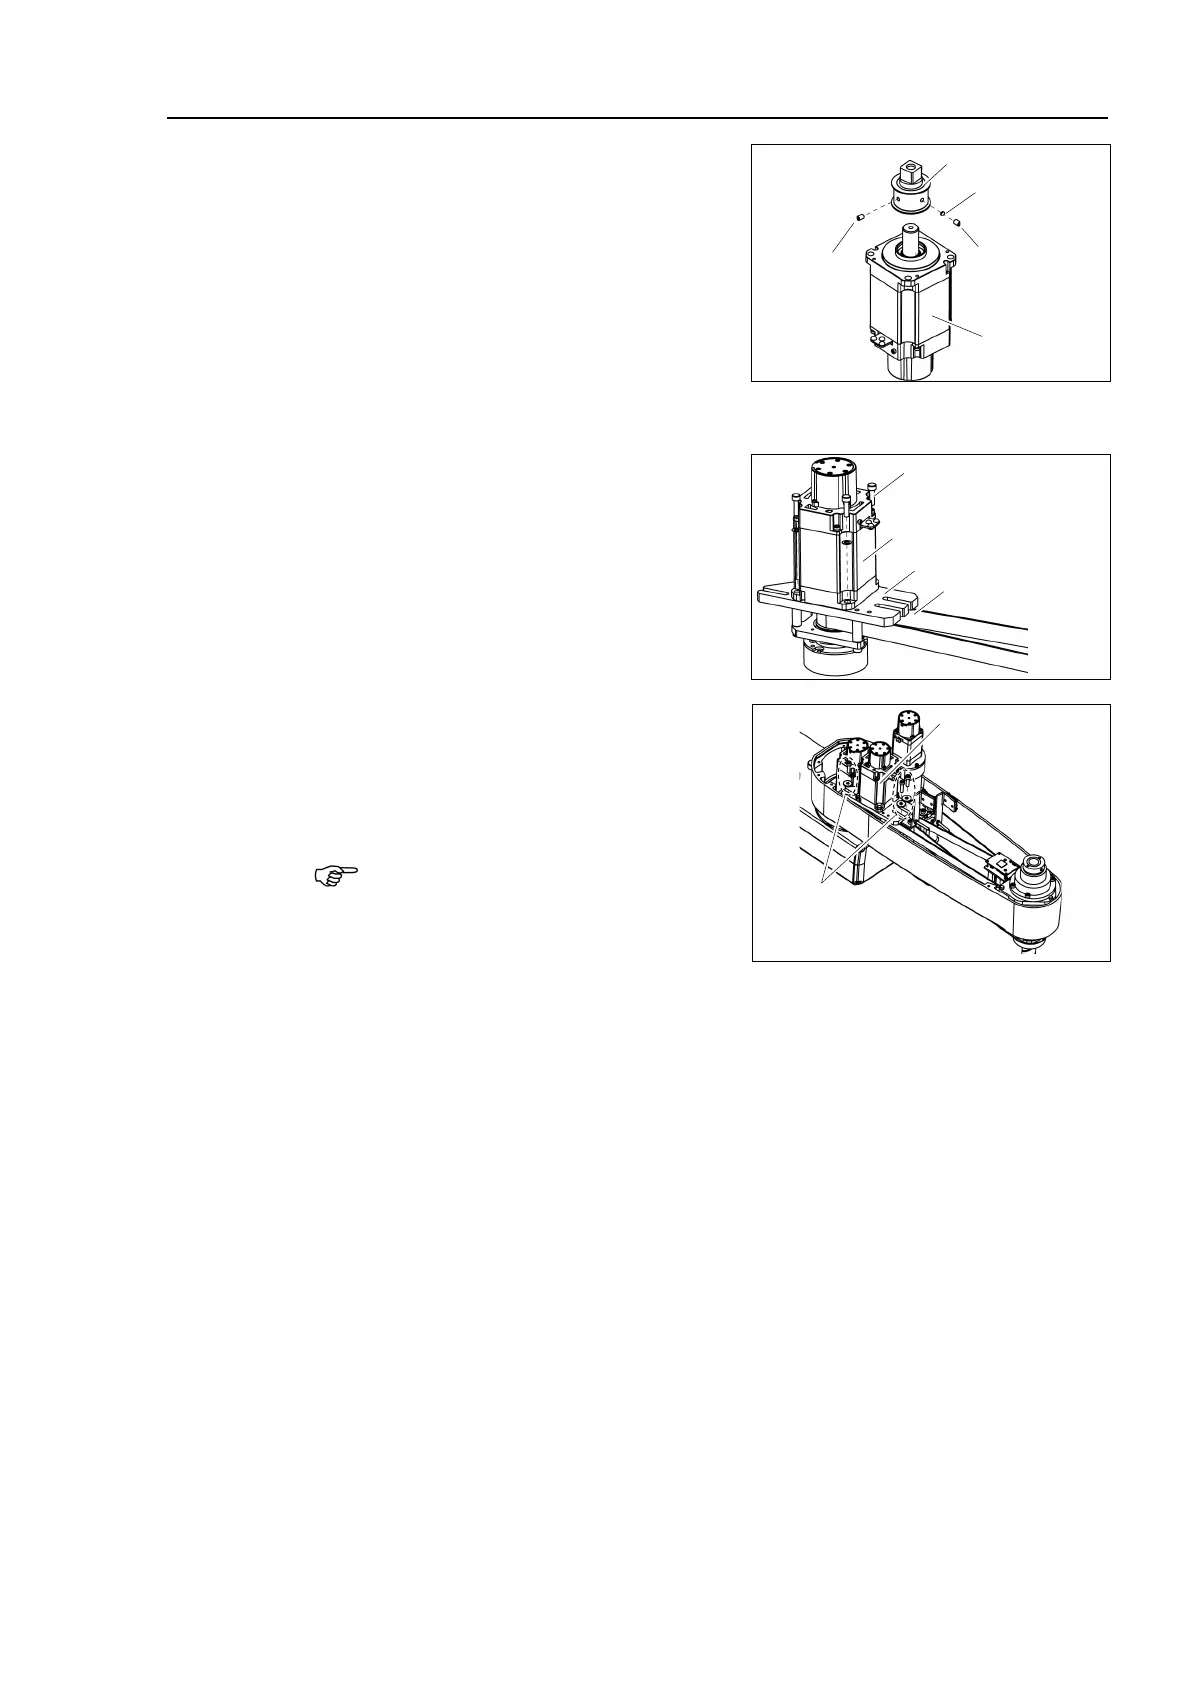
Joint #3 motor
Installation
the pulley to the Joint #3 motor.
Secure the pulley where the pulley end
face
touches the motor shaft end face.
Joint #3
Motor
M4 Bushing
Pulley
M6×6
Set Screw
M6×6
Set Screw
screws vertically on the flat face of the motor shaft.
Insert a bushing into the other set
screw hole to prevent damage to the motor shaft.
Mount the Joint #3 motor to the motor
plate while
aligning the hub to the brake
Before aligning the hub, set the motor so
that the
pulley will be inside of the Z belt.
Joint #3 Motor
Z Belt
4-M4×15+ Plain Washer
Motor Plate
secure the Joint #3 motor unit to
Arm #2. Make sure that the teeth of
engaged with those of
Check that the motor unit can be
moved
and it will not tilt when pulled.
Joint #3 Motor Unit
3-M5×20
+ washer for slotted hole
If the unit is tilted, the belt will not have the proper
tension.

 Loading...


