Maintenance 8. Joint #4
LS20-B Rev.4 127
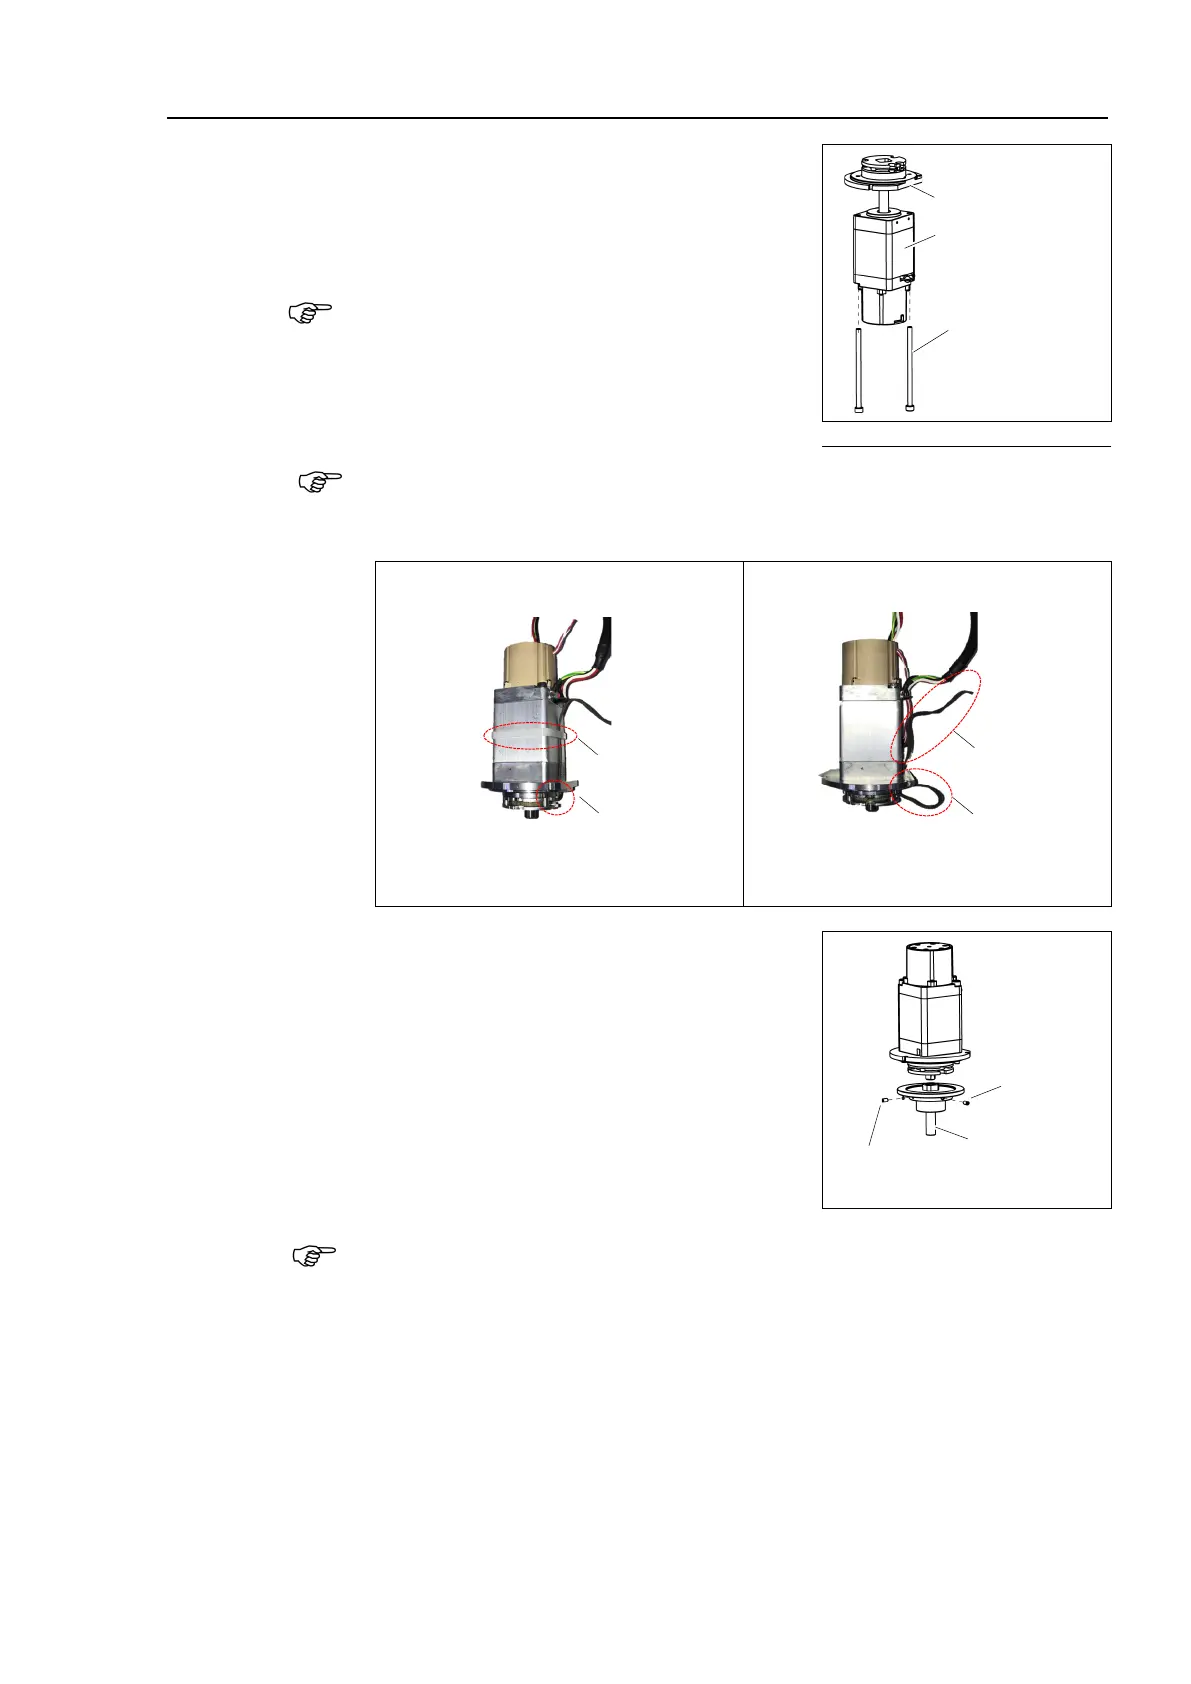
Mount the Joint #4 motor on
the motor plate.
the motor, make sure that the
passes through a gap of the motor
2-M4×70
Joint #4 Motor
Motor Plate
the motor, be careful not to catch the brake harness in the space
the motor plate and Joint #4 motor.
After the motor is mounted, bind
the
brake harness with a wire tie and fix it on the motor.
Correct Example Wrong Example
(a) The brake harness is fixed to the motor with
the attached wire tie.
(b) The brake harness is not come out.
(c) The brake harness is not fixed to the motor.
(d) The brake harness is come out.
extension shaft on the Joint #4 motor
while aligning the hub of the extension shaft to
Tighten one of the set screws vertically on the flat
extension shaft.
Insert a bushing into the other set screw hole to
t damage to the extension shaft.
M3×5 Set Screw
+ M3 Bushing
Extension Shaft
M3×5
Set Screw
When the brake disc is not aligned, manually adjust the position by following the
steps
1. Connect the connector: BR4.
2. Press the brake release switch to release the brake.
3. Manually adjust the brake disc so that the hole will be at the center.

 Loading...


