Maintenance 8. Arm #4
LS Rev.10 131
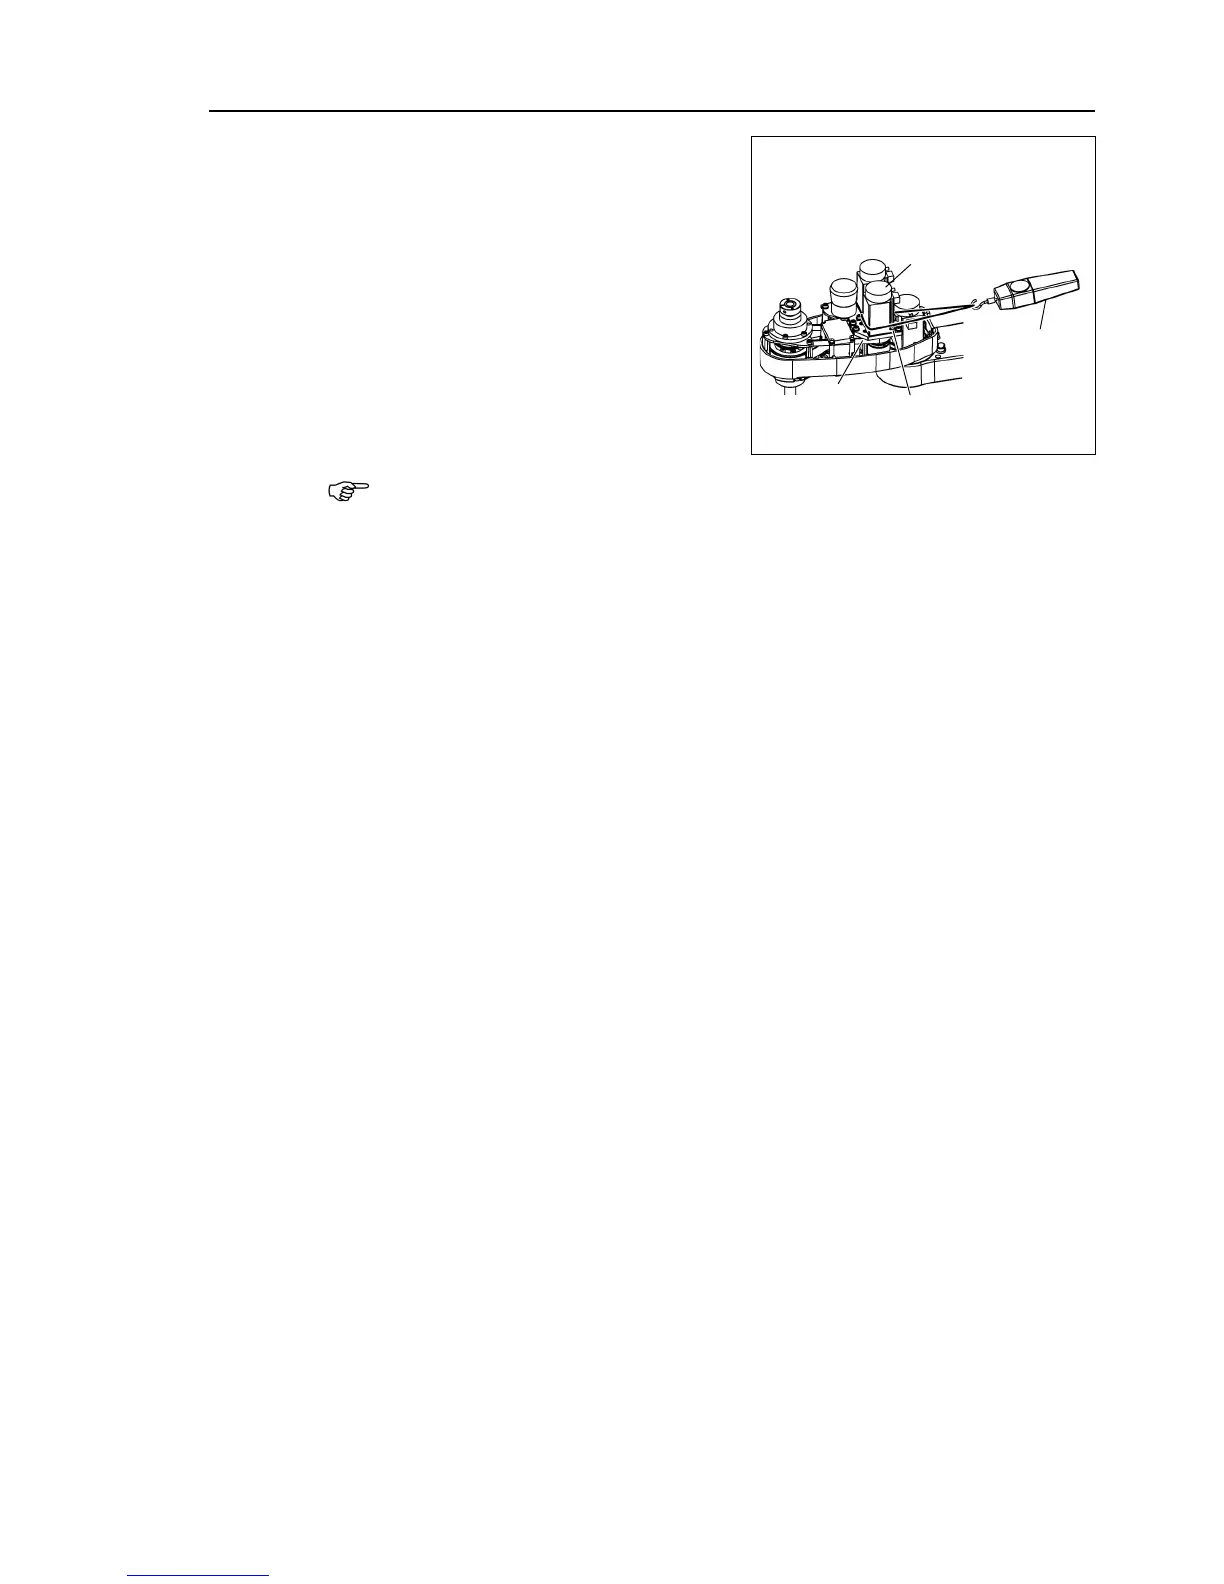
Apply the proper tension to the Z belt
and secure the Joint #3 motor unit.
ass a suitable cord or string around the
#3 motor unit near its mounting
Then, pull the cord using
or similar tool to apply the
tension shown in the figure on
the right.
Z belt tension:
check belt tension with the tension meter, refer to Maintenance: 7
.4 Checking the
Timing Belt Tension
Remove the control board.
Maintenance: 11.3 Replacing the Control Board.
Connect the following connectors.
Connector X31, X32, X35, X41, X231, X241
Maintenance: 3.5 User Plate.
the cables with a wire tie in their original positions
as before removed in the
removal step (7).
Do not allow unnecessary strain
Maintenance: 3.1 Arm Top Cover.
Execute the calibration for Joint #3.
For details on the calibration method, refer to
Maintenance: 13. Calibration.

 Loading...


