EPSON Perfection4180 Photo Revision A
DISASSEMBLY/ASSEMBLY Disassembly Procedure 45
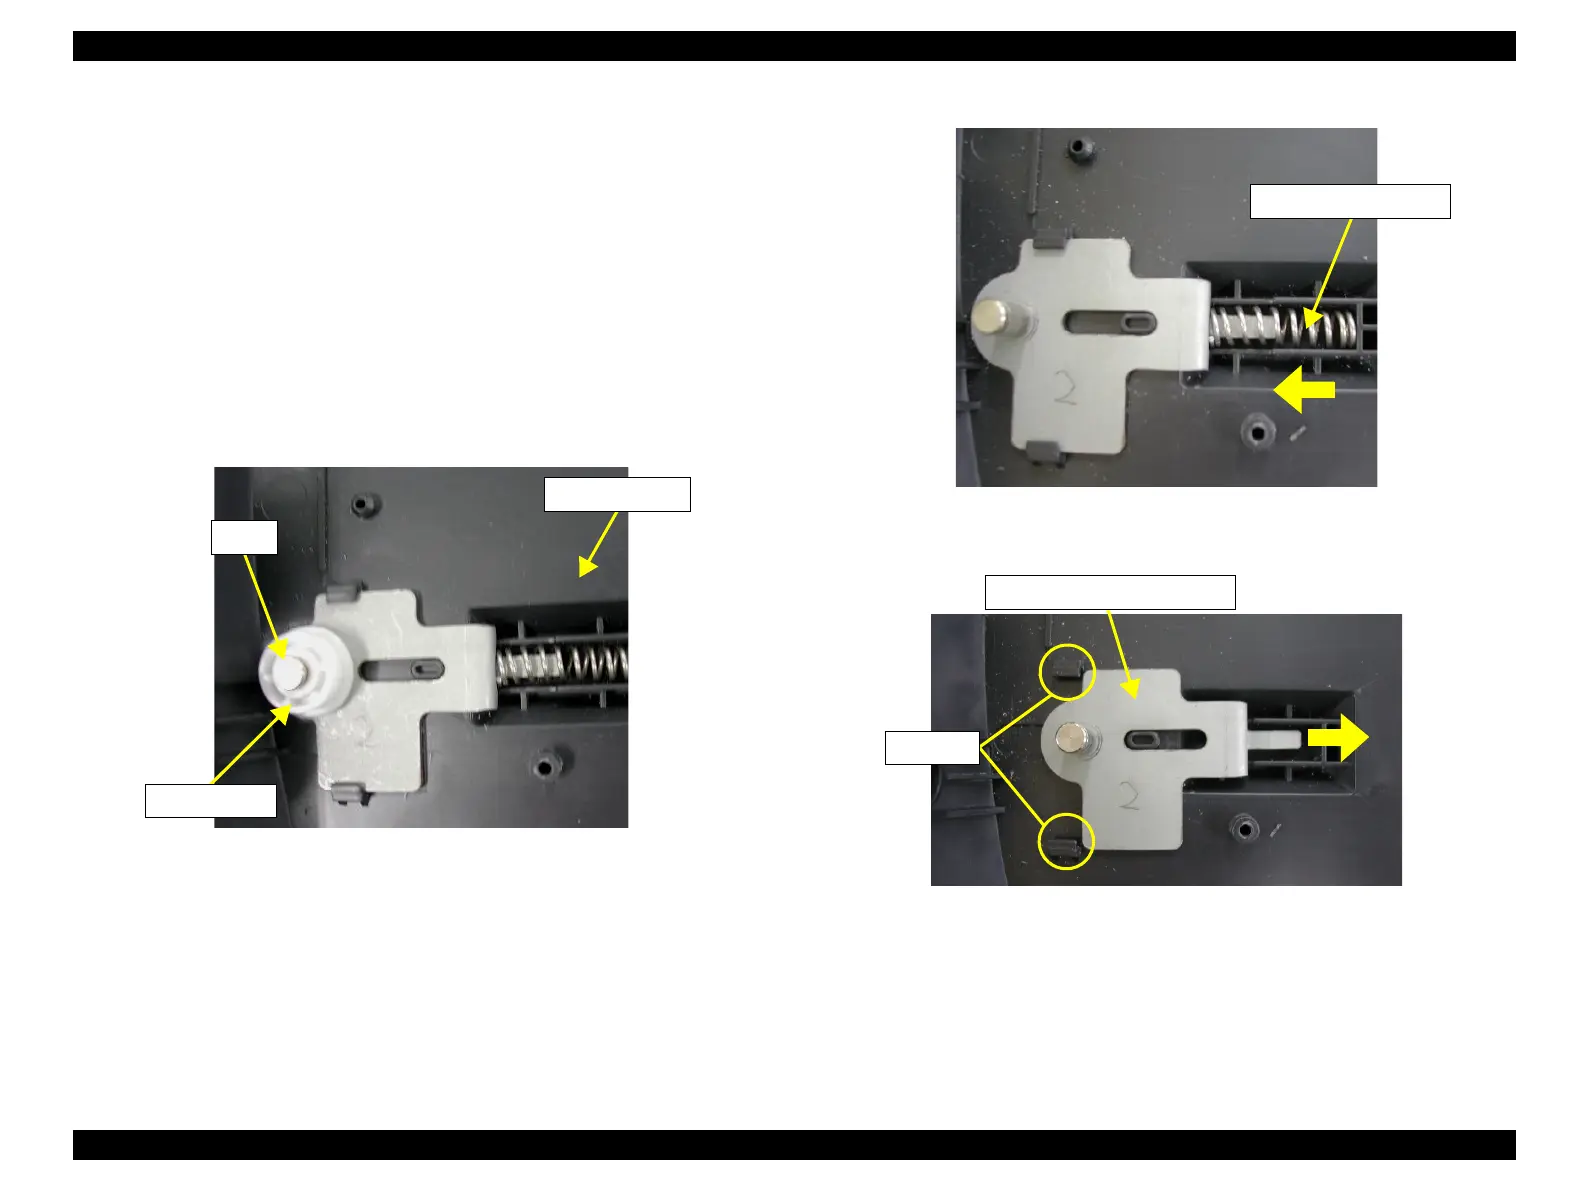
4.2.8 Removal of Driven Pulley, Driven Pulley Spring
and Driven Pulley Holder Assy
1. Remove the Carriage Unit.
(Refer to 4.2.3)
2. Remove the Main Board.
(Refer to 4.2.5)
3. Remove the Power Cable Cover.
(Refer to Step 5 in 4.2.6 Removal of Power Switch.)
4. Remove the Ground Plate.
(Refer to Step 4 in 4.2.7 Removal of Panel FFC.)
5. Remove the Driven Pulley from the Shaft.
6. Contract the Driven Pulley Spring in the direction in
Figure 4-26
, and remove it.
7. Slide the Driven Pulley Holder Assy in the direction in
Figure 4-27
, and remove it
from the stoppers of the Housing Lower.
Figure 4-25. Removal of Driven Pulley
Figure 4-26. Removal of Driven Pulley Spring
Figure 4-27. Removal of Driven Pulley Holder Assy
Driven Pulley
Shaft
Housing Lower
Driven Pulley Spring
Stoppers
Driven Pulley Holder Assy
 Loading...