Various Printing Options 65
2
2
2
2
2
2
2
2
2
2
2
2
3. Make the appropriate Paper Size setting. You can also define
a custom paper size. For details, see the following section.
“Making User Defined paper sizes for Mac OS 9” on page 376
4. Select Auto Sheet Feeder as the Paper Source when feeding
paper into the sheet feeder. Select Manual - Roll as the Paper
Source when feeding paper into the rear manual feed slot.
5. Select Portrait (tall) or Landscape (wide) to change the
orientation of your printout.
6. Click OK to save your settings and close the Page Setup dialog
box.
7. Access the Print dialog box.
“Accessing the printer software for Mac OS 9” on page 368
8. Make the appropriate Media Type setting.
Note:
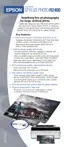
Advanced B&W Photo is available depending on the ink cartridge
installed (Photo Black or Matte Black), the media type setting, and
the print quality setting. For most media types, select Best Photo
or Photo RPM as the print quality setting.
9. Select Advanced B&W Photo as the Color setting.
10. Select Automatic as the Mode setting, and then select one of
the following settings from the pop-up menu.
Neutral Applies standard color correction for
black-and-white photos.
Cool Applies a cool tone to your photos.
Warm Applies a warm tone to your photos.
Sepia Applies a sepia tone to your photos.

 Loading...