❏ Read more le
Click when you want to import multiple les.
10.
Click Import, and then click OK on the import completion screen.
Return to the device's property screen.
11.
Click Transmit.
12.
Click OK on the conrmation message.
e settings are sent to the printer.
13.
On the sending completion screen, click OK.
e printer's information is updated.
Open the contacts from Web Cong or printer's control panel, and then check that the contact is updated.
Cooperation between the LDAP Server and Users
When cooperating with the LDAP server, you can use the address information registered to the LDAP server as the
destination of an email or fax.
Conguring the LDAP Server
To use the LDAP server information, register it on the printer.
1.
Access the Web Cong and select the Network tab > LDAP Server > Basic.
2.
Enter a value for each item.
3.
Select OK.
e settings you have selected are displayed.
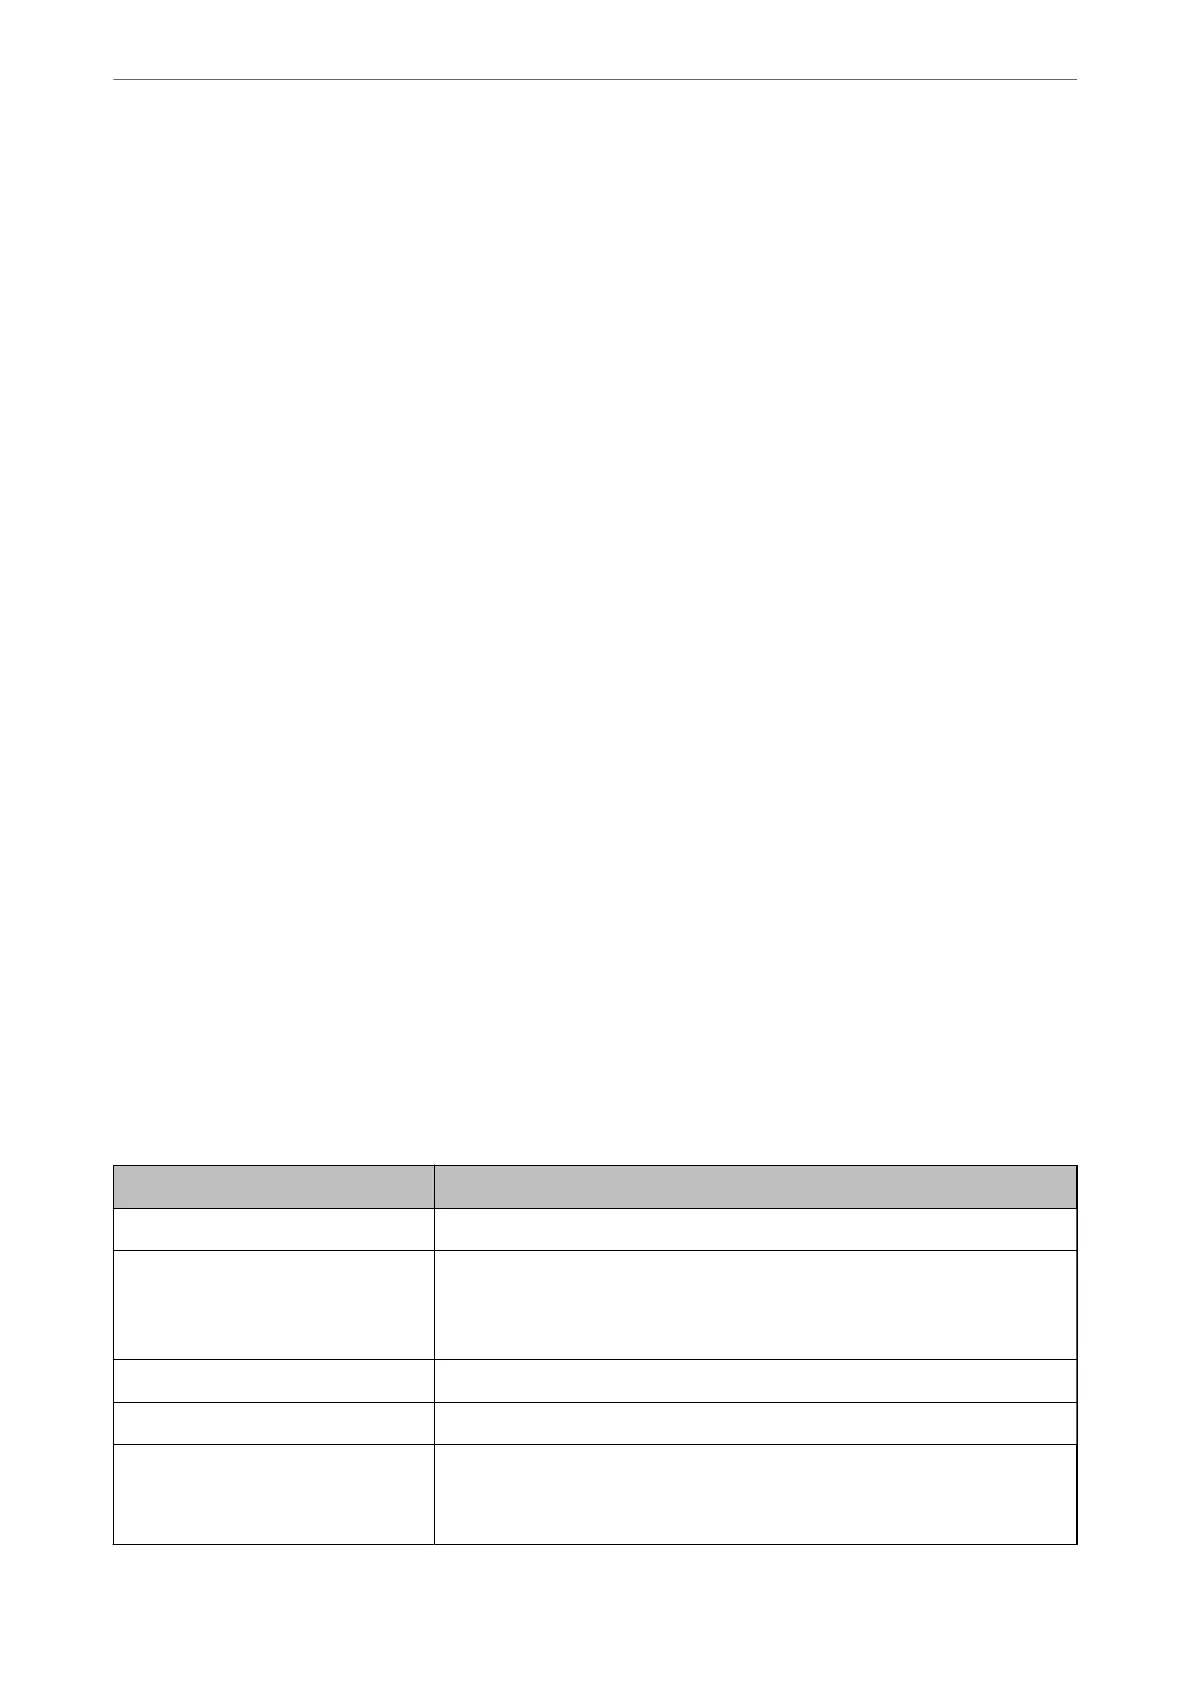
LDAP Server Setting Items
Items Settings and Explanation
Use LDAP Server
Select Use or Do Not Use.
LDAP Server Address Enter the address of the LDAP server. Enter between 1 and 255 characters of
either IPv4, IPv6, or FQDN format. For the FQDN format, you can use alphanumeric
characters in ASCII (0x20-0x7E) and "- " except for the beginning and end of the
address.
LDAP server Port Number Enter the LDAP server port number between 1 and 65535.
Secure Connection Specify the authentication method when the printer accesses the LDAP server.
Certicate Validation When this is enabled, the certicate of the LDAP sever is validated. We
recommend this is set to Enable.
To set up, the CA Certicate needs to be imported to the printer.
Administrator Information
>
Settings to Use the Printer
>
Making Contacts Available
451
 Loading...