4. Double-click the product you are configuring.
Note: If several products of the same model are connected, you can identify them by their MAC
address.
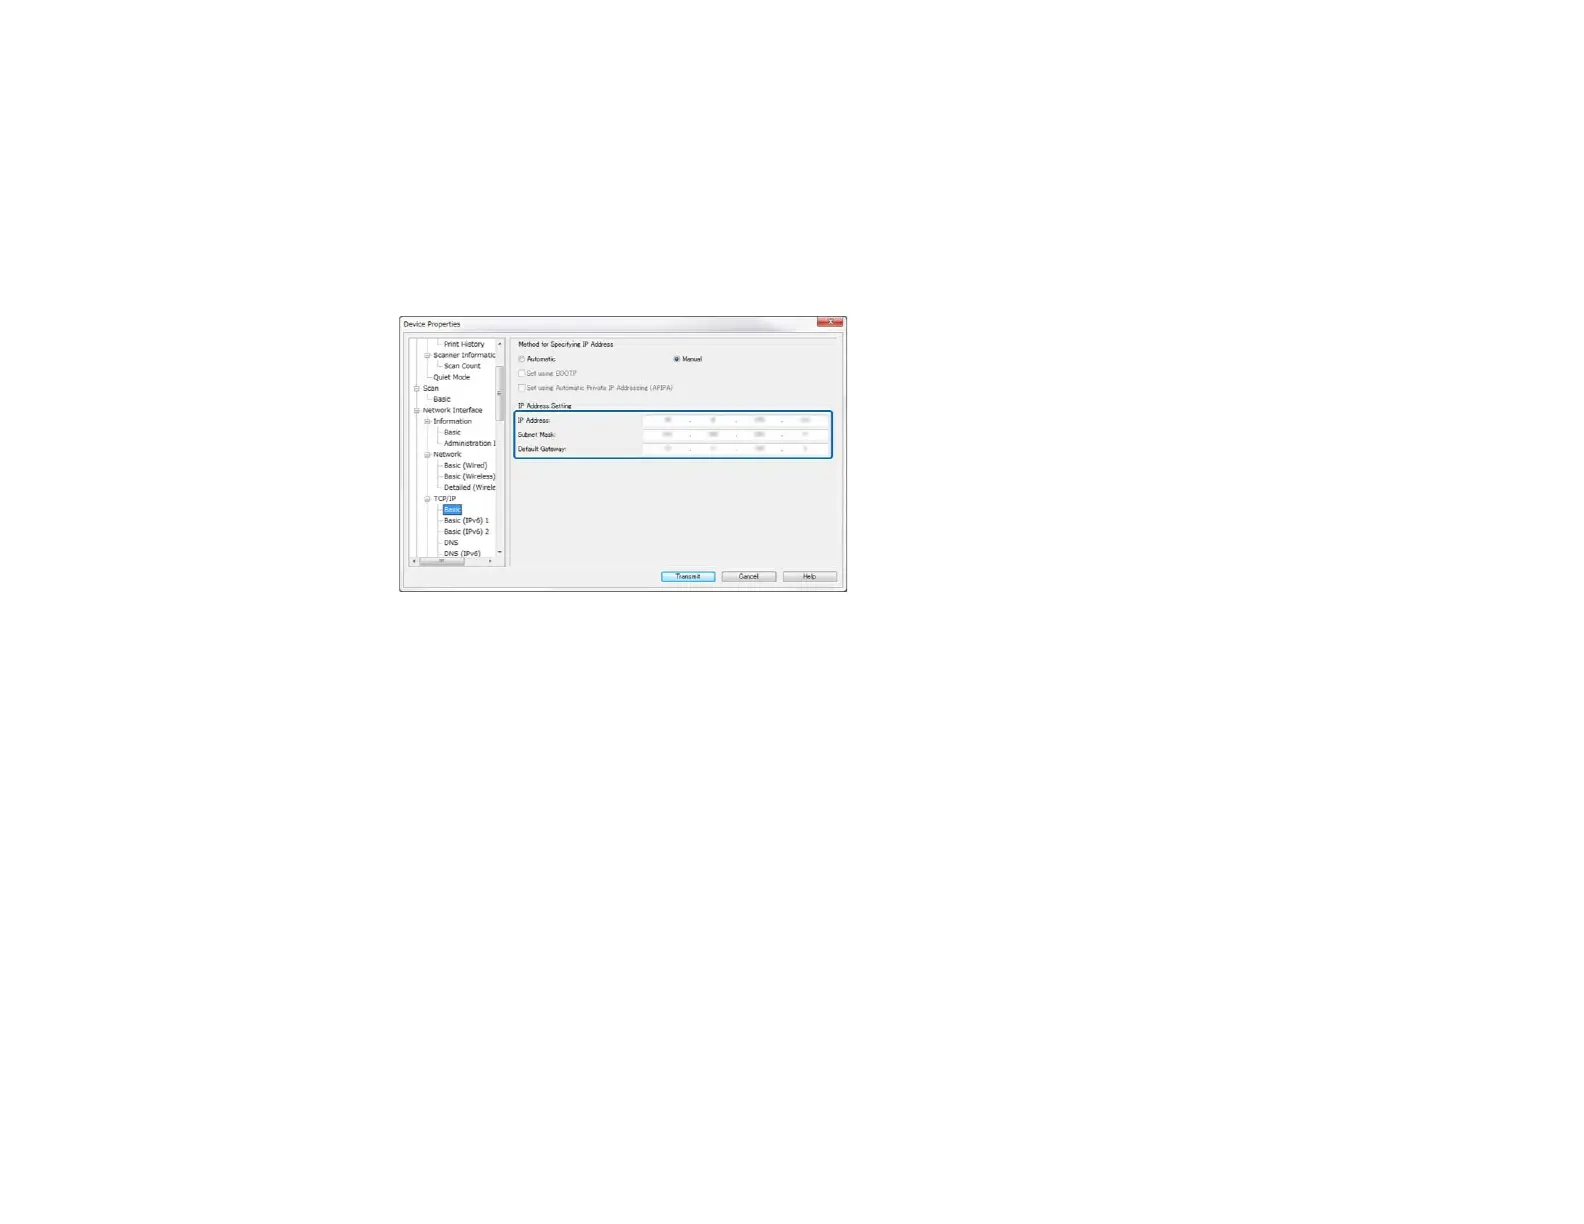
5. From the menu on the left, select Network Interface, select TCP/IP, and select Basic.
You see a window like this:
6. Enter the product's IP address, Subnet Mask, and Default Gateway settings in the fields provided.
Note: To connect the product to a secure network, enter a static IP address. You can also configure
the DNS settings by selecting DNS, and enter proxy settings by selecting Internet from the TCP/IP
menu.
7. Select Transmit.
Parent topic: Using EpsonNet Config Network Configuration Software
Configuring a Product IP Address Using EpsonNet Config - WiFi
You can configure the product's IP address using EpsonNet Config.
1. Turn on the product.
2. Connect the product to a network using an Ethernet cable.
3. Do one of the following to start EpsonNet Config:
• Windows 8.x: Navigate to the Apps screen and select EpsonNet Config under EpsonNet.
45