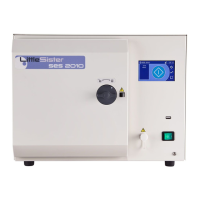
SES 2000 Vac (LS3) AUTOCLAVE Part 3
ST-SM45g Page 27 of 53
PART 3 MAINTENANCE
b Release the plumbing connections from the vacuum
pump, noting the orientation of parts to ensure
correct connection.
c Remove pipework from vacuum pump.
d Remove the nuts and washers securing the vacuum
pump to the AVA mounts and remove the vacuum
pump, noting orientation arrows on pump heads.
e Fit new or refurbished vacuum pump (see para. 38)
in exactly the same way as the original one. If the
vacuum pump is new, remove the two plastic pipe
fittings from each end of the pump and replace with
1/8 in. BSPT fittings.
Condenser (Fig. 2.3, item 6)
21 To remove the condenser, proceed as follows:
a Disconnect electrical connections to fan and vacuum
pump.
b Release plumbing connections to vacuum pump,
noting the orientation of parts for reconnection.
c Remove two screws and washers securing
condenser cover to dividing panel, and four screws
and washers securing the cover to the condenser.
Remove cover complete with fan and pump.
d Release plumbing connections from condenser,
and remove pipework.
e Remove four screws and washers and remove
condenser from chassis.
f Installation is the reverse of the removal procedure.
Note: When fitting the condenser in the chassis ensure
the condenser is correctly positioned over the PCB
cooling conduit and that the pipe connections face
forward.
Cooling Fans (Fig. 2.4, items 11 and 10)
22 Remove Condenser Fan (Fig. 2.4, item 11) or
Enclosure Fan (Fig. 2.4, item 10) as follows:
a Disconnect electrical cables from fan.
b Remove screws and washers and remove fan.
c Installation is the reverse of the removal procedure.
However, when installing Enclosure fan ensure that
the flow arrow points away from the support and that
the electrical wires are positioned at the bottom.
Bacterial Air Filter (Fig. 2.3, item 10)
23 Remove the bacterial air filter as follows:
a Disconnect the outlet silicone tube.
b Release the air filter from the spring clips on the
chamber support bracket.
c Refit the filter in reverse removal order.
CAUTION
Avoid kinking the silicone tube.
The filter must be changed at the autoclave service
interval, or at least every three months.
Discharge Line Filter (Fig. 2.3, item 12 and Fig. 3.2)
24 The filter in the discharge line should be removed and
cleaned approximately every 12 months as follows:
a Ensure all water has been discharged from chamber
back into the reservoir and switch off the autoclave.
b Remove filter assembly from discharge line,
disassemble components and rinse clean all parts,
using distilled water only.
c Allow components to dry, then reassemble filter
assembly. Ensure that copper washer is correctly
positioned with bevel side against filter body. If
washer is damaged, renew it.
Pressure Transducer (Fig. 2.4, item 7)
25 Remove the transducer as follows:
a Release the plumbing connection at the bottom end
of the pressure transducer.
b Remove the pressure transducer.
c Release the electrical cable from the securing ties
and disconnect from the relay board.
d Refitting is the reverse of the removal procedure.
On completion re-calibrate the autoclave (see para.
57 onwards).
Solid-State Relay Board (Fig. 2.4, item 14)
26 See Appendix B before changing the Solid-State
Relay Board. Remove the relay board as follows:
a Remove control board (see para.9).
b Remove transformer (see para.8).
c If a printer is fitted, remove fixing screw and move
printer forward.
d Disconnect relay board electrical connections.
e Remove four nylon thumb nuts, tilt the relay panel
away from the dividing panel and remove it from the
PCB support.
Refit the relay board in reverse removal sequence.
CAUTION
Ensure bottom edge of relay board is
located in the PCB support slot.