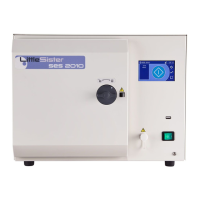
SES 2000 Vac (LS3) AUTOCLAVE Part 3
ST-SM45g Page 33 of 53
PART 3 MAINTENANCE
n Disconnect and remove the chart recorder.
o Refit the autoclave cover as described in para. 4.
AUTOCLAVE CALIBRATION
General
57 The autoclave will retain its calibration over long
periods of time but, occasionally, and when a new sensor
or control board has been fitted, re-calibration is necessary.
58 It is recommended that the calibration is checked at
regular intervals, or if the autoclaves calibration is suspect.
59 For the purpose of this description it will be assumed
that the autoclave is working correctly and that a routine
temperature calibration is required.
60 It is particularly important that the following points
are noted before calibration is started:
(i) There must be no steam leaks (Check by
running a leak test see para.55).
(ii) The chamber steam bleed valve must be
working correctly.
(iii) The machine should have been run sufficiently
to become thoroughly warm.
(iv) Running calibration cycles will not advance the
cycle counter.
(v) Some of the error detection systems are
automatically ‘switched off’ during the calibration
phase.
(vi) A machine with suspect calibration should only
be run using the calibration procedure described
below. This should avoid the possibility of the
safety valve lifting due to excess chamber
pressure, which might happen if the 134°C
programme were to be selected.
Calibration Procedure
Note: During calibration replace the cover (do not fix) to
ensure accuracy. On later models V1-V5 can be adjusted
through the sliding port in the cover.
61 The autoclave control programme contains a special
calibration sequence to ensure accurate calibration in the
shortest possible time. Do not set-up the autoclave by
doing normal sterilizing cycles; it is important to proceed
methodically.
62 Prepare the autoclave for calibration as follows:
a Switch off the autoclave and isolate from mains
supply. Ensure the water reservoir is full and, for
safety reasons, ensure that the reservoir is properly
covered. Ideally a test load should be placed in the
chamber, but this is not essential
WARNING
This procedure is done with the autoclave
cover removed, mains power switched ‘on’
and the system pressurized. Take care
when making adjustments.
a Remove the autoclave cover as described in para. 3.
b Insert a pressure probe into the pressure test port
(Fig. 2.4 item 22) making sure that the probe is fully
inserted into the port.
c Close the autoclave door, and select ENGINEERING
MODE (para.41).
d Simultaneously, start the stopwatch and press switch
SW1. Check that the vacuum pump starts, and the
pressure shown on the process display (Fig. 2.2
item 1) decreases steadily.
e After 5 minutes, stop and reset the stopwatch, and
note that the indication shown on the chart recorder
is less than 12kPa, and is decreasing very slowly.
f Using a small screwdriver, adjust V5 (Fig. 3.4) on
the control board (Fig. 2.4 item 19) to set the
autoclave process display indication to the value
shown on the chart recorder, (clockwise to decrease,
and anticlockwise to increase the pressure
indication).
Note: The autoclave process display can only be set in
steps of 2kPa, and it must be adjusted to the nearest
1kPa of the chart recorder indication, rounded ‘up’ or
‘down’ as necessary.
g Simultaneously, start the stopwatch and press switch
SW1 to stop the vacuum pump, and then record (as
P1, in kPa) the pressure shown on the chart recorder.
h After five minutes (± 10 seconds) has elapsed
record (as P2, in kPa) the pressure shown on the
chart recorder.
i Subtract P2 from P1. If the result (leak-rate) is less
than 0.65kPa continue the leak-test, if greater, stop
the leak-test and check the autoclave for leaks.
After correcting all leaks, the leak-test procedure
must be repeated.
j After 15 minutes (± 10 seconds) record (as P3, in
kPa) the pressure shown on the chart recorder (stop
and reset the stopwatch).
k Subtract P3 from P2 and check that the result is less
than 1.3kPa.
l Press switch SW2 (Fig.3.3) to open the discharge
valve to vent the chamber pressure to the reservoir.
m Remove the pressure probe from the pressure test
port, and refit the test port blanking cap.