Part 3 SES 2000 Vac (LS3) AUTOCLAVE
Page 30 of 53 ST-SM45g
PART 3 MAINTENANCE
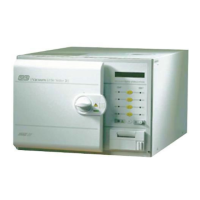
Display Board (Fig. 2.4, item 13)
39 Remove the display board as follows:
a Remove the solid state relay board (see para.26).
b Disconnect display board electrical connections.
c Remove nylon thumb nuts and remove the display
board.
Refit the display board in reverse removal sequenc
SPECIAL OPERATING MODES
40 The following switches , ‘held-pressed’ when power
is switched ON, will initiate the following special operating
modes (see Fig.3.3 for SW1-4 and Fig.3.4 for SW6):
❑ Switch 6 (SW6) - Machine set-up mode.
❑ Switches 1 and 2 (SW1+SW2) - Engineering mode.
❑ Switches 1 and 4 (SW1+SW4) - Clock-set mode
❑ 'P' button (SW5) - Function test (Door must be
CLOSED).
❑ Switches 2,3 and 4 (SW2+SW3+SW4) - All cycles
temporarily enabled for selection of calibration cycle.
❑ Switches 1 and 6 (SW1+SW6) - Test operation of
the 'Air in' solenoid valve.
❑ Switches 2 and 6 (SW1+SW6) - Test operation of
the 'Steam bleed' solenoid valve.
Note: When setting the clock use the SW1 and SW4
combination, not the set-up procedure. If the set-up
procedure is used the complete set-up procedure will
have to be done.
Engineering Mode
CAUTION
Inbuilt protection by the computer does not operate
in Engineering Mode.
41 To enter the Engineering Mode proceed as follows:
a Switch off power and wait 10 seconds.
b Push and hold switches SW1 and SW2 (Fig. 3.3)
and switch on power.
c Release switches SW1 and SW2 when the bleeper
sounds and the message 'ENGINEERING MODE'
shows on the display. Both fans will also start.
42 In Engineering Mode the programme selector
switches SW1 to SW4 toggle on/off sequentially. Switch
SW5 operates in a press-and-hold mode, and programme
indicator LED's operate as follows:
a Switch SW1 - Press to check vacuum pump and
AIR OUT solenoid valve. A red LED (D7) should
also be illuminated on the relay board.
b Switch SW2 - Press to check DISCHARGE valve
solenoid valve and door bolt solenoid.
c Switch SW3 - Press to check water heater heating
element is energized, as indicated by red LED (D6)
illuminated on the relay board.
d Switch SW4 - Press to check WATER FILL solenoid
valve.
e Switch SW5 - Press to check that band heater has
energized as indicated by LED (D5) on the relay
board illuminating intermittently.
f LED 1 (to the left of SW1) - illuminates to indicate
that door interlock lever has operated.
g LED 2 (to the left of SW2) - illuminates to indicate
that water level sensor circuit is operative.
h LED 3 (to the left of SW3) - illuminates when the
reservoir is full, and is ‘off’ when the reservoir is
empty.
43 To exit Engineering Mode, switch off power to the
autoclave, wait 10 seconds and then switch it on again.
Machine Set-Up Mode
44 Once started, the Machine set-up procedure must be
completed in full. Do not switch off the power before it has
been completed. If a mistake is made, switch off the
power and start again. On autoclaves fitted with a printer
a printout showing the main items selected within the set-
up procedure will be printed when the procedure has been
completed.
45 Throughout the Machine set-up procedures the
following switches are used (see Figs.3.3 and 3.4):
❑ Switch 1 (SW1) - Indicates 'Yes' or 'Up'.
❑ Switch 2 (SW2) - Indicates 'No' or 'Down'.
❑ Switch 3 (SW3) - Indicates 'Accept'.
❑ Switch 4 (SW4) - The fourth 'Down' control button.
❑ Switch 5 (SW5) - The fifth 'Down' control button.
❑ Switch 6 (SW6) - The button on the bottom outer
corner of the control board (Fig. 3.4).
Set-Up Procedure
46 The machine must be set-up as follows:
WARNING
During the following procedure the autoclave
cover is removed and mains voltage is exposed.