7
6
5
4
3
2
1
From the work screen of the edger, select > > to change the grooving or chamfering wheel.
You can access the tool-change menu by pressing on the work screen.
Changing both wheels at the same time
The menu is designed to replace only one wheel at a time. If you are replacing both wheels at the same time, simulate a
replacement of the second wheel so that the wear statistics are also reset.
To do this, press the button corresponding with the second wheel, then to validate, without touching the wheel shaft.
Replacing the grooving or chamfering wheel
Press the button corresponding with the wheel to be replaced:
Grooving wheel
Chamfering wheel
Take care when loosening the nut on the wheel shaft, you could be injured by the drill bit.
Before loosening the nut, you are strongly recommended to take the drill bit out of the chuck. For instructions on
how to proceed, consult section: Maintenance and servicing > Changing the tools on the edger > Changing or
.cleaning the drill bit (p.139)
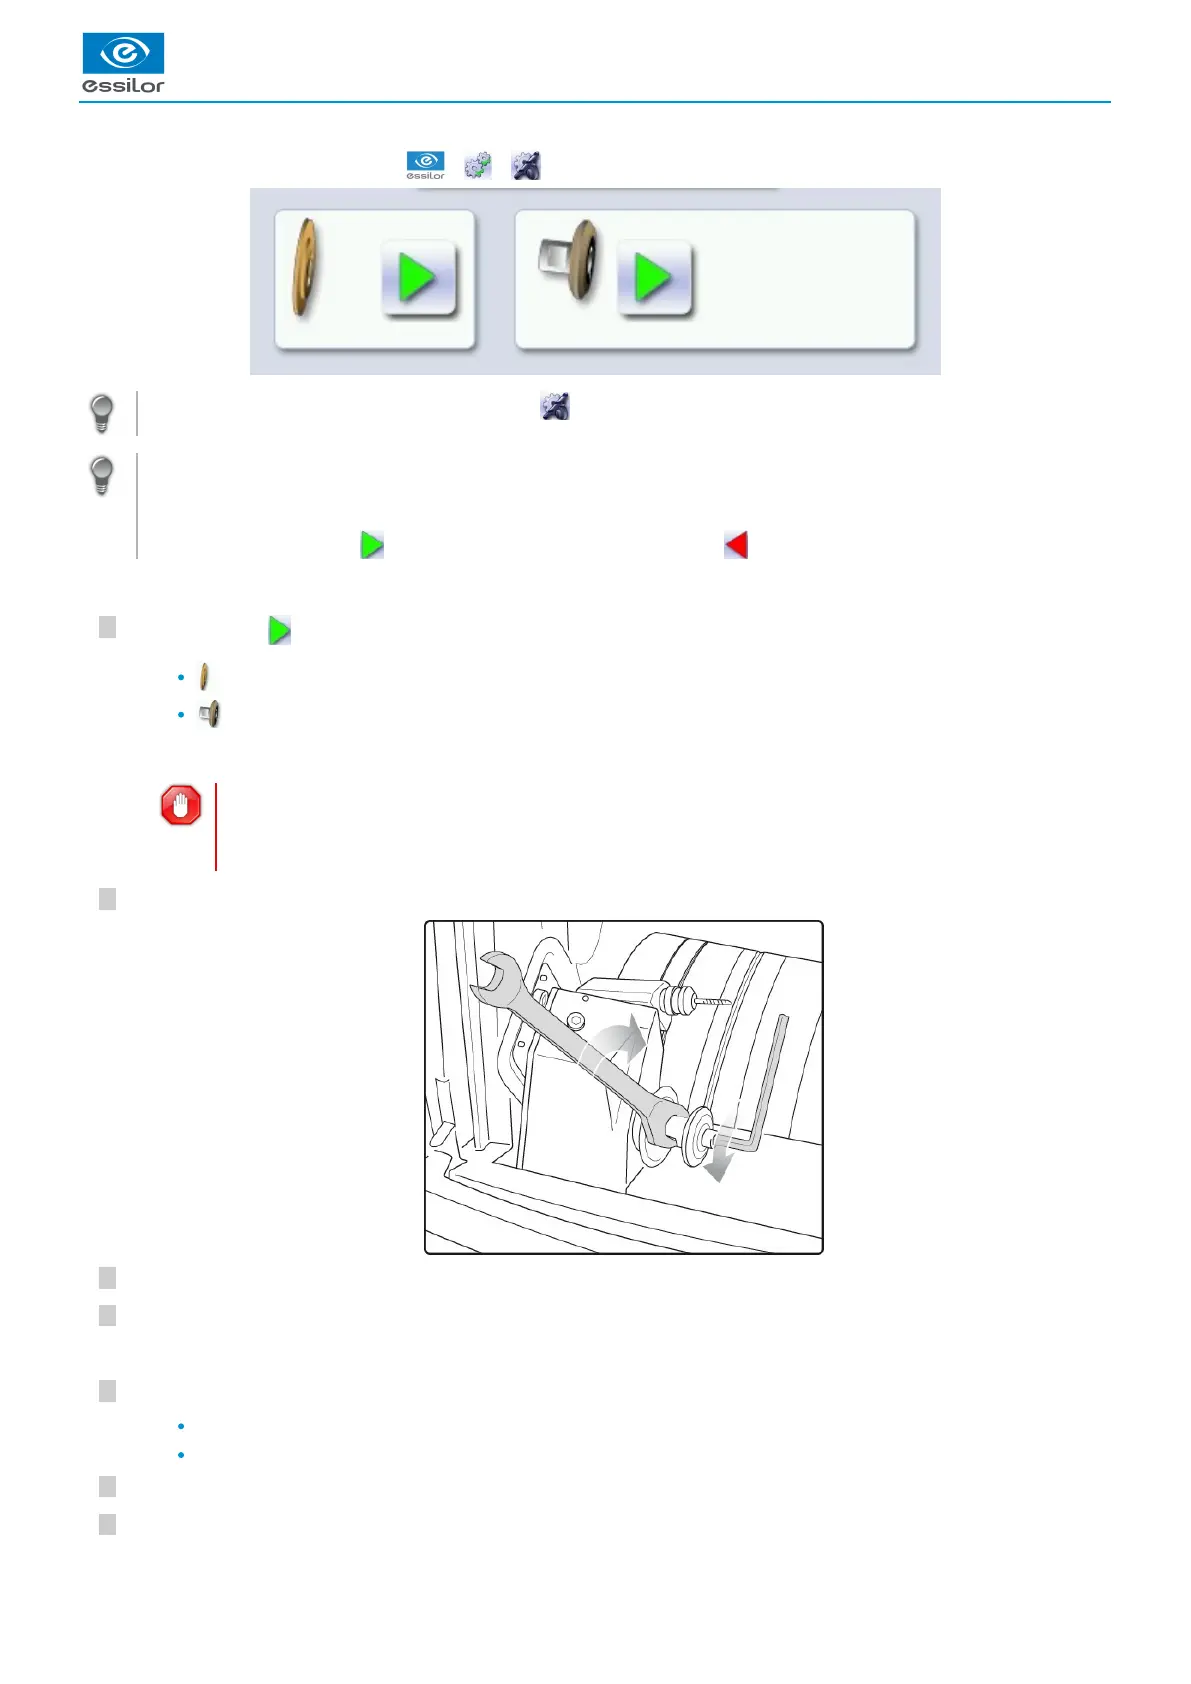
Place the open-ended spanner behind the chamfering wheel to hold the spindle and insert the Allen key in the screw.
Carefully remove the screw and washer without letting them fall into the trough.
Remove the chamfering wheel.
Replace the desired wheel. Reposition the second wheel.
Grooving wheel: the boss is turned towards the right.
Chamfering wheel: is provided with a positioner, which ensures that it is inserted the right way.
Put the screw back in and tighten it as much as possible.
If you took the drill bit out of the chuck, put it back.
The GMD module moves to facilitate the operation.>
You can access the grooving wheel.>

 Loading...
