Express LPC QuickGuide, v.3.1 7
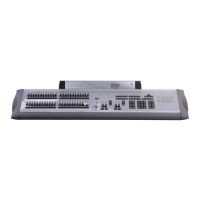
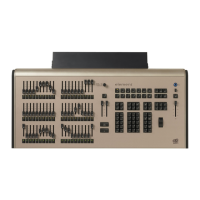
LPC operation
You need two things to run a show in an Express LPC: a diskette
containing the show in console-ready form, and instructions about which
macros available to the LPC were programmed into the show. The LPC
clock may also be used in addition to macros to control the show, but
clock control is not required.
3
Reading a showfile
Read showfiles by inserting a diskette in the LPC disk drive and pressing
the Read From Disk button on the LPC’s front panel. If the showfile was
prepared using system software older than version 3.03, everything in the
showfile will be transferred at once to the LPC memory. If, however, the
showfile was prepared with version 3.03 or later software, only the show
components of the showfile will be transferred into memory. For those
later showfiles, if you want to transfer the system configuration
components into the LPC memory, press M7 on the LPC’s front panel
while pressing the Read From Disk button.
See the Showfile appendix in your Express User Manual for a breakdown
of showfiles into show and system configuration components.
Macro control
Macros can control the LPC in three ways. Push button switches M1
through M7 on the LPC’s front panel can be used to activate macros 1 - 7.
Up to four switches can be wired to a rear panel connector and used to
activate macros 1901 - 1904. Used that way, those macros are known as
Remote Macros. Finally, the LPC may be set to respond automatically to
what is known as a Powerup Macro when the LPC is turned on. Any of
the 2,000 macros possible can function as the Powerup Macro.
For information about programming macros, including the Powerup
macro, see the Macros chapter of your Express User Manual.
4
Learn
about programming remote macros in the Remote Interfaces chapter of
your Express User Manual. For information about wiring the rear panel
Remote Macro connector, see the Installation appendix of your Express
User Manual.
3.
See Setting the clock, page 11, for information about preparing the LPC for real
time programs by setting the real time clock.
4.
See your user manual for information about programming and setup operations.