12 Setting the clock
Using an RFU
If attaching an RFU to your LPC to set the real time clock, follow the
procedure below.
1. Connect the RFU and a video monitor to the respective ports on the
LPC.
2. Use the M7/M4 autocontrol to go to the Setup display.
6
3. Follow the procedure called Setting the Clock in the System settings
chapter of your console user manual.
Using autocontrols
The LPC’s autocontrols allow you to perform all the configuration settings
for the real time clock except provide data for the astronomical clock.
6
In
general, follow the procedures given under Setting the Clock in the
System settings chapter of your console user manual except where
required to choose from the Clock Functions menu. To make that choice,
in the Express LPC, use the Plus or Minus autocontrols to move through
menu selections. Use the Enter autocontrol to confirm your selection.
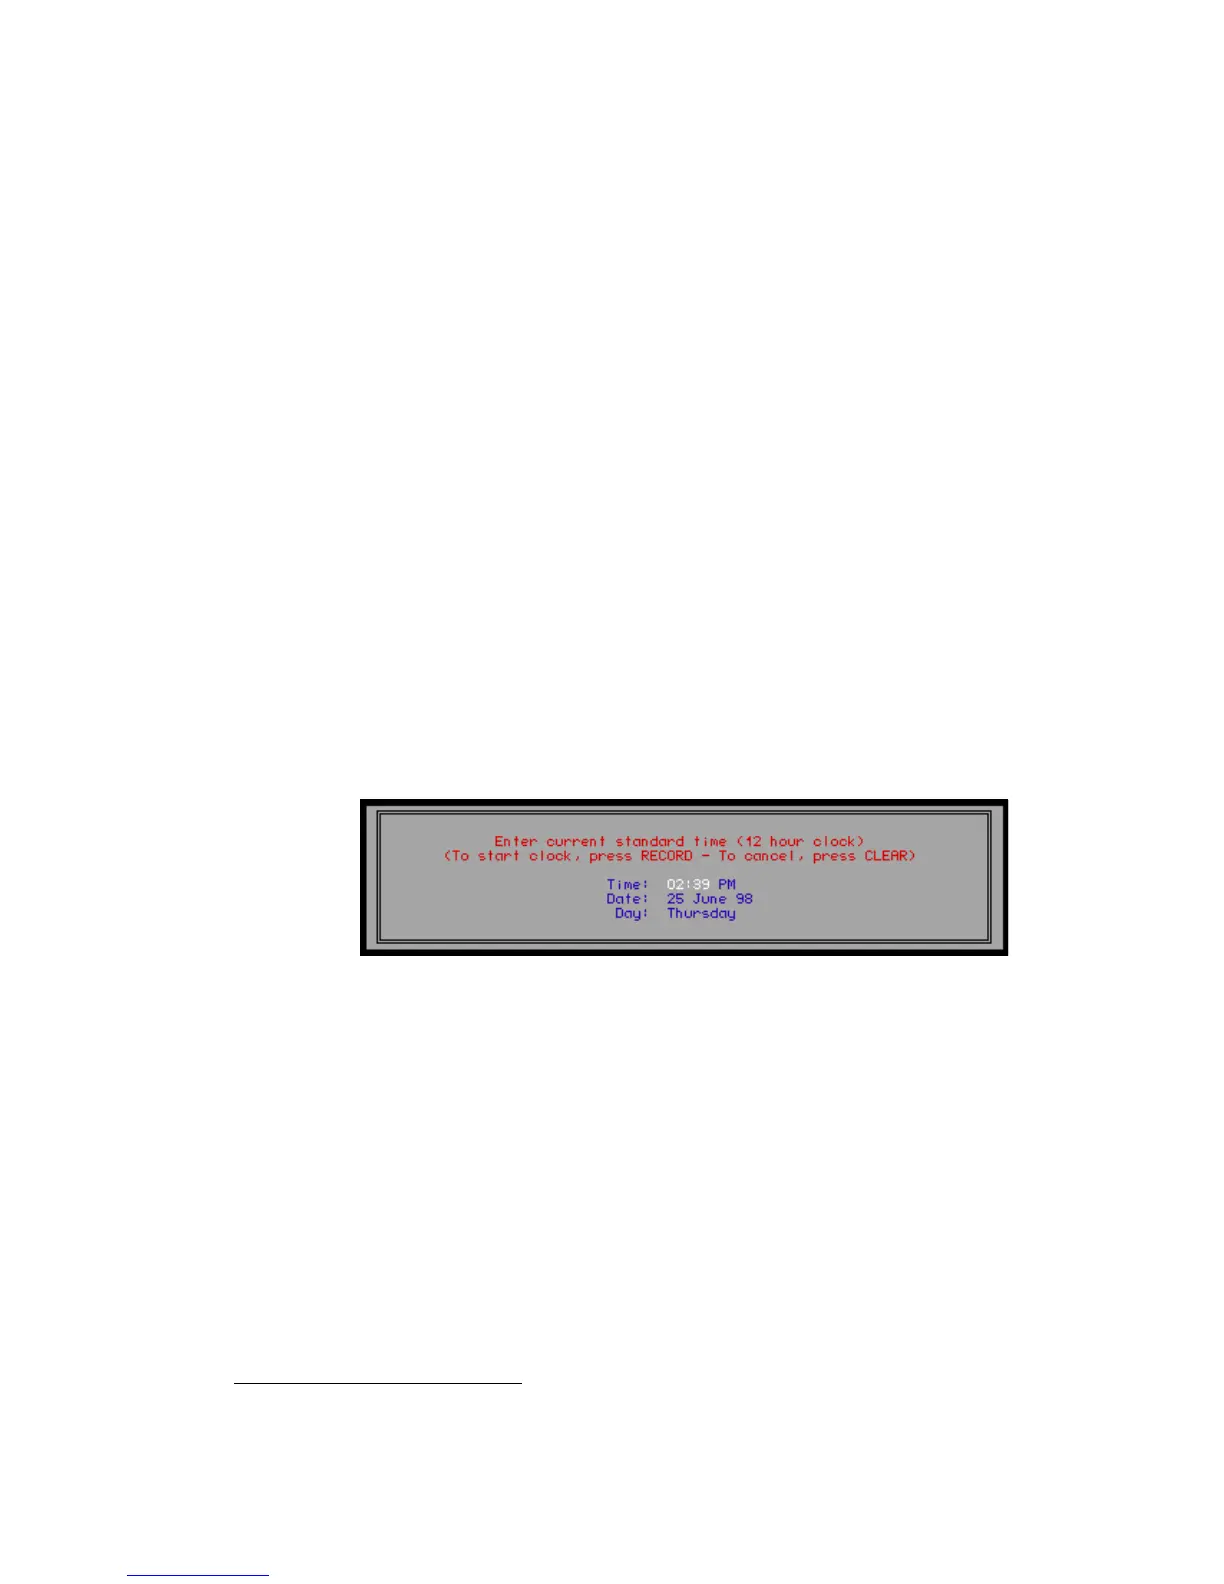
For example, set the time and date in your LPC as follows:
1. Connect a video monitor to the LPC.
2. Use the M7/M4 autocontrol to go to the Setup display.
3. Press M7/M1 and M2 to step to selection #2 on the Clock Functions
menu. You will see the following Time/Date display.
NOTE
: For any operations requiring the Plus or Minus autocontrol, you can
repeat the function after first activating it by tapping the M7 key as many
times as needed.
4. The time will be highlighted when you enter the display. To change it,
press the Plus or Minus autocontrols to increment or decrement the
time. When the minutes move past 60 or before 0, the hours
increment or decrement, respectively.
5. Press the Enter autocontrol to move to the AM/PM field. Change by
using the Plus or Minus autocontrols.
6. Continue with the rest of the settings in the Time/Date display using
the Enter, Plus and Minus autocontrols as above.
7. When you are satisfied with the settings, press the Record
autocontrol to start the clock.
6.
For a list of autocontrols, see Autocontrols, page 8.