6. Maintenance V10k automatic
40
EN
4 Measure the winding resistance::
5 If the tolerance is exceeded replace the
motor-gear-assembly (refer to 6.6.4.)
6.6.2 Replacing the rack
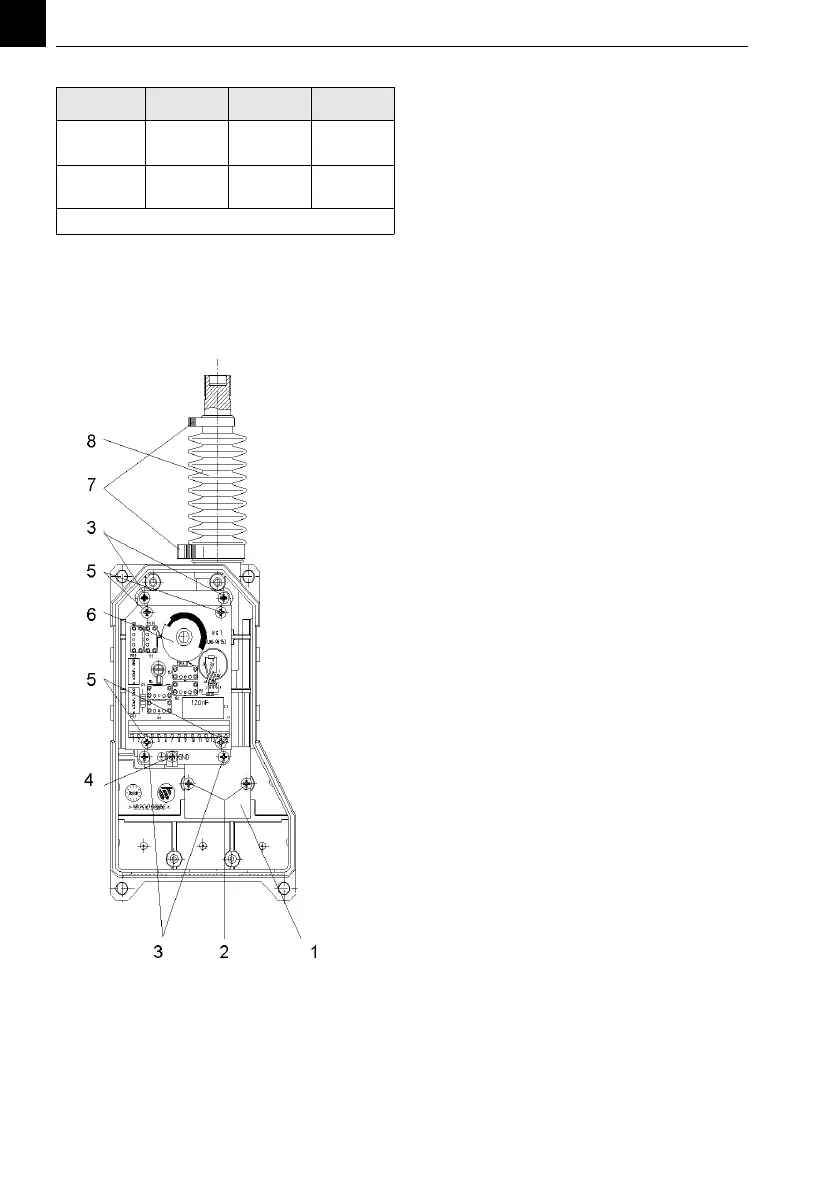
The position numbers (...) refer to the drawing
below.
1 Disconnect the positioner from the mains.
2 Remove the coupling between the posi-
tioner and the chlorinator.
3 Remove the knob and the cover
4 Remove all connectors at the board, dis-
connect the ground (4) from the gear.
5 Remove the 4 screws (3) and remove the
motor-gear assembly incl. board.
6 Remove the two screws (2) and remove
the cover (1)
7 Remove the clamps (7) and bellow (8)
8 Remove the Seeger circlip ring
9 Pull out the rack
10 Apply enough plastic compatible grease
to the new rack:
8 ml: W2T504248; 60 ml: W2T504249
11 Insert the rack into the housing
12 Place the Seeger circlip ring on the rack
13 Place the cover (1)
14 Mount motor-gear-assembly with board
and fix, pay attention to the toothed
wheel matching with the rack.
15 Pull the bellows over the rack and fix the
clamps (7)
16 Switch to manual by pulling the knob
shaft, pull out the rack.
17 Place the coupling to the chlorinator
18 Connect the cables on the board and the
ground to the gear (4).
19 Adjust the limit switches and the poten-
tiometer
20 Close the cover and check for function.
1 Cover plate
2Bolts
3Bolts
4 Earth connection
5Bolts
6Cam
7Clips
8Bellow
terminals 4‐6 5‐6 4‐5
230 V
motor
8500
Ohm
8500
Ohm
17000
Ohm
115 V
motor
1960
Ohm
1960
Ohm
3920
Ohm
tolerance ±10%