© Boule Medical AB, March 2018. Article no. 1504496 Page 19
2. Installation and Reagent Setup
Installation Checklist and Menu
4 Enter Reagent RFID tags
For RFID tag entry with a RFID reader:
Place the tag reader on the marked position on the reagent
container you want scan in. When the reagent tag has been
read a screen will display that the tag has been accepted.
After a RFID tag has been accepted it is now possible
to read another reagent, Enter another tag, or to exit to
previous menu, by pressing Exit.
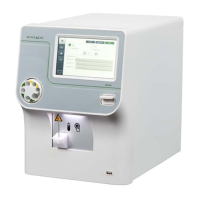
5 Connect Reagent tube
assemblies to reagents
After reagents are scanned, loosen reagent container caps,
remove factory seals, and connect the reagent tube assembly to
respective container based on color-coding.
Figure 14: Connect Reagents
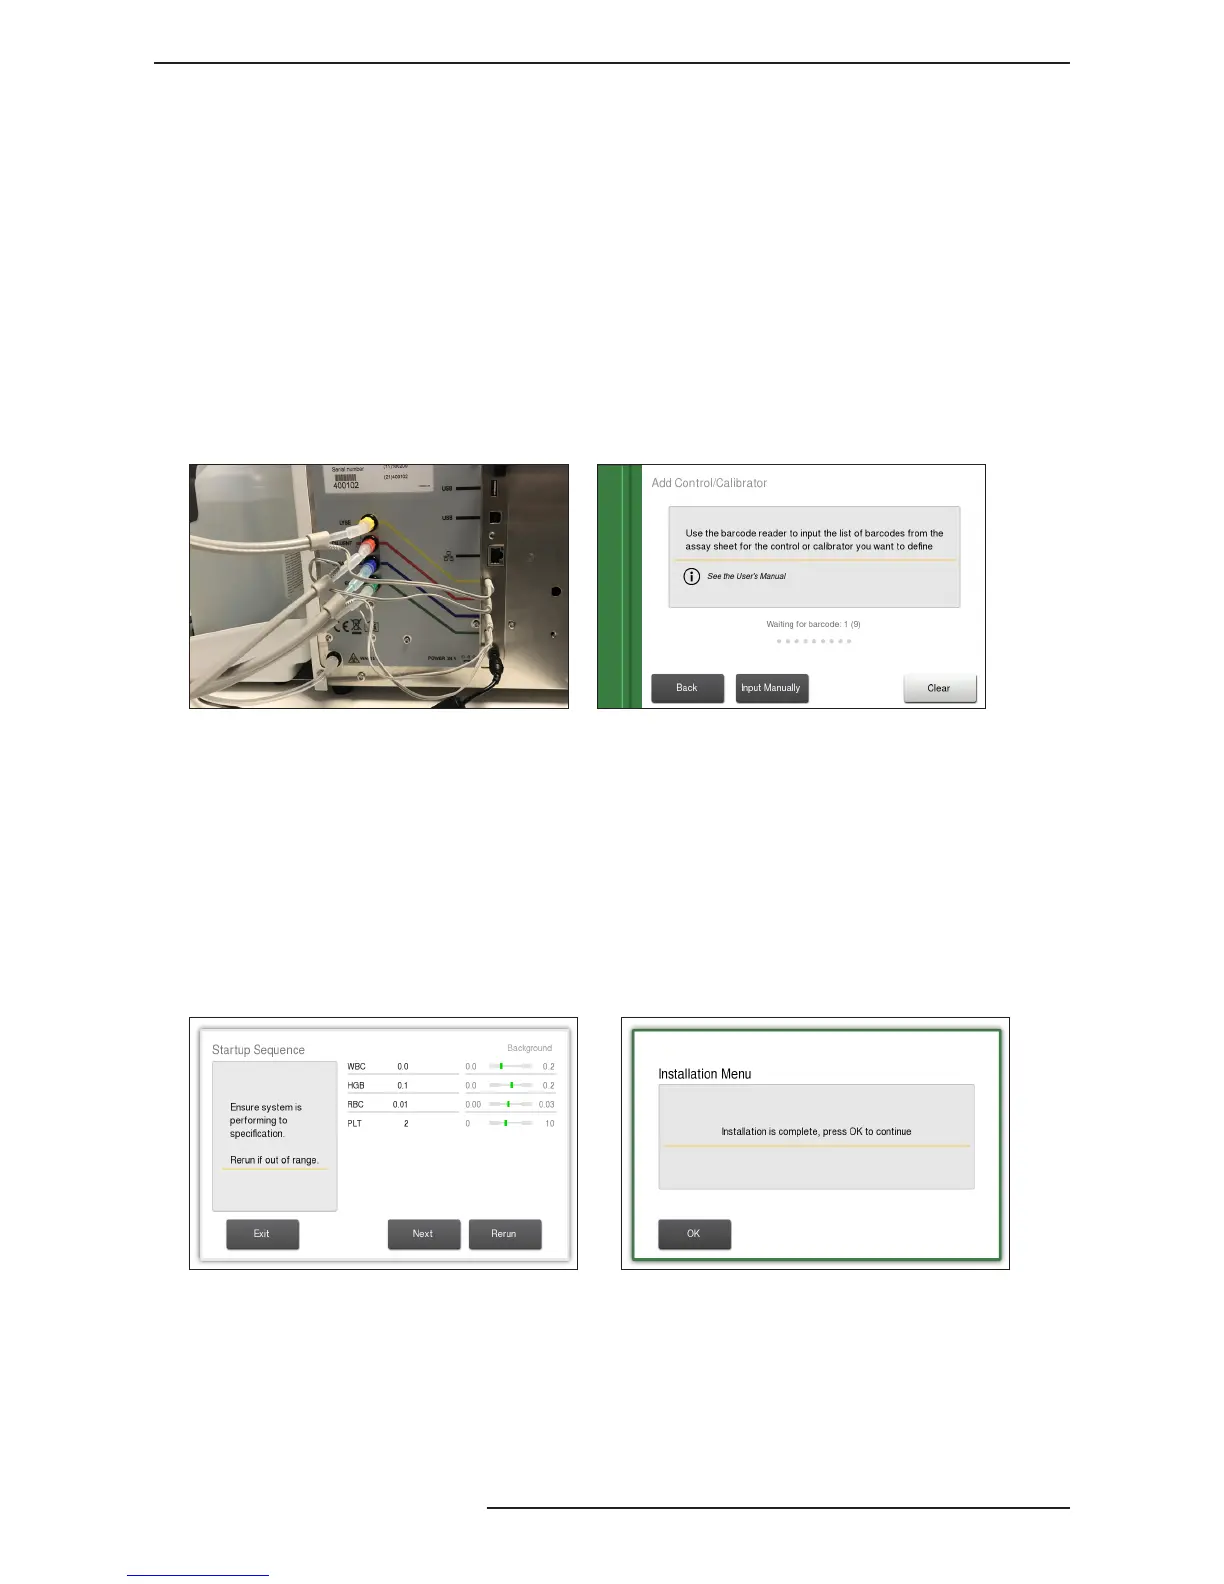
Figure 15: Enter Control barcodes
6 Enter Control barcodes Scan Control Assay Sheet to enter assay value ranges into the
system for the lot of Control being used.
Scan barcodes 1–9, in that order, from the assay sheet.
Once accepted, press Exit to return to Installation Menu.
7 Waste Counter See Chapter 7, waste counter setup.
8 Fill the liquid system To ll the system with reagents, select Fill System. This cycle
will last for approximately 3 minutes.
Figure 16: Daily Startup Figure 17: Completed Installation Menu
9 The installation sequence is
now complete.
To prepare the Exigo H400 to
analyze a sample perform one
of the following:
Option 1 (recommended):
Select Startup Sequence. This sequence guides the operator
through the beginning of the day startup routine for the
analyzer.
 Loading...