ADDITIONAL THERMOSTAT
16
ADDITIONAL 10.
THERMOSTAT
N.B. : Installation must be performed by an authorised technician
It is possible to thermostat a room adjacent to the room where
the stove is positioned: just connect a thermostat following the
procedure described in the next point (it is recommended to
position the optional mechanical thermostat at a height of 1.50m
from the ground).
There are two stove functioning modes, which are di erent on
the basis of the Stand- by function. See “Stand - by” chapter.
STOVE FUNCTIONING WITH 10.1.
ADDITIONAL EXTERNAL THERMOSTAT
OPTIONAL
To make the additional external thermostat function, set the
temperature set on
LOW by pressing the
P2
key several times.
At this point the digital thermostat supplied as per standard
will be excluded and the stove will work, only controlling the
additional external thermostat.
The desired room temperature will be set via the additional
thermostat. After ignition (by pressing the
P1
key or via chrono
mode) the stove will work to reach the set set, displaying WORK
(closed contact). When the room temperature has been reached
(open contact) the stove will go to minimum, displaying LOW.
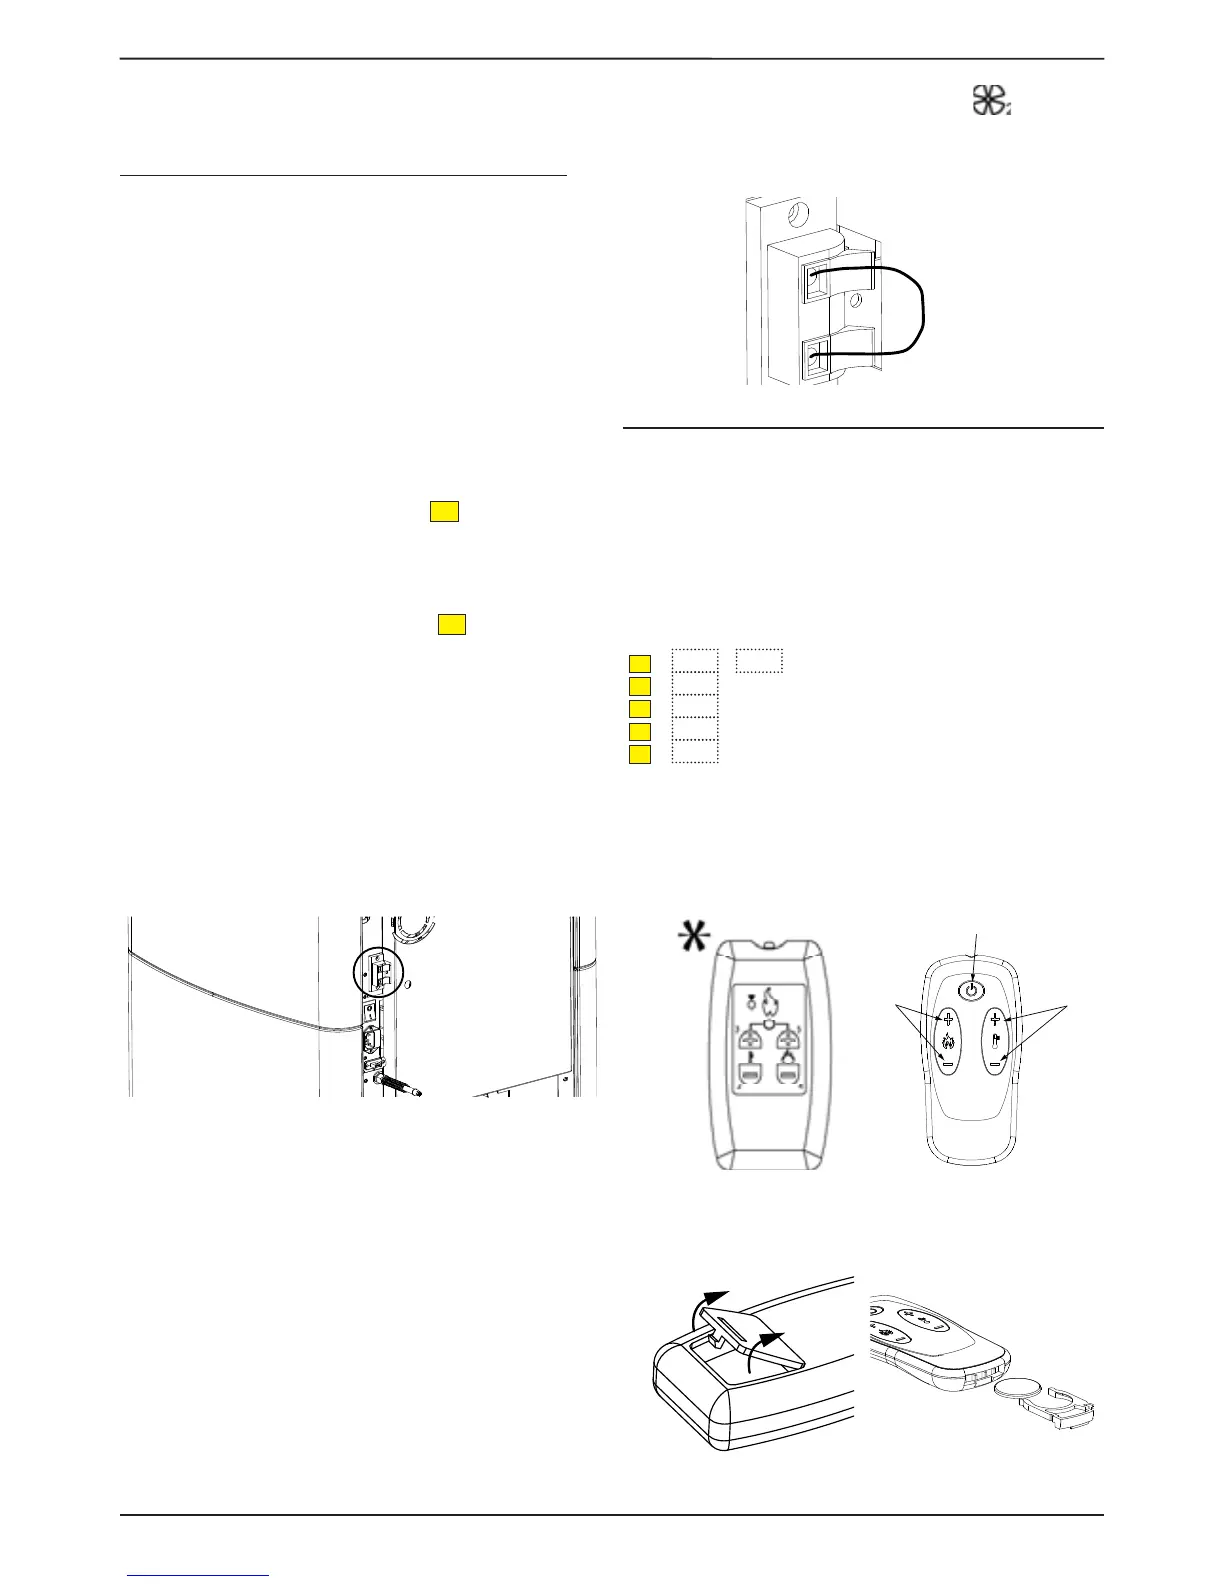
INSTALLATION 10.2.
Switch the appliance o using the master switch positioned
on the rear of the stove.
Remove the plug from the socket.
Refer to the electrical layout to connect the two thermostat
cables onto the relative clamps positioned don the rear of the
machine, one is red and the other black (with STBY label).
gure 41
ADDITIONAL THERMOSTAT 10.3.
FUNCTIONING FOR DUCTING MOTOR
CONTROL
For models with ducting motor there is also the possibility of
thermostatting the motor itself. The connection of an external
thermostat will allow to control the ducting motor independently
from stove functioning.
At this point just set the desired temperature on the thermostat.
The thermostat will control the functioning of the second motor:
with temperature to be reached (closed contact) the second
motor will follow the trend of the stove
when the temperature has been reached (open contact), it
takes the ducting motor to 1st speed and will be displayed by
the ashing LED relative to the ducting motor
.
Two external clamps are envisioned in the Elisir and Comfort Plus
models. The ducting thermostat clamp is that tted with jumper as
per standard. See example drawing.
gure 42
THE REMOTE CONTROL11.
Nota bene: the remote control is an optional for the
“Rosy” and “Preziosa” models.
The heating power, the desired room temperature and the
appliance ignition/switch o , can be adjusted using the
remote control.
S = Indicator light indicating the pressing of every key.
Display keys correspondence with remote control keys
P1
=
P3
+
P5
P2
=
P2
P3
=
P3
P4
=
P4
P5
=
P5
*to switch on the stove, simultaneously press keys 3 and
5 for 1 second; the appliance will automatically enter the
ignition phase. The power can be regulated using keys 4
and 5 and using keys 2 and 3 it is possible to regulate the
desired room temperature. To switch the stove o , press and
hold keys 3 and 5 simultaneously for three seconds.
gure 43
P1
P4
P5
P3
P2
gure 44
REPLACING THE BATTERIES11.1.
gura 45 gura 46