18
18
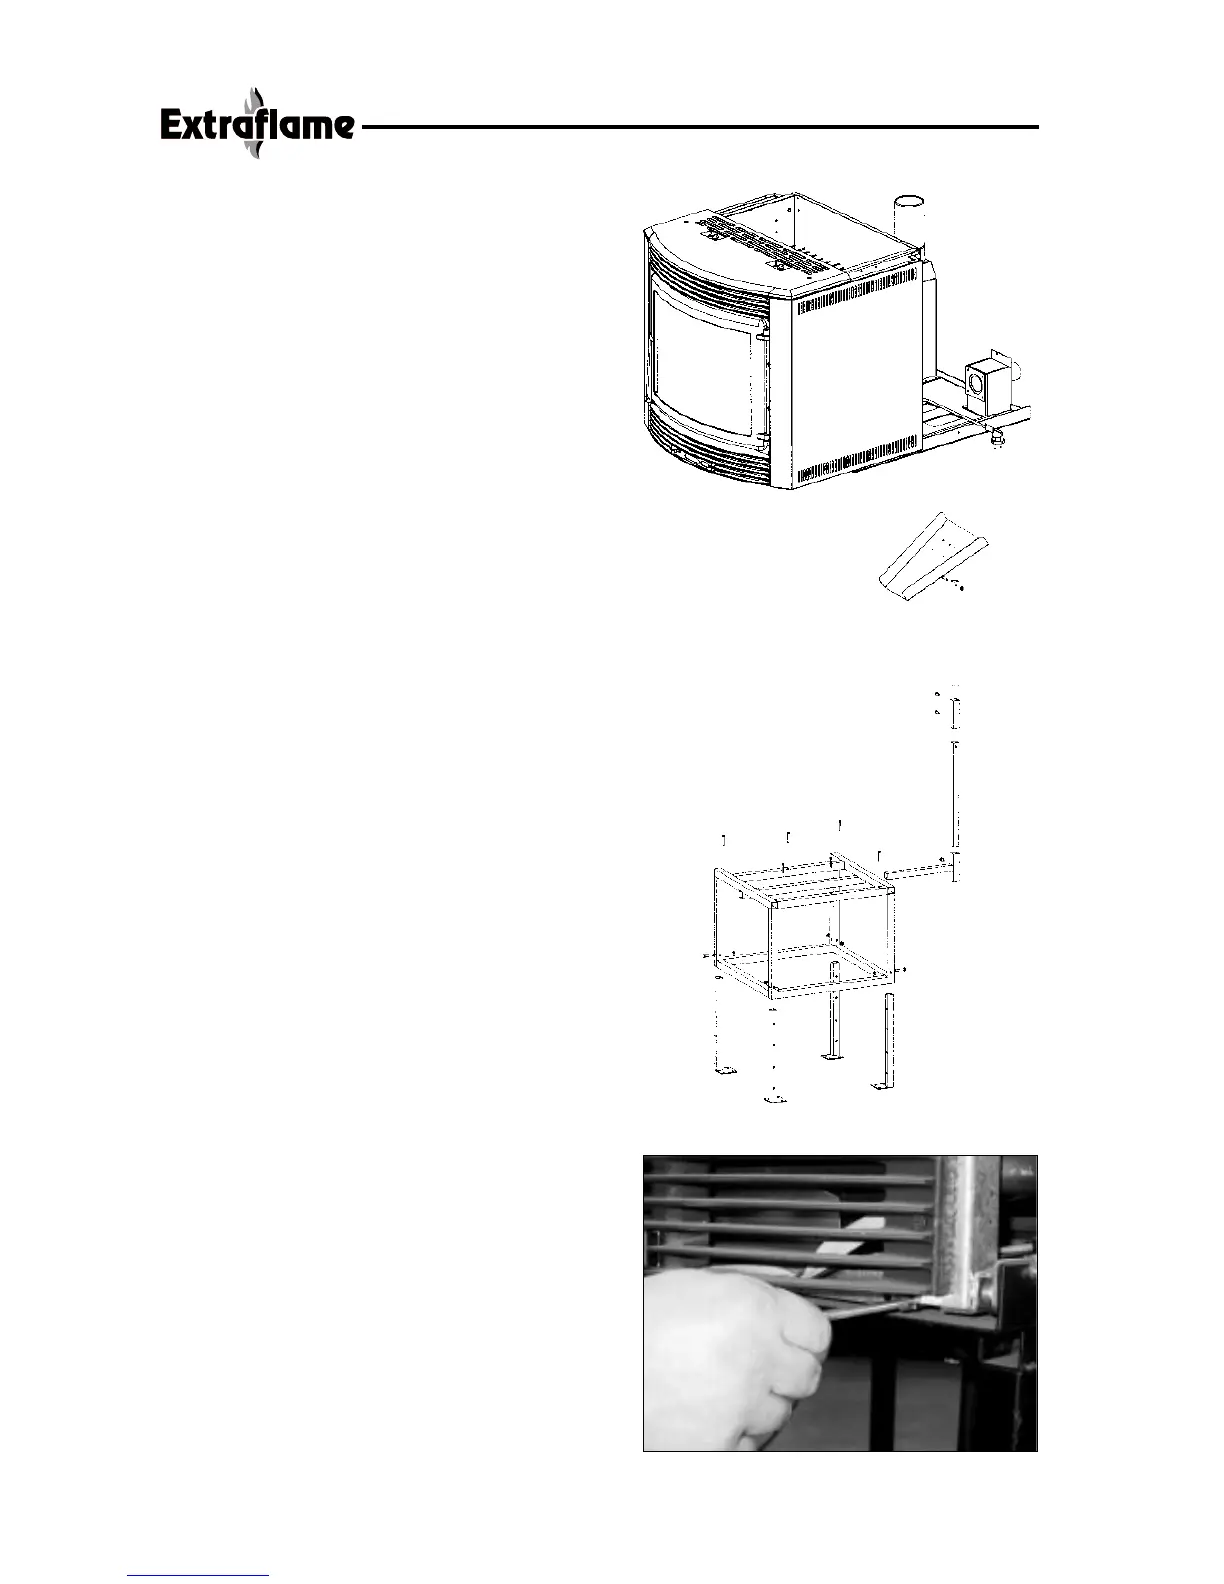
fig. 11
Finally, using the provided socket wrench, turn the
screw anticlockwise as shown in figure 11.
In order to see if the insert is correctly coupled with
the base, connect the plug to the power socket: the
display should switch on.
N.B. The bottom grill of the insert must stand at
least 1 cm above the marble fire top of the facing.
Installation with pedestal (optional)
Description of components:
• Comfort maxi and Mini insert (see previous
paragraph)
• Pedestal adjustable in height
• Lateral feeding hopper
• Adjustable hopper support
Installation of Comfort Maxi and Mini with
pedestal
Position the base in the desired point and adjust to
the desired height by means of the feet (the bolts
are located in the four external sides of the pedestal
at the bottom).
Provide a power socket in the rear of the pedestal,
easy to reach once the installation is finished.
Fix the pedestal to the floor using strong steel plugs,
diam. 8 mm.
Take the sliding base and fix it to the frame using
the bolts.
Connect the fume outlet and air intake as explained
in the previous paragraph.
Take the insert, tilt it as in fig. 8 so that the wheels
go into the provided rails, slide it until the fume
scroll coupling is completely inserted in the fume
conveyor box.(Fig.9)
Finally, using the provided socket wrench turn the
screw anticlockwise as shown in figure 11 (for
Comfort Maxi) and as shown in Fig. 11bis (for
Comfort Mini).
In order to see if the insert is correctly coupled with
the base, connect the plug to the power socket: the
display should go on.
Fit the hopper support as shown in fig. 10.
Insert the support in the provided coupling as
shown in fig. 10.
N.B.: In case you use our pedestal, it is necessary
to create an inspection window in the chimney,
allowing to check the pellet level in the hopper,
while filling it up.
fig. 10
fig. 9